
A composite only looks coherent when the figure, environment and light match. That is exactly what you work on in this tutorial: You build a floor with shadows for the basketball player, paint sparkling dots into the scene with a particle brush, and then adjust the color look of the entire image. The starting image already contains a curves adjustment and some brightening on the horse. You can carry these steps over to your own composition, even if your subject looks different.
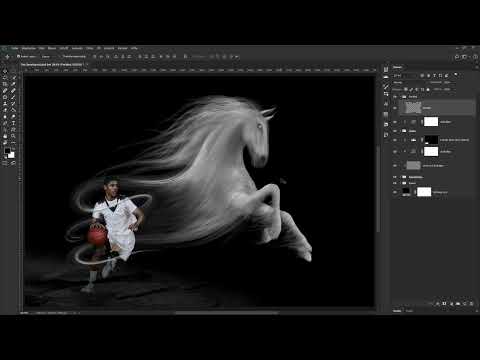
The video is only loaded from YouTube when you play it – data (including your IP address) is then transmitted to YouTube/Google. More in the privacy policy
Key Takeaways
- With layer styles (color or brightness), you can make areas of a layer transparent in a targeted way without deleting pixels.
- A black layer mask that you paint on with a white foreground color reveals parts of the image again. This is flexible because you can correct it at any time.
- A smart object allows you to apply transformations and filters such as Gaussian Blur non-destructively.
- A shadow is created from a copy of the figure that you distort, color with a solid color layer, and then blur.
- The particle brush can be used on a separate layer. A slight blur takes the hardness out of the particles.
- A gradient map as an adjustment layer changes the look of the entire image. With a selective color correction, you bring back the red tones.
Step-by-Step Guide
1. Emphasize highlights on the horse with a curves adjustment
Begin with the curves adjustment, which you create as a clipping mask above the threads group. This way, the correction affects only the threads and not the background. In the video, you brighten the highlights so that the horse glows a little more. Then close the threads group again so that the Layers panel stays clear.

2. Create the floor as its own group and place the image
Below the basketball player group, create a new group using the folder icon and rename it "Boden" (floor). Then drag an image file from the Explorer directly into the Photoshop window. Photoshop places the image as a smart object, so you can scale it freely. Via Edit, Transform, Flip Horizontal, you turn the floor so that its structure matches the subject. Then you drag the corners to stretch the image, and rotate it at the double arrow outside the frame into the desired position. Confirm with Enter.

3. Make light and dark areas of the floor transparent with layer styles
The floor is too colorful and too bright. Instead of a layer blend mode, you use the layer styles here. Drag the layer into the "Boden" group, then double-click on an empty area next to the layer name to open the dialog window. At the bottom, you will find two sliders that respond to the brightness gradient of the layer. If you move the slider for the dark areas to the right, the dark and mid-gray areas become transparent. If you overdo it, the entire layer disappears.
The slider initially acts very harshly. To make the transition soft, hold down the Alt key and click on the handle. This splits it into two halves. Drag the right part all the way to the right and the left one to the point where the transition looks soft. Then confirm with OK.

4. Create a black layer mask for the floor
Now only the lower left areas of the floor should be visible. To do this, reduce the layer's opacity to 90 percent. Hold down the Alt key and click on the mask icon so that a black mask is created. Since it conceals completely, you initially see nothing of the layer.
Select the Brush tool with a very soft tip and make sure that white is active as the foreground color. With white paint, you now paint the desired floor area into the image. Enlarge the brush if necessary, and reduce the brush's opacity for fine transitions. If you switch to black with the X key, you can remove areas that were painted too much. If the floor in the lower left is only meant to be hinted at, paint there with a lower opacity.

5. Fine-tune the transition of the floor
It is often worthwhile to refine the layer style afterwards. Open the layer styles again and move the black slider a little to the left until you like the transition. Then you can set the layer's opacity to about 20 percent and change the values in percent steps with the up or down arrow keys. It usually takes a few passes until the transition looks harmonious.
6. Creating the Player's Shadow
So that the player stands on the ground, you need a shadow. To do this, open the basketball player's group, select the player's layer, and copy it with Ctrl + C. Close the group, switch to the "Boden" group, and paste the layer with Ctrl + V.
So that you can distort the layer, first convert it into a rasterized layer. Unlock it, right-click it, and select "Rasterize Layer". Then you can apply the layer mask via the context menu, so that only the player remains. After that, convert the layer back into a smart object so that you can continue editing it.
Activate the Move tool, drag the layer to the bottom left, and open the transformation with Ctrl + T. Via Edit, Transform, Distort, you can use the handles to distort the figure so that it lies flat on the ground. The area of the feet should ultimately connect to the player's foot. If moving is choppy for you, deactivate the "Snap" option under View.
7. Coloring the Shadow with a Solid Color Layer
The shadow should be black and not adopt the colors of the figure. To do this, you create a solid color layer in black, which you place directly above the shadow as a clipping mask via Alt-click. To be safe, name it "Schattenfarbe" and likewise name the shadow's layer "Schatten", so that you don't get confused later. Now the entire shadow is colored black.
8. Softening the Shadow with the Gaussian Blur
The left part of the shadow should be softer than the area directly at the feet. Since the shadow is a smart object, you can apply the filter as a smart filter. Select Filter, Blur Filters, Gaussian Blur, and set the radius in the preview window so that the transition looks soft. Confirm with OK.
However, this also blurs the foot area, which should remain sharper. The smart filter automatically has a mask. Select it, choose a soft brush with black foreground color, and paint back the effect of the filter in the foot area. There, the shadow then becomes somewhat sharper again, while on the left it remains softer.

9. Adding Missing Shadow with a Correction Layer
Shadow is still missing in some places. To fix this, create a new empty layer, name it "Schattenkorrektur", and drag it below the shadow layer. With a soft brush and black foreground color, you paint the shadow into the image at the missing spots. The figure serves here only as orientation for how the shadow should run. For harder edges, you can additionally use a firmer brush, for example below the shoes.
Then you reduce the opacity of the Schattenkorrektur layer and the shadow layer to 70 percent each. This makes the shadow look more natural.

10. Creating a Particle Group with the Particle Brush
For the particles, you create a new group at the very top of the layer stack and name it "Partikel". Inside it, you create an empty layer that is also called "Partikel". Select the Brush tool, scroll in the brush selection to your previously created particle brush, and set white as the foreground color. With a brush size of about 13 pixels, you get fine dots that fit the image well.

11. Painting Particles Selectively into the Scene
Place the particles with a click or short stroke where they should have an effect. In the video, these are mainly the hair, the strands, and the swing directly in front of the player. You can also place a few dots in the leg area. While painting, you can vary the pressure: with firmer pressure, larger dots are created, with light pressure, smaller ones. If you don't like a stroke, undo it with Ctrl + Z and start again.
Make sure you don't overdo it. The particles should not appear everywhere in the image, but mainly in the areas that convey dynamism, such as in the mane and the hair.

12. Softening the Particles with a Blur
So that the particles don't look too harsh, you convert the particle layer into a smart object. Right-click it and select "Convert to Smart Object". Then you apply the Gaussian Blur via Filter, Blur Filters. The default radius of 20 pixels is too strong, because then the individual particles disappear completely. Therefore, set a significantly smaller value, in the video about one pixel, and check the result in the preview. Then confirm with OK.

13. Adjusting the color look of the image with a gradient map
The horse and the ground still look rather gray. A slightly bluish look suits them better. Therefore, create a gradient map as an adjustment layer at the very top of the layers panel. The image initially looks strange because the gradient still goes from black to white. Click on the gradient to open the editor.
The dark areas should now appear blue-gray. To do this, click on the left stop and choose a dark blue. By double-clicking on the gradient, you add more stops and assign them slightly lighter blue-gray tones. The right stop stays on white. Confirm with OK and name the layer "Farblook". Reduce the opacity to about 35 percent. This keeps the effect subtle.

14. Bringing back red tones with a selective color correction
Because of the cool look, the red tones of the player and the ball in particular lose strength. You counteract this with a selective color correction. Create the layer via the icon for adjustment layers and choose "Selective Color". In the "Reds" range, move the Cyan slider a bit to the left, roughly to the middle. This removes the blue component in the red tones, and the ball appears more vivid again. Compare the image before and after to check the effect. Finally, name the layer "Rottöne verstärken".

Summary – Sports spirit in compositing: Painting particles and adjusting the color look in a targeted way
You built the composite step by step: First you emphasized the light on the horse and inserted the ground with layer styles and a mask. Then you created a shadow from a copy of the player, colored it, and blurred it. With a particle brush you added sparks, which you softened with a light blur. Finally, you adjusted the color look via a gradient map and made the red tones more vivid again with a selective color correction. With these techniques, you can embed any subject in a believable scene.
FAQ
Do I have to convert the layer into a smart object before distorting it?Yes, a smart object allows you to edit transformations and filters again at any time. In addition, you can adjust the Gaussian Blur later as a smart filter.
Why is the ground only partially visible after the layer style?The layer style makes dark areas transparent. With a layer mask, you can then specify exactly which parts of the ground you want to make visible.
What should I do if the particles look too harsh?Convert the particle layer into a smart object and apply the Gaussian Blur with a small radius. This way the particles remain visible but look softer.
Why does the gradient map change the colors of the player?The gradient map affects the entire image. That is why the ball gradually becomes cooler. A selective color correction helps you to strengthen the red tones again in a targeted way.
Can I change the opacity of the adjustment layers afterwards?Yes, you can adjust the opacity of any adjustment layer at any time. This way you control the strength of the color look without having to redefine the settings.


