
A basketball player suddenly standing on the court next to a big cat? Before you can put together a motif like this, you need to cleanly separate the main figure from the background. That is exactly what this tutorial by trainer Marco Kolditz is about. He shows you how to cut out the player with various tools, remove logos and distractions, and prepare the image so that you can place it without any problems in the next step.
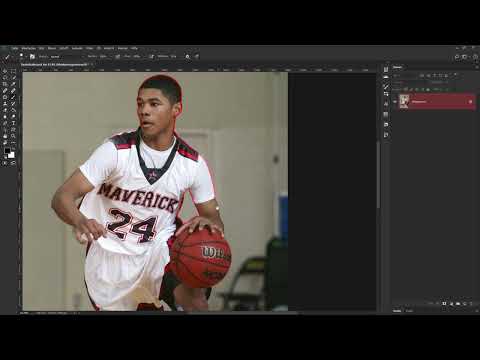
The video is only loaded from YouTube when you play it – data (including your IP address) is then transmitted to YouTube/Google. More in the privacy policy
You will learn about Quick Mask mode, work with the brush and a graphics tablet, use the Fill tool, and remove distracting details with the Patch tool and the Spot Healing Brush. The tutorial is suitable for anyone who already knows the basics of Photoshop and wants to make their cutouts more precise.
Key Takeaways
The Select Subject function provides a quick starting point, but for precise results you need Quick Mask mode with the brush. This way you keep control over every edge area at all times.
A graphics tablet with the pen pressure option activated allows you to draw thin and thick lines, depending on how hard you press.
Smoothing of about 30 percent ensures clean lines, even if your hand trembles at times.
With the X key you switch between foreground and background color and thus correct mistakes without interrupting your workflow.
The Patch tool and the Spot Healing Brush remove logos, wrinkles and lettering if you choose areas with a similar structure and color as the source.
Step-by-Step Guide
Step 1: Open the image and check the background layer
First, open the photo of the basketball player in Photoshop. In the Layers panel you see the image as a background layer. This layer is the basis for all the following steps, so you should select it right at the start.

Step 2: Test the Select Subject function
Before you work manually, it is worth taking a look at the automatic detection. Under Select you will find the Subject function, available since Photoshop CC 2018. Photoshop detects the most likely main object in the image and draws a selection around the contour. In the example the selection fits quite well, but parts of the player are missing at the ear and in other places. These are exactly the weak points you will have to correct later. Therefore, undo the selection with Ctrl + D if you want to work more precisely.
Step 3: Switch to Quick Mask mode
Activate the background layer and click the Quick Mask mode icon in the toolbar. The layer turns red, which shows you that you are in the mode. The keyboard shortcut B then brings up the Brush tool. Quick Mask mode allows you to use the brush to define exactly which areas are selected and which are not.
Step 4: Set up the brush for pen pressure
In the options bar at the top you will find various settings for the brush. Particularly important is the last icon, which activates pen pressure. If you work with a pen and a graphics tablet, you can draw thin or thick strokes by applying different amounts of pressure. This saves you many brush changes and makes it easier to work on fine contours.
Step 5: Set the smoothing
Under Smoothing, set a value of about 30 percent. Otherwise, shaky hands quickly lead to messy, wavy lines. With smoothing, your strokes become more even, so the contour looks clean later. You can of course adjust the value if needed.
Step 6: Reset the colors
For masking you need black as the foreground color and white as the background color. If the colors are set differently, simply press the D key. Black then marks the areas you want to select. White removes them from the selection again.
Step 7: Adjust the brush size and hardness
You can conveniently change the size of the brush with a right-click. A slider opens, with which you can set size and hardness. It is even more intuitive if you hold down the Alt key and the right mouse button and move the pen or mouse left and right. This changes the size. If you move the mouse up or down, you adjust the hardness. Use a smaller brush for the contour so that you can get close to the edge.

Step 8: Trace the contour
Now zoom in on the head area and begin with the contour of the basketball player. At first, trace only the edges, that is, the outer outline of the person. You will fill the interior areas later. Feel free to take your time with this step. For soft edges, such as hair or skin transitions, you can reduce the hardness of the brush a little to better capture the transitions.

Step 9: Correct mistakes with the X key
If you paint beyond the edge, it's no big deal. Simply press the X key to switch to the white foreground color. This removes excess areas from the selection. Pressing X again takes you back to black so you can continue working. This method is much faster than undoing each mistake individually.

Step 10: Edit the arm and fine details
You also proceed step by step on the arm and the hand. Make sure to trace the contour of the entire person completely. In places the background shows through, for example between the body and the arm. That doesn't matter as long as you have traced the outer contour cleanly. For soft areas like the hand, you can reduce the brush hardness. Later, the edge areas can still be made softer if needed.

Step 11: Select the interior areas with the fill tool
Once the contour is closed, you fill the interior areas. For this you use the fill tool, which is hidden behind the paint bucket icon. Alternatively, press the G key. Set the foreground color to black and the tolerance to about 100 or 110. Then click in the inner area. The area is filled with black and thus selected. The places where you outlined the background remain unfilled, because they were not enclosed by the contour.

Step 12: Refine and round the selection
Zoom in closer when viewing the edges. There you may see individual pixels that were not selected, exactly where the contour and the fill area meet. Instead of painting this fine line again, you exit Quick Mask mode by clicking the corresponding icon at the bottom. Then you choose Select, then Modify, and Smooth. One pixel is usually enough to close the gap. Confirm with OK and then switch back to Quick Mask mode to check the result.

Step 13: Create the mask
When the selection is clean, you exit Quick Mask mode for good. With the background layer active, you then click the mask icon at the bottom of the Layers panel. The background disappears, and the basketball player is cut out. The mask remains editable, so you can make improvements at any time.

Step 14: Create a copy of the layer
Before you remove the logos, rename the current layer to Original. Then press Ctrl + J to create a copy, and name this copy Basketballer. You continue working with this layer. The original layer is kept as a backup. Make sure that you are working on the image layer and not on the mask.

Step 15: Remove logos with the Patch tool
Now zoom in on the ball with the logos and select the Patch tool. In the options, set the selection to Source. Use it to mark the area you want to repair, and drag it to a spot with a matching color and texture. When you release, Photoshop replaces the marked area. Gradients or dark spots may appear in the process. Simply repeat the procedure in other places until the logo has disappeared. Make sure not to choose source areas along dark lines, because otherwise these lines will be carried over into the area.

Step 16: Lightening Dark Shadows
You correct dark shadows that result from removing the logos with the Patch tool in Lighten mode. To do this, select the mode at the top, hold down the Alt key, and click on a light area as the source. Then you paint over the dark areas. In Lighten mode, only the dark areas are adjusted. If needed, keep setting a new source. By the way, the same technique is also suitable for simple skin retouching.
Step 17: Correcting Fine Areas with the Spot Healing Brush
For smaller areas, such as the star on the shirt, the Spot Healing Brush is the fastest. Activate it and simply paint over the areas you want to remove. Keep the mouse button pressed and only release it when the area is completely covered. Photoshop calculates the correction automatically. If remnants remain, simply paint over them again. Each pass delivers a slightly different result, so you gradually work your way toward a convincing outcome.

Step 18: Removing Lettering Letter by Letter
For lettering on the shirt, it is best to proceed letter by letter. Paint only as much as you actually want to remove, and stay close to the edge. The Clone Stamp can also help you at this point. Where artifacts remain visible, you correct them with another brushstroke. Work piece by piece until the shirt looks even.

Step 19: Comparing the Result with the Original Image
Finally, you look at the before-and-after result. The player is cut out, the logos have largely disappeared, and the shadows look natural. This means the basketball player is ready to be placed in the composite, which will be covered in the next video.

Summary ??? Cutting Out a Basketball Player in Photoshop for Compositing
You have seen how to cleanly cut out a basketball player using Select Subject as a starting point and Quick Mask mode as the main tool. With pen pressure, smoothing, and the X key, you control every edge. Afterwards, you remove distracting logos and details with the Patch tool, Lighten mode, and the Spot Healing Brush. The result is a clean cutout that you can insert into your composite in the next step.
FAQ
Do I absolutely need a graphics tablet for this technique?A graphics tablet is helpful because you can draw thin and thick lines with pen pressure, but the cutout can also be done with a mouse.
Why shouldn't I just accept the Select Subject result?The automatic selection often does not reliably detect details such as the ear or areas on the body, so manual refinement in Quick Mask mode is usually necessary.
What does the X key do when masking?The X key switches between black and white as the foreground color, so you can quickly remove areas that were selected too much.
Why is it worth rounding the selection by one pixel?Rounding closes fine gaps between the outline and the fill area, which would otherwise be visible as unclean edges in the result.
Can I still change the mask after creating it?Yes, the mask remains editable, so you can touch up edge areas at any time with a brush or filter.

