
Imagine you have a cut-out athlete who still looks like a foreign body on an empty background. This is exactly where this tutorial comes in. You will learn how to insert the player into a new composite, give him a three-dimensional look with light and shadow, and adapt his color effect to the scene.
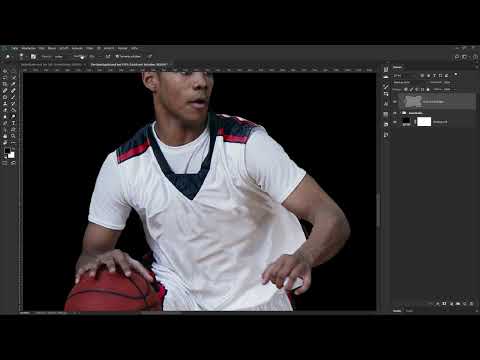
The video is only loaded from YouTube when you play it – data (including your IP address) is then transmitted to YouTube/Google. More in the privacy policy
The guide follows the video step by step. The screenshot variables mark the places where you can insert the matching images from the video.
Key Takeaways
You copy the player as a Smart Object into your composite, then scale and flip him before you start with the color grading. You attach all adjustment layers to the player as clipping masks so that they affect only him. Curves and Levels work with luminosity so that the colors do not shift unintentionally. With a layer in Soft Light mode filled with medium gray, you paint highlights and shadows using Dodge and Burn without destroying the original image.
Step 1: Create the Composite Document
Start with File, New. In the dialog, give it a meaningful name, for example "The Sporting Spirit". In the video, a width of 3612 pixels and a height of 2383 pixels are used. These values are only an example; you can choose any other format. It is important that you choose black as the background content, because the background should actually be black later.

Step 2: Use a Color Fill as a Flexible Background
The black background layer is not sufficient if you want to change the color later. Therefore, click on the icon for new fill layers at the bottom of the Layers panel and select Solid Color. Choose black again and name the layer "Background". This way you can double-click on the fill at any time and set a different color.

Step 3: Transfer the Basketball Player into the Composite
Switch to the document with the basketball player and activate the player's layer there. Copy it with Ctrl + C. This method transfers the entire layer including the mask. In the composite, you activate the top layer and paste the layer with Ctrl + V. Afterwards, you can drag the player's original background layer onto the trash icon via drag & drop so that it doesn't get in the way.

Step 4: Proportionally Shrink and Flip the Player
Since the player is present as a Smart Object, you can scale him without loss of quality. Choose Edit, Transform, Scale. While dragging a corner handle, hold down the Shift key so that the proportions are preserved. In the video, the player is made a bit smaller and moved to the desired position.
If the player is looking in the wrong direction, choose Edit, Transform, and Flip Horizontal again. Confirm the transformation with Enter.

Step 5: Adjust the Background Color
If you don't like the pure black, simply open the "Background" fill layer and choose a dark blue or another color. This changes the overall mood of the image without you having to change anything on the player.

Step 6: Improve the Contrast with a Curves Adjustment
Activate the player layer and click on the icon for adjustment layers at the bottom of the Layers panel. Choose Curves. The curve shows the highlights at the top right, the midtones in the middle, and the shadows at the bottom left. Pull the lower area downward to darken the shadows. Make sure that the midtones and highlights remain as unchanged as possible. To do this, set the curve points in the middle and at the top back to their original position. Give the layer a fitting name for clarity, for example "Contrast" or "Darken shadows".

Step 7: Avoid Color Shifts with Luminosity Mode
With the Curves adjustment, you can observe that not only the brightness but also the saturation changes. To prevent this, change the blending mode of the adjustment layer from Normal to Luminosity. The curve then acts exclusively on the brightness information and leaves the colors untouched. With the eye icon, you can check the before-and-after comparison at any time.
Step 8: Soften the bright areas with the Levels adjustment
So that the player's brilliant white doesn't look too strong, you create a Levels adjustment layer and name it, for example, "Darken highlights". Drag the white slider a bit to the left. As a result, the brightest white in the image may only be a light gray. The change is subtle, but it takes the harshness out of the image.
Step 9: Tint the shadows with a Color Balance
To make the composite look cooler overall, you need a Color Balance adjustment layer. Make sure that under Tonal Range only the shadows are active, so that midtones are not affected. Add a bit of cyan to the shadows and, if needed, add a minimal amount of magenta. Keep comparing the look with the before state until you like the bluish mood.

Step 10: Apply all adjustment layers as clipping masks
So far, the adjustment layers affect all layers beneath them. To make them affect only the player, hold down the Alt key and click between the adjustment layer and the player layer. A small arrow appears, indicating that the layer acts as a clipping mask. Repeat the process for the Levels adjustment and the Color Balance.
Step 11: Combine the layers into a group
To manage the player in an organized way, select the topmost adjustment layer, hold down the Shift key, and click on the player layer. All layers in between are automatically selected as well. Press Ctrl + G or drag the selection onto the folder icon. Name the group, for example, "Basketball player".
Step 12: Prepare a layer for light and shadow
For the three-dimensional shaping you need a new layer that affects only the group. To do this, hold down the Alt key and click the icon for a new layer. Name it "Light and shadow". Set the mode to Soft Light and enable the option to fill the layer with neutral gray. Since mid-gray appears transparent in Soft Light mode, you won't see any change at first. Now create a clipping mask to the group again via Alt-click.

Step 13: Brighten highlights with the Dodge tool
Zoom in close on the player and select the Dodge tool. Set the exposure to about 20 percent and adjust the brush size. Now paint with the tool over the bright areas, for example over the shoulders, chest, or facial areas. Briefly toggle the layer's visibility now and then to see the difference. Repeated, gentle painting over often looks more natural than a single strong stroke.

Step 14: Model the player's shape
With small brushes you can specifically emphasize muscles, wrinkles in the clothing, or contours in the face. Vary the brush size and paint over the areas that should gain more three-dimensionality. If the effect is too strong, reduce the exposure or use a softer brush. This technique is particularly suitable for portraits and images with clothing folds.

Step 15: Deepen shadows with the Burn tool
Switch to the Burn tool and work with a similar exposure, but adjust it as needed. Paint along the existing shadows to increase the contrast where you like it. The shadows become clearer this way, and the image looks more three-dimensional overall. Don't overdo it, because areas that are too dark quickly lose detail.

Step 16: Raise the highlights with another Curves adjustment
Above the light-and-shadow layer, create a new Curves adjustment that also acts as a clipping mask. Click in the middle and in the shadows to lock these points, and raise only the highlights slightly. Name the layer, for example, "Brighten". This way you gain a bit more brilliance in the highlights.

Step 17: Darken the legs selectively
The player's legs still look too bright and should be in shadow. Create a Levels adjustment above the brightening layer and drag the highlights slider significantly to the left, to about a dark gray value. Hold down the Alt key and click on the layer mask to fill it with black. This way the change remains invisible at first.

Step 18: Editing the Mask Selectively with the Brush
Select the Brush tool with a soft tip and reduce the opacity. Set the foreground color to white and paint over the legs so that the effect becomes visible there. If you use black, you take the effect back in the area of the ball. Work in small steps and regularly compare before and after.

Step 19: Controlling the Intensity via Opacity
If the legs still look too dark in the end, simply reduce the opacity of this adjustment layer, for example to 90 percent. This way you keep the direction of the correction and dose the strength exactly to your taste.
Summary ??? Photoshop Composing: Placing a Basketball Player and Adjusting Him for Depth and Dimension
You have seen how to transfer a player as a Smart Object into a new composite, scale and flip him, and design the background flexibly. With curves and levels adjustments in Luminosity mode, you control brightness and contrast without distorting the colors. Clipping masks ensure that all adjustments affect only the player. The layer in Soft Light mode with Dodge and Burn gives the athlete depth and shape. Finally, you adapt the look to the scene with Color Balance and targeted masks.
FAQ
Why should I copy the player as a Smart Object?A Smart Object can be scaled as much as you like without any loss of image quality. This way you can change the size later without any problems.
What does Luminosity mode do for the curve?Luminosity mode limits the effect to brightness. The colors are preserved, and no unwanted saturation shifts occur.
Do I always have to work with clipping masks?Clipping masks are useful when an adjustment should affect only a specific subject. Without them, the correction would change all the layers beneath it.
How can I tell whether a layer acts as a clipping mask?You can recognize a clipping mask by a small arrow to the left of the layer in the Layers panel. It indicates that the layer affects only the layer beneath it.
Why is the layer with medium gray in Soft Light mode initially invisible?Medium gray is rendered transparent in this mode. Only when you paint with Dodge or Burn do visible differences in brightness arise.
How can I dose the effect of the highlights and shadows?You can reduce the exposure of the tools, use softer brushes, and adjust the opacity of the adjustment layers at any time.


