
Hardly anything looks as fake in a portrait as skin that is completely flawless. You want an even surface that still looks like real skin. This is exactly where fine retouching with Dodge & Burn comes in. You work with differences in brightness, not with blurring tools, and so you keep the pore structure. In addition, in this step you lay the foundation for light and shadow in the face.
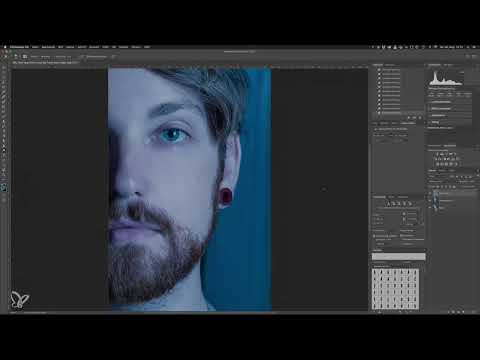
The video is only loaded from YouTube when you play it – data (including your IP address) is then transmitted to YouTube/Google. More in the privacy policy
Key Takeaways
- Fine retouching with Dodge & Burn is done on a separate layer that is filled with 50% gray and set to Soft Light mode.
- With the Dodge and Burn tools, you work in the Midtones range with a low exposure of about 10 to 15%.
- The Alt key switches between lightening and darkening while painting, without you having to change tools.
- You edit the micro layer at 300% zoom with a small, soft brush to selectively lighten pores.
- On a second macro layer, you shape light and shadow in the face with a larger brush.
Step 1: Check the basic retouching as a starting point
Before you begin the fine work, you should make sure the basic retouching is in place. In this tutorial, it was done exclusively with the Healing Brush. Beard stubble, dark circles under the eyes, and irregularities in the eyebrows have already been removed. Compare the before and after states before you continue. Only once the major flaws are gone is working with Dodge & Burn worthwhile, because otherwise you would end up editing the flaws too.

Step 2: Create the Dodge & Burn layer
Create a new layer via the Layers panel and give it a clear name right away, for example "Dodge and Burn". A clear name helps you later when you have to keep track of several layers at once. This layer stays completely separate from your image layer in the next steps. That is the reason why you can reduce, repeat, or completely discard corrections at any time.

Step 3: Fill the layer with 50% gray
The new layer must be filled with neutral 50% gray. To do this, go to Edit and Fill. Alternatively, press the key combination Shift and F5. In the dialog, choose the option 50% Gray under Contents. Leave the opacity at 100%. Confirm with OK. You will now see a completely gray surface, which is normal for the moment.

Step 4: Set the blend mode to Soft Light
In the Layers panel, change the blend mode of the gray layer from Normal to Soft Light. The image now looks the same as before, because 50% gray has a neutral effect in this mode. That is exactly the advantage: you can show and hide the layer without anything changing. But as soon as you paint with the Dodge or Burn tool, differences in brightness are created that exist only on this layer.

Step 5: Set up the Dodge or Burn tool
Now select the Dodge or Burn tool. Both are in the same tool group, and you can switch between them with the O key. Which one you take first doesn't matter at the beginning, because you will use both functions later anyway with the Alt key.
The options in the top bar are important. Be sure to set the Range to Midtones, because you are working on a 50% gray layer. Reduce the Exposure to about 10 to 15%. Low values ensure that you approach the desired effect slowly, instead of intervening too strongly with every stroke.

Step 6: Quickly adjust values by dragging the mouse
A small tip saves a lot of time: you don't always have to change setting values such as opacity or exposure via the input field. Move the mouse pointer over the label of the option. The cursor changes to a double-headed arrow. Now hold down the left mouse button and move the mouse to the left or right. The value changes continuously. This is much faster than clicking into the field every time.
Step 7: Micro Dodge & Burn at 300% zoom
Now the actual pore work begins. Zoom to 300% so you can clearly see individual pores. Reduce the brush size significantly and make sure the hardness is set to 0%. A soft brush prevents visible edges.
Now place the brush on the dark spots, that is, on the pores that run inward, and lighten them. This makes the skin look smoother overall without the pores themselves disappearing. It is exactly this balance that makes the technique so high-quality. The downside is the time required. The work is very detailed, so you should take your time and not rush.

Step 8: Switch between lightening and darkening with the Alt key
You don't have to constantly switch tools for this work. When you have the Dodge tool active, you lighten with a stroke. If you hold down the Alt key while painting, the tool automatically switches to the Burn tool and darkens. This function is identical for both tools. So whether you start with the Dodge tool or the Burn tool doesn't matter at first.
There is no visible feedback for the switch, so you should briefly make sure what you are currently doing. Use the Alt key deliberately, for example when you spot an extremely bright streak on the skin. Hold Alt briefly and darken it in a targeted way. You usually need both functions in parallel.

Step 9: Lighten pores in a targeted way and preserve skin texture
Now go along the individual pores and gently raise them. One pass is sufficient in most cases. Going over them multiple times makes the area too bright and artificial. Check the result regularly by toggling the layer on and off. This way you can see whether the skin looks even without losing its texture.
This work takes place on a pore layer and serves primarily for skin retouching. Later you can build on the same technique to change light and shadow in the face on a somewhat larger scale.

Step 10: Check the result and rename the layer
When you are done with the pores, rename the layer to "Micro Dodge and Burn". This helps you distinguish it from the macro layer later. Compare the before and after states. The skin looks smoother, cleaner, and more even everywhere, and at the same time the skin texture is preserved.
You can also adjust small details in this step. For example, lift a nostril wing or emphasize a scar on the cheek. Such features are very helpful for the look later, because they bring character and recognizability.

Step 11: Create the macro layer for light and shadow
Now you work on a larger scale. Create a new layer again and name it "Makro Dodge and Burn". Fill it again with 50% gray via Shift and F5 and set the blend mode to Soft Light. Now take the Dodge or Burn tool with a larger brush. In contrast to the pore work, this is about the large shapes of the face.

Step 12: Set background, ear, and facial shadows
Start with the background and the ear, which should not be in the foreground. Darken them roughly by painting over them several times with the brush. The ear doesn't need to be bright, since it fades into blur anyway. For larger areas, you can safely set the exposure to 100%.
Then you work your way to the facial areas. You darken bright spots in the beard area so that the impression of dense facial hair arises. You can also make the eyebrows somewhat darker so that they stand out more. For the nose, you can make the nose shadow more even by toggling the layer on and off in between. This way you see how the shape develops.

Step 13: Emphasize the eyes and darken the eyelashes
Zoom in closer for the eye area. Darken the eyelashes in a targeted way so that the gaze gets contour. For the underside of the eyes, a larger brush with low strength is suitable. Go evenly along the entire underside so that the result looks harmonious. The same applies to the upper side. Where natural shadow already exists, you can strengthen the effect, because shadows will be emphasized later anyway.
A common trick is to brighten the lower edge of the lower eyelid. This makes the eye look larger. It doesn't have to be much; even a subtle line makes a noticeable difference. If the effect seems too strong to you, don't worry: you will keep readjusting throughout the editing process anyway.

Step 14: Placing Highlights on the Bones, Nose, and Lips
With this layer, you create the light zones that are later supposed to appear in the finished portrait. Lift the cheekbone, place light on the eyebrow, on the bridge of the nose, and on the tip of the nose. These areas determine where the face looks three-dimensional.
With the lips, you proceed in a somewhat more differentiated way. In the original shot, the middle of the mouth disappears into black, and only the outer edges are visible. Therefore, darken the middle properly. Afterwards, you brighten the outer edge and the upper edge of the upper lip again. This creates a clear, appealing lip look.

Step 15: Grouping Layers and Checking the Effect
When both Dodge & Burn layers are finished, combine them into a group. To do this, select both layers while holding the Ctrl key (Command on macOS). Then click the folder icon at the bottom of the Layers panel. Name the group, for example "Dodge and Burn". This keeps things organized.
With the group, you can show and hide the entire effect with one click. The difference is clearly visible and shows you how much impact these layers have. The retouching is thus an important step toward the finished Game of Thrones portrait.

Summary ??? Skin Retouching with Dodge & Burn in Photoshop: Smooth Skin and Sculpted Light
With Dodge & Burn, you refine the skin without losing its structure. You work on separate layers that are filled with 50% gray and set to the Soft Light mode. This leaves the original image untouched, and you can adjust every change at any time. With low exposure in the Midtones range, the Alt key for switching, and a small, soft brush at 300% zoom, clean skin results. On the macro layer, you then place light and shadow that give the face depth. Grouped layers keep everything organized.
FAQ
Why should the Dodge & Burn layer be filled with 50% gray?Neutral gray appears invisible in Soft Light mode. Only when you paint with the Dodge or Burn tool do brightness differences arise that you can control precisely.
Why is the blend mode set to Soft Light?The mode ensures that the gray area does not alter the image underneath. So you don't see any difference until you work with the brush.
Do I have to switch between the Dodge and Burn tools?No. Holding down the Alt key reverses the function. So you can lighten and darken in a single pass without switching tools.
Why should I reduce the exposure to 10 to 15%?Low values allow fine corrections. With high values, you would change too much with every stroke, and the skin quickly looks artificial.
How do I avoid the skin looking painted?Work with a soft brush at 0% hardness, reduce the exposure, and lift only the pores that run inward. This preserves the pore structure.
Can I still adjust the Dodge & Burn corrections later?Yes. Since the changes are on their own layers, you can reduce the opacity, rework areas, or recreate the layer completely.
How long does the micro Dodge & Burn work take?The technique is very time-consuming because each pore is edited individually. Therefore, plan enough time and work in stages.
Why is a second layer worthwhile for large-area corrections?On a macro layer, you can shape light and shadow without affecting the fine pore corrections. Both layers can be controlled independently of each other.


