
Transparency initially sounds like an abstract term, but it is one of the most important tools in image editing. If you want to cut out objects in GIMP, create soft transitions, or let gradients fade out into nothing, you can't avoid transparency. In this tutorial, you will learn what lies behind the term, how to make transparency visible in GIMP, and how to use it in a targeted way with layer masks. You can follow all the steps directly in your own document.
The video is only loaded from YouTube when you play it – data (including your IP address) is then transmitted to YouTube/Google. More in the privacy policy
Key Takeaways
Key Takeaways
- Transparency means that pixels are fully, partially, or not at all visible.
- The alpha channel stores the transparency of a pixel: 255 stands for fully opaque, 0 for completely transparent, and all values in between for partial transparency.
- Gradients from color to transparency can be created with the Gradient tool.
- Layer masks hide areas of a layer without permanently deleting the pixels. Black hides, white reveals.
- Soft brush tips create partial transparencies and avoid ugly jagged edges.
Step-by-Step Guide
Step 1: Understand the basic principle
Start with a new document that has a white background. In this context, transparent means see-through: the content underneath shines through. There are not only fully opaque and fully transparent areas, but also partially transparent intermediate levels. It is precisely these gradations that make soft and natural-looking transitions possible.

Step 2: Create a transparent layer
Now create a new layer by clicking the new layer icon in the Layers palette. Give it a name, such as "Gradient", and confirm with OK. The new layer initially looks inconspicuous because it is empty and transparent. However, you can recognize it in the Layers palette and work on it while the white background layer underneath is preserved.

Step 3: Create a gradient from color to transparency
Select the Gradient tool in the toolbox. Set a color as the foreground color, for example a shade of green, and confirm with OK. In the tool options, you then choose the gradient "FG to Transparent". The preview immediately shows you how the transition runs from the full color to complete transparency.
To draw the gradient horizontally and cleanly, hold down the Ctrl key while dragging. Click on the left side of the image, hold the key, and drag to the right. After releasing, you have a straight gradient on the transparent layer.
Step 4: Evaluate the result correctly
At first glance, the gradient may look odd because the white background layer lies beneath it. Briefly hide this layer using the eye icon. Then the familiar checkerboard pattern that represents transparency appears. You can now clearly see that the gradient actually leads from an opaque green to a see-through area. Afterwards, show the background layer again.

Step 5: Understand color mode and color depth
Open the foreground color dialog by clicking on the color swatch. You will see that your document is in RGB color mode with 8-bit color depth. This means that every color can be mixed from the red, green, and blue channels, and each channel has 256 levels, from 0 to 255. If you move the red slider all the way to the left, the value is 0; all the way to the right, it is 255. Then close the dialog with "Cancel".

Step 6: Examine the alpha channel with the Color Picker
Switch to the gradient layer in the Layers palette, because the measurement only works correctly there. Then select the Color Picker and activate the option "Use info window" at the bottom. Now click in the green area of the gradient. In the information dialog, you see the values for red, green, and blue as well as the value for alpha.
The alpha channel determines the transparency of a pixel. For the opaque green, it is at 255, so the pixel is fully visible. If you click on the right side of the image, in the transparent area, the picker shows a 0 for all values, because there is nothing to see there. If you drag the picker to the right with the mouse button held down, the alpha value decreases steadily. In between lie the partially transparent pixels.

Remember: 255 is fully opaque, 0 is fully transparent, and all values in between represent partial transparency.

Step 7: Using transparency with a layer mask
Now we will use transparency deliberately. Create a new layer again and fill it with a shade of blue using the Bucket Fill tool. Rename it, for example, to "Color Area". Then right-click on this layer and select "Add Layer Mask". Choose the white layer mask so that the blue area initially remains fully visible.

Step 8: Punching holes with the Pencil and the Paintbrush
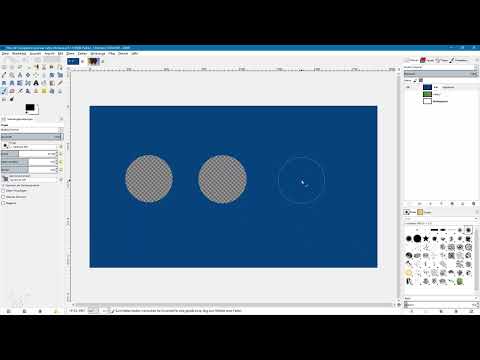
Activate the layer mask by clicking on it, and switch to the Pencil tool. Set a suitable brush size. Choose black as the foreground color and click once in the image. Black in the layer mask hides the corresponding area, creating a hole in the blue area. Underneath you can see the green gradient layer, which you can hide if needed via its eye icon.
Then switch to the Paintbrush tool. Here you can choose soft and hard brush tips. Punch one circle with a hard tip, a second with a soft tip, and a third with a very soft tip. The differences only become visible when you zoom in.

Step 9: Examining the edges closely
Select the Zoom tool and drag a frame around the first circle. With the hard edge you see unsightly jagged stair-stepping, because there is no partial transparency at all here. With the soft circle, on the other hand, the edge is drawn gently, because partially transparent pixels smooth the transitions. However, such hard edges are not always a disadvantage: for retro graphics or deliberate pixel art they are even explicitly desired.

With the third circle, made with the very soft tip, a gradient is created from the outside to the inside. In the center the area is fully transparent, and toward the outside it becomes increasingly opaque until it again matches the full blue.

Step 10: Cutting out objects using transparency
Layer masks can be used not only to create circles but also to cut out objects. In the example, a hot air balloon has already been cut out and is available, including its layer mask, in a separate file. Drag the layer into your other file via drag & drop, and the balloon is placed. With the Move tool you can then move it freely. The other layers shine through wherever the balloon is transparent.

To check the mask, hold down the Control key and click on the layer mask. This temporarily disables it, and the original background of the image becomes visible. Clicking again while holding the Control key reactivates the mask. If, on the other hand, you hold down the Alt key and click on the mask, you see only the mask itself. Black areas are hidden, white ones are shown.

Step 11: Paying attention to the file format
Finally, an important note: not every image format supports transparency. The PNG format is a reliable standard for this, especially if you want to publish images on the internet. When saving, make sure your format preserves the alpha channel, otherwise your transparent areas will be lost.

Summary ??? GIMP Transparency Explained Simply: Alpha Channel, Gradients and Layer Masks
Transparency in GIMP is far more than an effect. It resides in the alpha channel of every pixel and determines how opaque an area appears. With gradients to transparency, layer masks and soft brush tips, you can design transitions, cut out objects, and deliberately avoid or use hard edges. Once you have understood the basics, many creative possibilities in digital image editing open up to you. For more advanced techniques such as cutting out bodies and hair, it is worth taking a look at the video training "GIMP Basics for Beginners".
FAQ
What does transparency mean in GIMP?Transparency means that pixels are fully, partially, or not at all visible, so that the layers underneath show through.
What values does the alpha channel have?The value 255 stands for fully opaque, 0 for completely transparent. All values in between describe partial transparency.
How do I create a gradient to transparency?Create a transparent layer, choose the Gradient tool with the "Foreground to Transparent" gradient, and drag the gradient in the image. Holding down the Ctrl key makes it especially straight.
What is a layer mask?A layer mask hides or shows areas of a layer without deleting the pixels. Black hides, white shows.
Why do hard edges sometimes look stair-stepped?Hard brush tips do not produce partial transparencies. This results in jagged edges, which can even be desired in retro graphics or pixel art.
How can I check a layer mask?By holding down the Ctrl key and clicking on the mask, it can be temporarily disabled. By holding down the Alt key and clicking, GIMP displays only the mask.
Which file formats support transparency?The PNG format is a reliable standard for transparent images. Not every format supports transparency, so you should check the format before saving.

