
A photo with a beautiful evening mood often looks convincing only in the bright sky, while the foreground sinks into shadow. That is exactly where you lose details and colors, even though they are present in the original image. In GIMP, you can brighten these shadows afterwards, and in several ways. You can work with color tools, intervene selectively with masks, or use a layer mode that needs almost no sliders. This guide takes you through all the methods shown in Marco Kolditz's video tutorial. You will learn how to work non-destructively, why the mask is so important, and how to fine-tune the results.
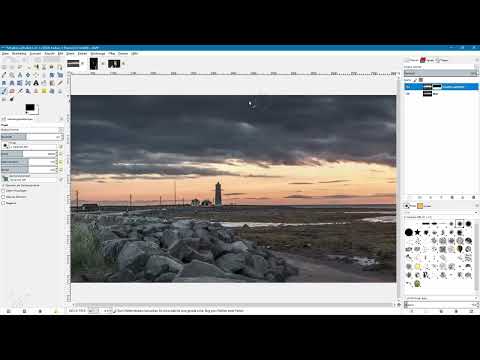
The video is only loaded from YouTube when you play it – data (including your IP address) is then transmitted to YouTube/Google. More in the privacy policy
Key Takeaways
- Always work on a copy of the original layer so that you can return to the starting image at any time.
- If you only brighten the shadows, you protect the highlights by moving the sliders selectively. The black slider usually remains untouched.
- Layer masks are the key to control. With a black mask and white foreground color, you paint the brightening exactly where you want to see it.
- Curves deliver smoother transitions than simple sliders.
- The Screen layer mode brightens an image purely through blending. Combined with a mask, it can also be used to selectively brighten individual areas such as hair.
Step-by-Step Guide
Step 1: Duplicate the layer and work non-destructively
Open your image in GIMP and duplicate the original layer. Give the copy a meaningful name, for example "Brighten shadows". This step seems inconspicuous but is important: all changes are on a separate layer, and the original remains untouched.

Step 2: Read the histogram and use the Levels adjustment
Activate the new layer and open Levels via Colors. In the histogram, you can see where the tonal values are concentrated. The left side represents the shadows, the right side the highlights. In the example, the foreground and sky are on the left, the sun on the right.
Don't simply move the black slider to the right, because that makes the already dark areas even darker. Instead, drag the mid-gray slider to the left. This way you brighten the midtones and thus the shadows as well, without destroying the detail in the highlights.

Step 3: Brighten selectively with the midtone slider
The mid-gray slider is your most important tool in this phase. Move it gradually and watch the preview. Move the white slider to the left only if the highlights look too flat. Keep in mind that the sky may deliberately be blown out, because it will be protected later via the mask anyway.

Step 4: Create a black layer mask
Right-click your layer copy and choose "Add Layer Mask". Be sure to choose the option for a black mask. The mask then initially hides all changes completely. You see the original image again, even though the layer remains active.

Step 5: Paint the brightening into the image with white
Switch to the Paintbrush tool and make sure the layer mask is selected. Set the foreground color to white. With the double arrow next to the color swatches, you can quickly swap foreground and background colors. The brush dynamics are also important: set them to "Dynamics Off" so that size and opacity remain constant while painting.
Now choose a soft brush tip that is somewhat larger, and paint over the foreground. By holding the Alt key and clicking on the mask, you can see which areas you have already covered. This way you spot gaps at a glance.

Step 6: Make transitions soft and correct mistakes
Hard edges quickly look artificial. Therefore, reduce the brush opacity and paint over the transitions, for example at the horizon. This creates a natural gradient. If you want to take something back, switch to the black foreground color and paint the brightening away again. So you don't have to worry about brightening too much.
The sky can also be gently brightened this way. Work there with a lower opacity and paint over the area several times until the effect looks subtle.

Step 7: Control the strength via the layer opacity
If the overall effect seems too strong to you, reduce the opacity of the entire layer. To do this, click in the opacity slider at the top of the Layers window and drag it to the left until the result looks right. In the example, a value of about 85 percent works well.

Step 8: Create a soft gradient with tone curves
For finer control, duplicate the original layer again and name it "Curves". Open the tone curves (Curves) via Colors. The diagonal line shows the tonal value distribution: the lower area represents the shadows, the upper area the highlights.
First, pull the shadows upward to brighten them. The highlights stay on the diagonal so that they remain untouched. An S-curve increases the contrast and is unsuitable for this purpose. However, it shows which direction you are moving in. If you additionally raise the bright parts in the shadow area slightly, the brightening looks more natural. The great advantage of the curve is the soft transition, which you can check with the preview while moving the points.

Step 9: Refine the curve with a mask
As with the levels adjustment, you can add a black mask here as well and, with white as the foreground color, reveal the areas that should be brightened. You will usually paint the foreground quickly because you already know the technique. Reduce the opacity of the brush at soft transitions so that no hard edges appear.

Step 10: Use the Screen layer mode
The most elegant method of all works without sliders. Duplicate the original layer and name it "Screen". Open the layer mode menu and select "Screen". The mode blends the active layer with the layers beneath it, and the image is brightened immediately. The shadows gain definition without you having to move a slider.
The brightness can be readjusted if needed. You can edit the layer further with color tools or reduce its opacity. If you only want to brighten certain areas, add a layer mask again and paint over the desired spots with full opacity.

Step 11: Create a grayscale mask for detailed selection
For particularly precise results, you can use a luminance mask. To do this, duplicate the original image, name it "Mask", and add a layer mask. This time, choose the option "Grayscale copy of layer". The mask shows the image as a black-and-white version.
Invert the mask via Colors and "Invert". Now the dark areas are white and thus released for the change. The bright areas remain protected. Afterwards, you can strengthen the mask's contrast with Colors and Curves so that the separation between shadows and highlights becomes even clearer.

Step 12: Apply the luminance mask to the image
Activate the image layer again and adjust it via tone curves. Thanks to the mask, the brightening affects only the dark areas. The sunset in the background remains unchanged. Compare the result in between by briefly deactivating the mask.

Step 13: Create an HDR look with blur and Overlay
For a typical HDR look, duplicate the original layer and name it "HDR". Via Filters, Blur, apply the Gaussian blur with a high radius, for example 120 pixels. Then invert the colors of this layer via Colors and "Invert". Set the layer mode to "Overlay". The shadows are thereby brightened strongly, and contours get the characteristic HDR effect. With this look, pay attention to the skin, because it can quickly look shiny or artificial. With a mask, such areas can be excluded again.

Step 14: Selectively Brighten Hair with the Screen Mode
To finish, the video shows a practical example for portraits. Duplicate the current layer, set it to the Screen mode, and add a black mask. Paint with white as the foreground color and a soft brush tip only over the hair. Adjust the brush size to the width of the strands of hair. If you accidentally hit the face, paint over it with black. If the hair looks too bright, reduce the opacity of the brush or the opacity of the layer.

Summary ??? Brightening Shadows in GIMP: A Practical Guide with Levels, Masks, and Layer Modes
You have seen that GIMP offers many ways to brighten shadows. Levels adjustment and tone curves give you precise control over the tonal values. Layer masks decide where the brightening is allowed to take effect. The Screen layer mode does the job with a single click, and the luminance mask protects the highlights especially reliably. Always work non-destructively so that you can go back at any time. Experiment with the methods until the image looks exactly the way you imagine it.
FAQ
Do I always have to duplicate the original layer?Yes, this is recommended, because that way you keep the original unchanged and can undo any change at any time.
Why shouldn't I drag the black slider to the right?Doing so makes the already dark areas even darker, and details are lost. The mid-gray slider, on the other hand, selectively brightens the midtones and shadows.
What does a black layer mask do?It initially hides all changes. With white as the foreground color, you then paint the brightening into the image only where you want to see it.
Why should the brush dynamics be set to "Dynamics Off"?That way, brush size and opacity stay constant while you work, and you get consistent results.
When do I use the Screen layer mode?You use it when you want to brighten an image quickly and without sliders. With a mask, you can then limit the effect to specific areas.


