
Making a young face age by decades sounds unusual at first. That is exactly why this project is well suited for understanding GIMP's most important tools working together: layer copies, filters, layer modes, layer masks, and the precise alignment of two photos.
The video is only loaded from YouTube when you play it – data (including your IP address) is then transmitted to YouTube/Google. More in the privacy policy
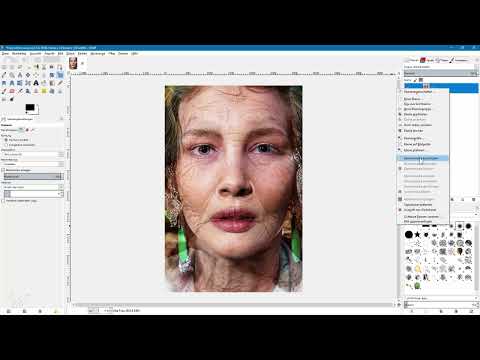
A young model photographed from the front serves as the example. The model's skin is enriched step by step with the pores, texture, and wrinkles of an older woman. Hair, eyes, and lips deliberately remain unchanged, because this is only about the skin.
The result stands or falls with the source material. Two photos with a similar perspective and head position are much easier to combine than shots taken from different angles. So plan some time for choosing the images.
Key Takeaways
- Pores and skin texture can be emphasized with the High Pass filter on a copy of the original layer.
- The layer mode determines how the texture is blended with the original image. In GIMP, the suitable modes are called Hard Light and Soft Light.
- The template is rotated and scaled using guides at the eyes, chin, and cheeks.
- A layer mask and a soft brush determine where wrinkles are allowed to be visible.
- The neck, saturation, and transitions require separate post-processing so that the result looks believable.
Step-by-Step Guide
Step 1: Create a layer copy for the pores
Open your portrait photo and check in the layers palette that the original layer is active. Duplicate it using the "Duplicate Layer" icon at the bottom of the palette. Then give the copy a clear name, for example "Pores". This way the original layer stays untouched, and you can undo or hide any change at any time.

Step 2: Apply the High Pass filter to the pore layer
Select the pore layer and open the High Pass filter via the menu Filters, Generic. If this entry is missing, it is probably not installed as a script. In the video, the installation is explained in a separate tutorial on the topic "Sharpening an image". Another video shows how to achieve the effect without any plugin.
The dialog offers no preview. So try out different values, confirm each time with OK, and judge the result in the image. The right value depends heavily on the subject and resolution. For this photo, the value 20 works very well. Also deactivate the option "Keep original layer" so that the effect ends up directly on the pore layer.

Step 3: Enhance the texture with the appropriate layer mode
After the High Pass filter, a medium gray dominates, because only the details are supposed to be visible. So change the layer mode of the pore layer. In the video the term "hard edges" is used; in the GIMP menu the appropriate mode is called Hard Light. Hide the layer once and show it again to see the difference. The skin now looks rougher and more detailed, without the image being completely overlaid.

Step 4: Insert and clean up the template of the older woman
Drag and drop the photo of the older woman into the image window. GIMP creates the image as a new layer. Then free this layer from distracting edges and background areas so that only the woman is visible. Pay attention to two deviations: The image was taken slightly at an angle and is somewhat smaller than the original photo. You will correct both in the next steps.

Step 5: Align and rotate the image with guides
Drag a horizontal guide down from the top ruler into the image. If the rulers are not visible, activate them under View. The line serves as a reference for the eyes.
Select the layer of the older woman and then the Rotate tool. In the tool options, be sure to set the interpolation to Lanczos 3. Without this setting, the result will be pixelated after rotating. Then click on the image, drag the grid at a corner until both eyes are parallel to the guide, and confirm with "Rotate".

Step 6: Adjust size and position to the original face
This step determines how well everything fits. Briefly hide the woman's layer and move the guide so that it runs exactly through the eyes of the young model. Then place two vertical guides at the positions of the eyes in the original image. Add further lines for the chin as well as for the left and right cheeks.
The guides are necessary because GIMP does not show a semi-transparent preview image when scaling. The image appears fully opaque again during scaling. Set the zoom to about 10 percent and scale the layer proportionally while holding down the Ctrl key. Move the image until the woman's eye lies on the respective crosshair. Check the chin and cheeks and adjust everything again if needed. Before confirming, set the interpolation back to Lanczos 3.

Step 7: Set up the Soft Light layer mode and layer mask
Set the layer mode of the woman's layer to Soft Light. The wrinkles are thereby blended with the original image. Since the result is initially visible on the eyes, lips and hair, you need a layer mask.
To do this, right-click on the layer and select "Add Layer Mask". Choose the option "White (full opacity)". A white mask does not change the image at first, but it prepares the next step.

Step 8: Selectively hide wrinkles with the brush
Make sure the layer mask and not the image is active. Choose a soft brush and deactivate the brush dynamics. This keeps opacity and size constant while painting. Paint with black over all areas where no wrinkles should appear. These include the eyes, eyelids, lips and parts of the nose.
With the X key you switch between black and white. This lets you correct mistakes without starting over. Work with reduced opacity and go over problem areas several times so that the transitions become soft. If an edge looks like a scar instead of a wrinkle, you weaken it selectively. A graphics tablet noticeably makes this fine work easier.

Step 9: Correct excessive saturation
The layer mode also increases the color saturation, which quickly looks artificial. Select the image layer and not the mask. Then open the dialog via Colors, Hue-Saturation and reduce the saturation value by feel. Note that the preview may show no change in this case. Therefore, compare the result by showing and hiding the layer, and confirm with OK.

Step 10: Fit the neck in as a separate layer
The face of an older woman rarely fits exactly onto the neck of a younger model. Therefore, you edit the neck separately. Drag the woman's image into the document again and name the layer, for example, "Neck". Rotate the image again based on the eyes and set new guides: one for the beginning of the neck, one for the width of the neck and one for the chin.
Then scale the layer at about 10 percent zoom. Align the width so that the edges of the neck match the guides on the original photo. The lower end should lie where the actual image ends in the original picture. Then confirm with "Scale" and check again whether the interpolation is set to Lanczos 3.

Step 11: Mask the neck and smooth the transitions
Set the layer mode of the neck layer to Soft Light and add a black layer mask. This makes the layer completely hidden at first. Choose white as the foreground color and paint the neck into the image on the mask. At the beginning the mask may go a little beyond the chin, since this can be corrected later.
Switch to black with the X key to remove clothing and areas of the chin that do not belong to the neck. Reduce the opacity for soft transitions and use a larger, very soft brush at the edges. Especially at the bottom edge of the image, several light strokes help the young woman's skin blend smoothly into the older woman's skin.

Step 12: Merge visible layers and readjust saturation
Select the top layer and open the menu Layer, New from Visible. This gives you a single layer with the finished result. On this layer, you reduce the saturation slightly once more via Colors, Hue-Saturation. The image then looks more natural, especially in the area of the neck and cheeks.

Step 13: Create a Before-and-After Comparison
Finally, duplicate the original photo and drag the copy all the way to the top of the layers palette. Then show and hide it to compare before and after directly. This way you can immediately see whether the pores, wrinkles, and transitions are convincing, or whether you should still improve individual areas.

Summary ??? Aging Skin with GIMP: Transferring Wrinkles to Young Skin
You have learned how to emphasize pores and skin texture using a layer copy and the high-pass filter. With Hard Light you enhance the details, and with a template from the photo of an older woman you add wrinkles. Guides, rotating, and scaling ensure that both faces lie on top of each other. With Soft Light, layer masks, and a soft brush, you determine where the wrinkles remain visible. Finally, you correct the saturation and the neck area. The better the source photos match each other, the more convincing the result will be.
FAQ
How do I know that my high-pass filter is set correctly?The right value shows predominantly medium gray with visible details in pores and skin lines, without strong edges or noise.
Why should I duplicate the original layer before applying the filter?This way the original photo is preserved, and you can hide or undo changes at any time.
Which interpolation should I use when rotating and scaling?Use Lanczos 3, as other settings can make the image pixelated or blurry.
Why do I work with guides instead of a semi-transparent preview?GIMP does not display a semi-transparent image when scaling, so guides serve as reliable orientation.
What should I do if the saturation shows no change in the preview?Confirm the setting with OK and then compare the result by showing and hiding the layer.
Why should I edit the neck and face separately?Face and neck rarely match each other perfectly, so they can be adjusted more precisely separately.
What does the X key mean when masking?With X you switch between black and white as the foreground color, so you can correct mistakes quickly.


