
A photo taken at dusk often looks grainy, and in a sky image, individual leaves or compression blocks suddenly spoil the effect. You don't have to discard such shots right away. GIMP comes with tools built in that are well suited for these tasks. You don't need any additional plugins for this.
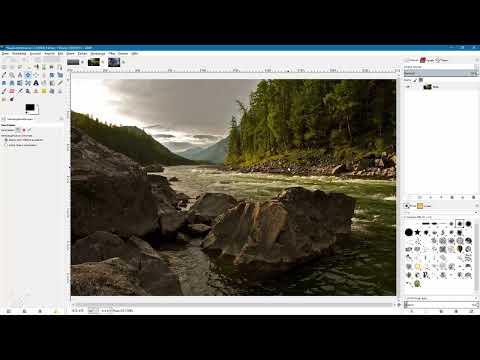
The video is only loaded from YouTube when you play it – data (including your IP address) is then transmitted to YouTube/Google. More in the privacy policy
In this tutorial, you will learn three approaches: the "Despeckle" filter against image noise, the Heal tool for individual distracting objects, and the Selective Gaussian Blur, which you limit to specific areas with a layer mask. All three methods work on duplicated layers, so your original image always remains unchanged.
Key Takeaways
- Always work on a copy of the layer. This way the original is preserved, and you can undo or reduce changes at any time.
- The "Despeckle" filter reliably reduces noise. The "Recursive" option strengthens the effect, but also blurs fine contours.
- With the Heal tool, you remove distracting objects by setting a clean source with Ctrl-click. The brightness adjusts automatically in the process.
- The Selective Gaussian Blur smooths compression artifacts without destroying strong edges. A layer mask ensures that only the desired areas are affected.
- Through the opacity of an edited layer, you find a compromise between freedom from noise and preserved details.
Step 1: Duplicate and Prepare the Layer
Before you change anything in the image, you should duplicate the layer. This sounds like a minor detail, but it prevents you from losing the original if you make a mistake. In the Layers palette, select the active layer and click the small icon at the bottom for a new layer copy. With a double-click on the copy, you assign a descriptive name such as "Remove Noise". The copy is then your working layer, and the original lies untouched underneath.

Step 2: Apply the "Despeckle" Filter
Activate the working layer and open the Filters entry in the menu, then Enhance, and there Despeckle. In the dialog window, you see a preview at the top. If you click in the small square and drag the section, you can select an area with light, medium, and dark regions. This is the best way to judge the effect, because noise appears with different intensity in areas of different brightness.
By default, the "Adaptive" option is enabled. The filter then orients itself on the layer's histogram and removes the noise almost fully automatically. Note that the Radius slider has no effect in this mode, since it is grayed out. If you switch the preview off and on again, you can clearly see the difference.


Step 3: Use the "Recursive" Option for Stronger Noise Reduction
If the default effect isn't enough for you, enable the "Recursive" option. The filter is then applied to the image multiple times, and the noise disappears much more strongly. The price for this is a certain amount of blurring. Fine contours blur slightly. With photos that are denoised after the fact, you usually have to accept this compromise. For a noticeably better overall effect, however, recursive application is generally recommended.
Step 4: Use Thresholds for Coarse Spots
The two sliders "Black threshold" and "White threshold" are suited for larger, conspicuous spots, not for fine graininess. If you drag the Black threshold slider to the right, the very dark areas are weakened first. With an excessive value, more and more dark regions disappear, which is helpful for coarse black spots. With the White threshold, the same happens with light areas. If you move the slider to the left, light spots are smoothed. If you go too far, light areas merge with their surroundings. Therefore, approach it step by step and keep an eye on whether details are being lost.

Step 5: Check the Result and Adjust Opacity
Confirm the filter with OK and enlarge the view to 100 percent by pressing the 1 key. By clicking the eye icon of the edited layer, you show or hide it. This way you compare the before and after versions directly. It becomes apparent that the noise is significantly reduced, but fine details are sometimes lost.
If that is too much of a good thing for you, reduce the opacity of the edited layer, for example to 50 or 70 percent. The layer is then blended with the original. You get a middle path with less noise and somewhat more detail. Decide based on your image whether calmness or structure in the picture is more important to you.

Step 6: Remove distracting objects with the Heal tool
Not every problem is noise. Flying leaves or individual birds can be removed with the Heal tool. You can find it in the toolbar, or you can simply press the H key. First, create a new copy of the layer and name it something like "Remove spots". That way, everything stays non-destructive here as well.
In the tool options window, set a soft brush tip. For small blemishes, you can reduce the size to around 10 pixels. For the dynamics, it is best to choose "Dynamics off" so that the size stays constant. Under alignment, set "aligned". The source then moves along with the mouse pointer, and you don't constantly copy the same area.

To set a source, hold down the Ctrl key and click on a clean spot nearby. Then click with the left mouse button on the distracting object. The great thing about the Heal tool is that it takes the brightness information into account. If you choose a dark source, the dark color is not simply transferred. Mainly the structure is adopted, while the brightness adapts to the surroundings. With the space bar held down, you can move the image section if you need more room to work. In this way, you work your way through the image piece by piece until all the blemishes have disappeared.
Finally, zoom out and toggle the layer on and off to compare the before-and-after result. The retouching is often so inconspicuous that you can hardly notice it later.

Step 7: Smooth artifacts in the sky with the Selective Gaussian Blur
You can get compression artifacts, meaning visible blocks in the sky, under control with a different tool. To do this, duplicate the original image again and name the copy, for example, "Remove artifacts". Then open the Filters menu, then Blur, and choose the Selective Gaussian Blur.
This filter smooths the image but takes edges into account. You set two values. The radius determines how strongly the image is blurred. With a radius of 20, the sky looks almost like a uniform surface, but then the rest of the image becomes too soft as well. The maximum delta determines how well GIMP protects contours. A low value protects strong edges more, while a high value lets them break up. A delta of around 50 has proven effective in practice. You should then adjust the radius carefully. A value of around 9 to 10 often delivers a good result, while 7 still shows artifacts in some images.


Confirm with OK and wait a moment, as the calculation can take a while with larger images. Afterwards, the entire sky is smoothed, but so are other parts of the image such as smoke or forest. This is exactly why you need the layer mask in the next step.

Step 8: Mask selectively with a layer mask
With a layer mask, you decide where the blur takes effect. Right-click on the active layer and choose Add Layer Mask. Choose the white mask and confirm. Initially nothing changes in the image, because a white mask leaves everything visible.
Now choose a brush tool, set black as the foreground color, and use a relatively soft brush. Paint over the areas that should not be blurred, that is, smoke, volcano, forest, and road. A soft brush creates a gentle transition at the edge, so the boundary is not visible. Reduce the brush size for fine areas and increase it for larger surfaces.


To check which areas you have already covered, hold down the Alt key and click on the mask. Then you see only the mask. White areas are blurred, black ones stay sharp. Paint specifically over the remaining white spots that should actually stay sharp. With another Alt-click, you return to the normal view.

At the end, compare the before and after images, ideally at 100 percent zoom level. The sky should now be free of artifacts, while the smoke and landscape retain their sharpness. If the blur is too strong overall, lower the opacity of this layer, as you already learned with the noise filter.

Step 9: Save the result
You can go back at any time. The mask can be corrected afterwards if you discover blurry spots at the edge of the smoke or have blurred too much of the sky. If you save the image in GIMP's native XCF format, all layers, the opacity, and the layer mask are preserved. This way you can continue your work at a later time.

Summary ??? Removing Noise in GIMP: Step by Step
You have seen that GIMP offers three reliable ways to improve images. The "Despeckle" filter with the options "adaptive," "recursive," and the threshold values reduces image noise. The Heal tool removes distracting objects while taking brightness and structure into account. The Selective Gaussian Blur smooths compression artifacts, and a layer mask limits the effect to the desired areas. Always work on duplicated layers, use opacity for fine adjustment, and save your project in XCF format so that you can continue working at any time.
FAQ
Can I remove noise completely without losing detail?No, strong noise reduction always smooths fine structures as well. With the opacity of the edited layer, you can find a middle ground between smoothness and detail.
Do I have to install plugins for these methods?No, all the tools shown in the tutorial are included in GIMP by default.
Why should I duplicate the layer before editing?This way the original image is preserved. You can hide, delete, or weaken changes at any time.
What does the "recursive" option do in the filter?The filter is applied to the image multiple times, which removes the noise more strongly. At the same time, contours may look somewhat softer.
What is the Alt key useful for with the layer mask?By holding the Alt key and clicking on the mask, you see only the mask. This way you can see exactly which areas will be blurred.
Why do I save in XCF format?Only the XCF format preserves layers, opacity, and layer masks. Other formats such as JPEG combine everything into a single image.


