
A background that distracts from the subject, or a disruptive image area that needs to go: GIMP offers the Eraser tool for this. It removes image information directly on a layer, makes it transparent, and can be undone if needed. In this tutorial, you will learn how to use the tool properly, why it works differently on layers with and without an alpha channel, and why a layer mask is the better choice in many cases.
The video is only loaded from YouTube when you play it – data (including your IP address) is then transmitted to YouTube/Google. More in the privacy policy
Key Takeaways
Key Takeaways
- You can access the Eraser tool via the icon in the toolbox or with the keyboard shortcut Shift + E.
- Without an alpha channel, the Eraser paints with the background color; with an alpha channel, it actually removes the image information.
- By holding down the Alt key, you can restore erased areas, even after saving in XCF format.
- A layer mask is more flexible because you can undo changes at any time without permanently losing image information.
Step-by-Step Guide
Step 1: Finding the Eraser Tool
The Eraser tool is hidden behind its own icon in the toolbox. It is quicker with the keyboard shortcut Shift + E. The tool's settings largely correspond to those of the Paintbrush tool, so if the options are unclear, it is worth looking at the basics of the brush first.

Step 2: Understanding the Layer Structure
Open your image and take a look at the layers palette. In the example, the photo is at the bottom as the background layer, and above it is a second image that is currently hidden. Pay attention to which layer is actively selected, because the Eraser tool always only affects the currently selected layer. In the example, you are therefore working on the lower image layer.

Step 3: Erasing with the Background Color
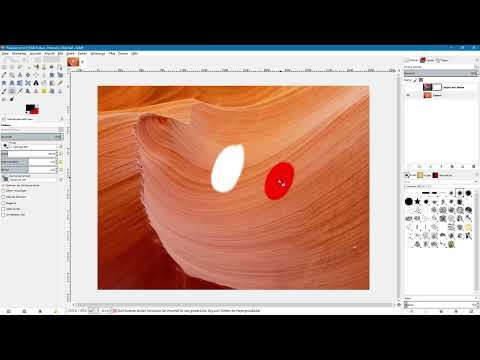
If the layer has no alpha channel, meaning no transparency support, the Eraser behaves differently than you might expect. When you paint over the image with the Eraser active, the image information is replaced by the current background color. The default background color is white. Feel free to test this: if you change the background color to red, for example, and erase again, exactly that color appears in the edited areas. The result is therefore painting over, not true transparency.


After you have done the test, undo the steps with Ctrl + Z. Then reset the foreground and background colors to the default values using the small icon below the color swatches. This way you have white as the background color again.

Step 4: Adding an Alpha Channel and Creating True Transparency
For the Eraser to actually remove image information, the layer must have an alpha channel. To do this, right-click the layer in the layers palette and select "Add Alpha Channel". Initially nothing changes in the image itself. You only notice the difference when you paint over an area with the Eraser. There you can see the transparent background shining through. The image information is therefore actually removed.


Step 5: Restoring Deleted Areas with the Alt Key
A major advantage of the Eraser is the ability to make areas visible again. To do this, hold down the Alt key and paint over the spot you want to bring back. This function is retained even if you save the image in XCF format, close it, and open it again. So you can still correct the areas later.

Step 6: Using a Layer Mask as a Better Alternative
Even though the Eraser seems practical, I recommend that you work with a layer mask instead of the eraser. To do this, show the upper layer and add a layer mask. Select the Paintbrush tool and set black as the foreground color. With black on the mask, you hide the area of the layer so that the layer beneath shows through.


The preview of the mask illustrates the principle: everything that is black is not displayed from the image layer, everything that is white remains visible. If you want to show an area again, switch the foreground color to white and paint over the spot on the mask again. Your original image remains untouched, and you can undo any correction at any time.
Summary – Using the GIMP Eraser: Removing and Restoring Image Areas
You can access the Eraser tool in GIMP via the icon or with Shift + E. Without an alpha channel, it paints over areas with the background color. True transparency only arises once an alpha channel has been added. By holding down the Alt key, you can bring back erased areas, even after saving in XCF format. For flexible and non-destructive editing, however, you should use layer masks, with which you hide areas in black and show them again in white.
FAQ
Can I also restore areas with the eraser?Yes, hold down the Alt key and paint over the area, and the original image information becomes visible again.
Why is my erasure white instead of transparent?The layer probably has no alpha channel. Add it via the layer's context menu, and then transparency will be created.
Are the erasures preserved if I save the image in XCF format?Yes, even after reopening, the erased areas can be restored by holding down the Alt key.
Why is a layer mask recommended instead of the eraser?A layer mask does not permanently change the original image, and you can show areas again at any time.
Which color do I have to choose for a layer mask?With black you hide areas, with white you show them again.


