
Before you start painting with the brush in GIMP, you need to know which color your brush is actually using. That is exactly what this tutorial is about. You will learn how to select colors via the color dialog, mix them, and save them for later. It also becomes clear why light and watercolors mix according to completely different rules.
The video is only loaded from YouTube when you play it – data (including your IP address) is then transmitted to YouTube/Google. More in the privacy policy
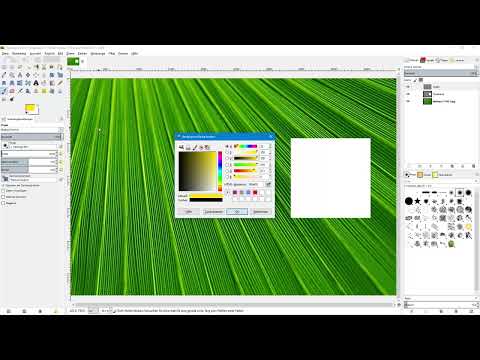
A simple example image with a white area serves as the starting point. You will try out all the functions on it without putting your actual project at risk.
Key Takeaways
- In GIMP, the foreground color is the color you paint with. By default it is black, and the background color is white.
- The color dialog offers several tabs that display the same color in different ways: via RGB values, via the hue on the color wheel, or via HSV values.
- The RGB color mode works additively: the more light you mix, the brighter the result becomes, all the way up to white.
- Each of the three RGB channels has 256 levels. This results in around 16.7 million possible colors.
- Saved colors are available to you again at any time. In addition, you can adopt colors via hexadecimal code or pick them up from an image with the color picker.
Step-by-Step Guide
Step 1: Create a separate layer for painting
Before you add color to the image, a separate layer is worthwhile. Create a new, empty layer via the Layer menu and name it, for example, "Painting". Set the layer fill to transparency and confirm with OK. Then drag it with the mouse button held down all the way to the top of the layer list. This way your original remains untouched, and you can remove anything you paint at any time.

Step 2: Activate the Paintbrush tool
Now select the Paintbrush tool in the toolbox. Below the toolbox, the settings for the brush appear, such as size and opacity. These options are a topic of their own and will be covered in detail in a later video. For choosing colors, all that matters right now is that the Paintbrush tool is active.

Step 3: Understand the default colors in the toolbox
In the toolbox you will find two color swatches. The upper one is the foreground color, here black. The lower one is the background color, here white. With the brush active and a black foreground color, you can paint directly onto the image. To undo a test attempt, press Ctrl + Z. This quickly gets you the white area back.


Step 4: Open the color dialog
As soon as you want a different color, click on the foreground color swatch. The color dialog opens. At first it may seem overloaded, but it has a clear logic. On the left side you will find various tabs. You use them to switch between different views of one and the same color.

Step 5: Choose a color via the color mixing tab
The tab with the color mixer shows you the current color value at the bottom, for example your black. If you click in the color field or hold the mouse button down and drag, the color value changes immediately. With OK you adopt the mixed color as the foreground color. Feel free to experiment a little, because you can choose again at any time.


Step 6: Select a hue via the color column
Another column in the dialog allows you to directly click on a basic hue. If you choose blue, for example, the other fields adjust accordingly. This way you quickly find a saturated blue, a darker one, a lighter one, or a tone in between. This step is ideal if you know the direction but not yet the exact tone.

Step 7: Working with Hue, Saturation, and Value
On the right-hand side, you will find the sliders for hue (Hue), saturation (Saturation), and brightness (Value). The hue slider determines the basic color, for example yellow. You can drag it, click on a hue, or type in a numerical value. Saturation determines the intensity. At 0%, the color is gray; at 100%, it is fully saturated. Brightness controls how close the color is to black. If you lower it, your yellow becomes increasingly dirty and darker.


Step 8: The RGB Sliders and Additive Color Mixing
Below that are the sliders for red, green, and blue. By default, GIMP works in the RGB color mode, which you can also see at the top of the dialog. RGB stands for red, green, and blue. If you set all three sliders to the left, the result is black.
This mode is additive. That means you are adding light. The more color you mix in, the brighter the result becomes. The opposite of this is subtractive color mixing, as occurs when painting with watercolors or paint from a tube. There, each color absorbs part of the light. The more colors you mix, the darker and grayer the result becomes, often resulting in an unsightly "gray mush" instead of the hoped-for black.
Step 9: Trying Out Additive Mixing in Practice
Drag the red slider all the way to the right, and you get a pure, bright red. If you add green, it turns into yellow. If blue is added as well, you finally get white. This very logic explains why screens consist of red, green, and blue dots.

Step 10: Understanding the Number of Possible Colors
Each of the three RGB values can take values from 0 to 255. That is 256 gradations per channel, since 0 is counted. Multiplying 256 × 256 × 256 yields about 16.7 million colors. Transparency, by the way, also has 256 gradations, so the selection expands even further.

Step 11: Selecting Colors via the Color Wheel
The tab with the circle icon offers a different view of the colors. Here, you first select the hue in the wheel, for example a pink or magenta tone. Then you determine whether the color should be more saturated, move more toward black, or tend toward white. For many people, this tab feels more intuitive because it shows colors the way we describe them in everyday life.

Step 12: Saving a Color for Later
If you like a color value, you can accept it directly with OK. If you need it again later, click instead on the small arrow icon next to the color swatch. This saves the color in your color palette. Going forward, you can access it at any time without setting the values again.

Step 13: Reusing Saved Colors
If you open the color dialog again, you will find your saved color there. You can switch back and forth between different saved colors, confirming each time with OK. This way, color schemes for a motif can be built up quickly.

Step 14: Using the Hexadecimal Code
If you work with websites more often, the hexadecimal code is very handy. It is displayed in the color dialog and describes the color in a form that can be used directly in HTML code. In the example, it is cc2d8a. You select the code, copy it, and paste it into your code. Conversely, you can also paste in a code to get exactly that color.

Step 15: Picking a Color from the Image with the Color Picker
Next to the tabs, you will find a small icon for the color picker (pipette). If you click on it, the mouse pointer turns into a pipette. Then you click on the desired spot in the image, for example on a shade of green. The color is picked up, and you can paint with it. This is especially helpful if you want to take a color exactly from a photo.

Step 16: Swap foreground and background color
With the double-arrow icon in the toolbox, you swap the foreground and background color. Afterwards, white is the foreground color, and your shade of green is in the background. This saves time when you want to switch between two colors.

Step 17: Restore the default colors
If you want to return to the initial state, click the small icon for the default colors at the bottom of the toolbox. This makes black the foreground color and white the background color again.

Summary – Mixing and Saving Colors in GIMP: A Guide for Beginners
You have learned how to create your own layer for painting in GIMP and activate the brush tool. You now know how to work with the color dialog using the color mixer, color wheel, and RGB sliders, and how to save colors. You are also familiar with the hexadecimal code, the color picker, and swapping the foreground and background color. The most important takeaway remains the difference between additive and subtractive color mixing: RGB adds light, while paint from the tube subtracts it. Once you have understood this logic, choosing any color in GIMP becomes much easier.
FAQ
How can I quickly switch back to black and white in GIMP?Click the small icon for the default colors at the bottom of the toolbox, and black becomes the foreground color and white the background color.
Why does my mixed color always get lighter with RGB?RGB works additively, meaning each color channel you add increases the amount of light. Only the combination of all three colors results in white.
How do I save a color so I can use it again later?Click the arrow icon next to the color swatch in the color dialog, and the current color will be saved.
Can I pick up a color from an image?Yes, activate the color picker in the color dialog and click on the desired spot in the image.
What is the hexadecimal code used for?It describes a color as a string of characters that you can use, for example, in the HTML code of a web page.
How many colors can GIMP display in RGB mode?Each of the three channels has 256 gradations, resulting in around 16.7 million colors in total.


