Working with images in GIMP can sometimes be challenging, especially when making various changes and not remembering exactly how the original image looked. A valuable feature that can help you is GIMP's Journal. In this tutorial, I will explain how to use the Journal effectively to keep track of your editing steps and undo them if necessary. Let’s work together to see how this tool can facilitate your creative process!
Key insights
- The Journal allows you to track changes made and easily switch between different states of an image.
- You can undo or restore changes using keyboard shortcuts or through the user interface.
- Clearing the Journal can save storage space but also means that you cannot recover any previous edits.
Step-by-Step Instructions
What is the Journal in GIMP?
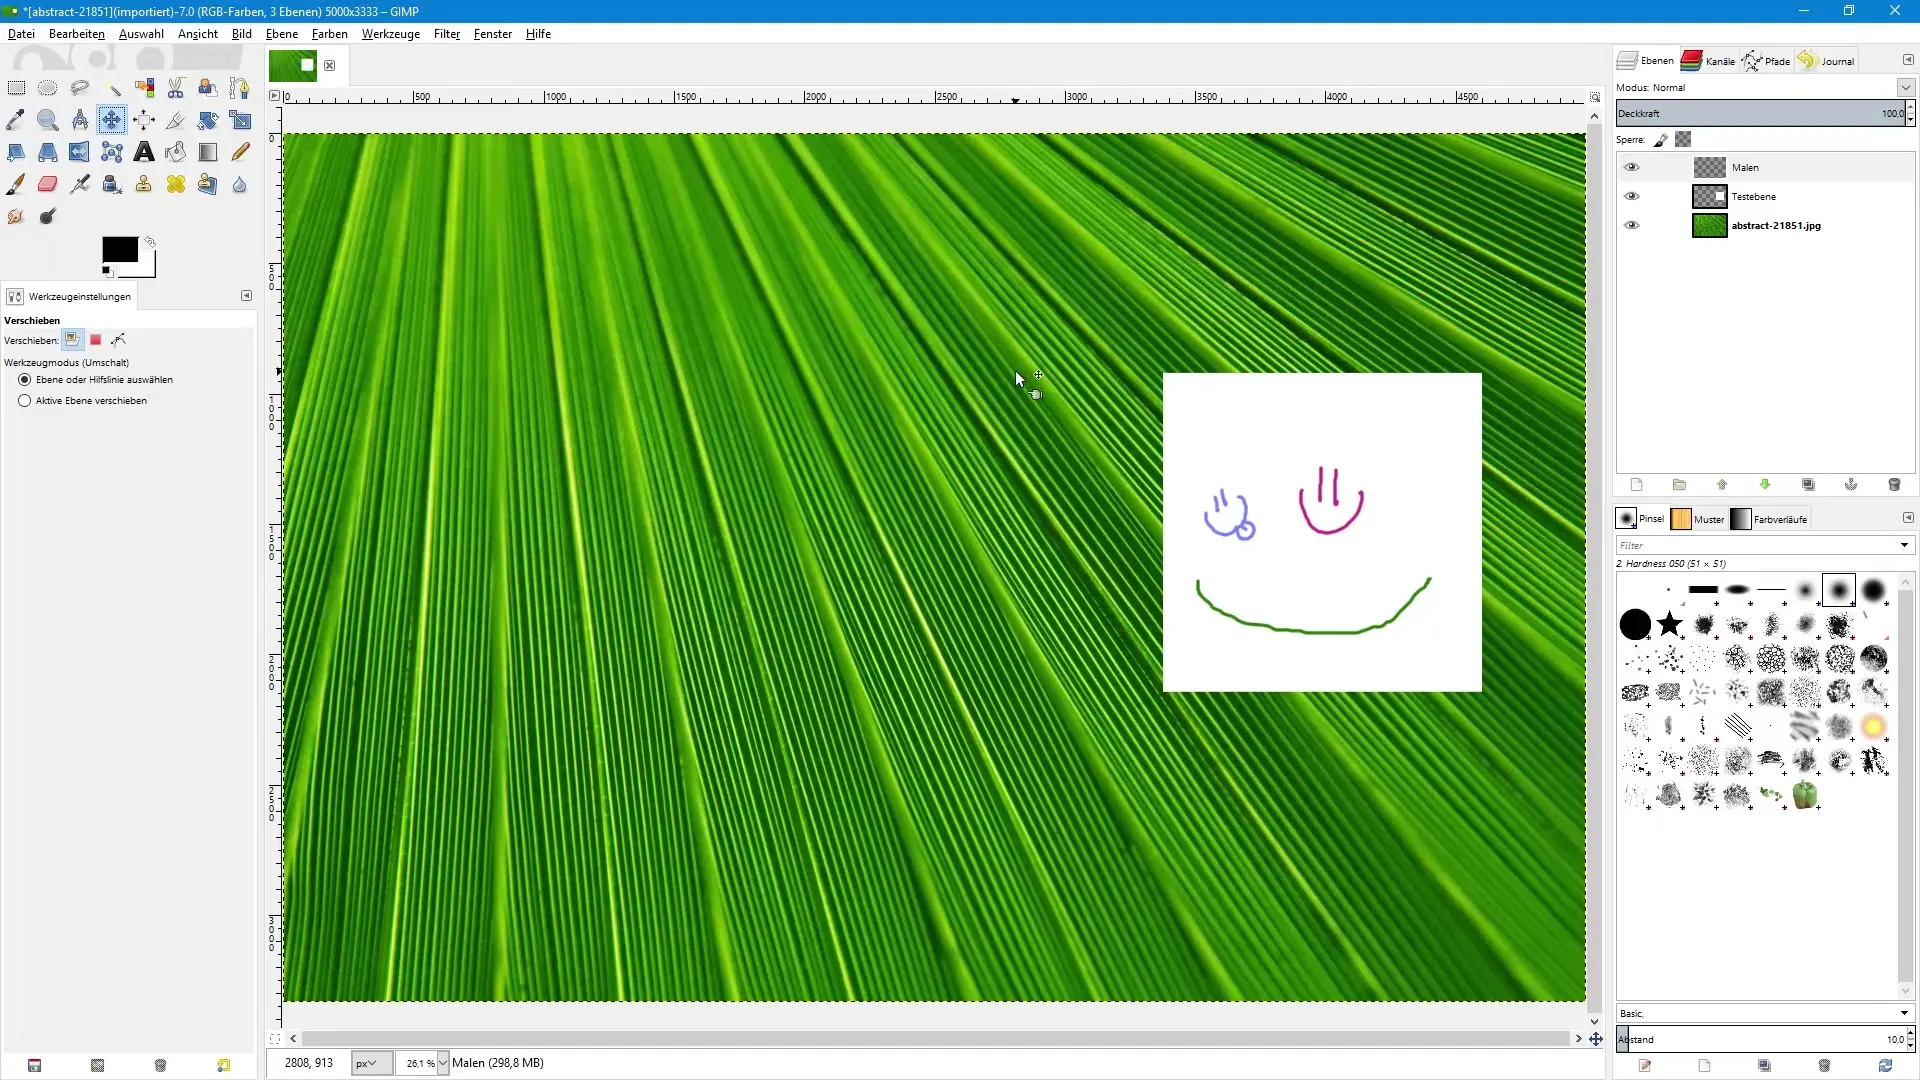
The Journal is a feature in GIMP that records all changes you make to your image. When you play with colors or add drawings, each of these actions is saved in the Journal. This gives you the option to revert to a previous state at any time.
Undoing Steps
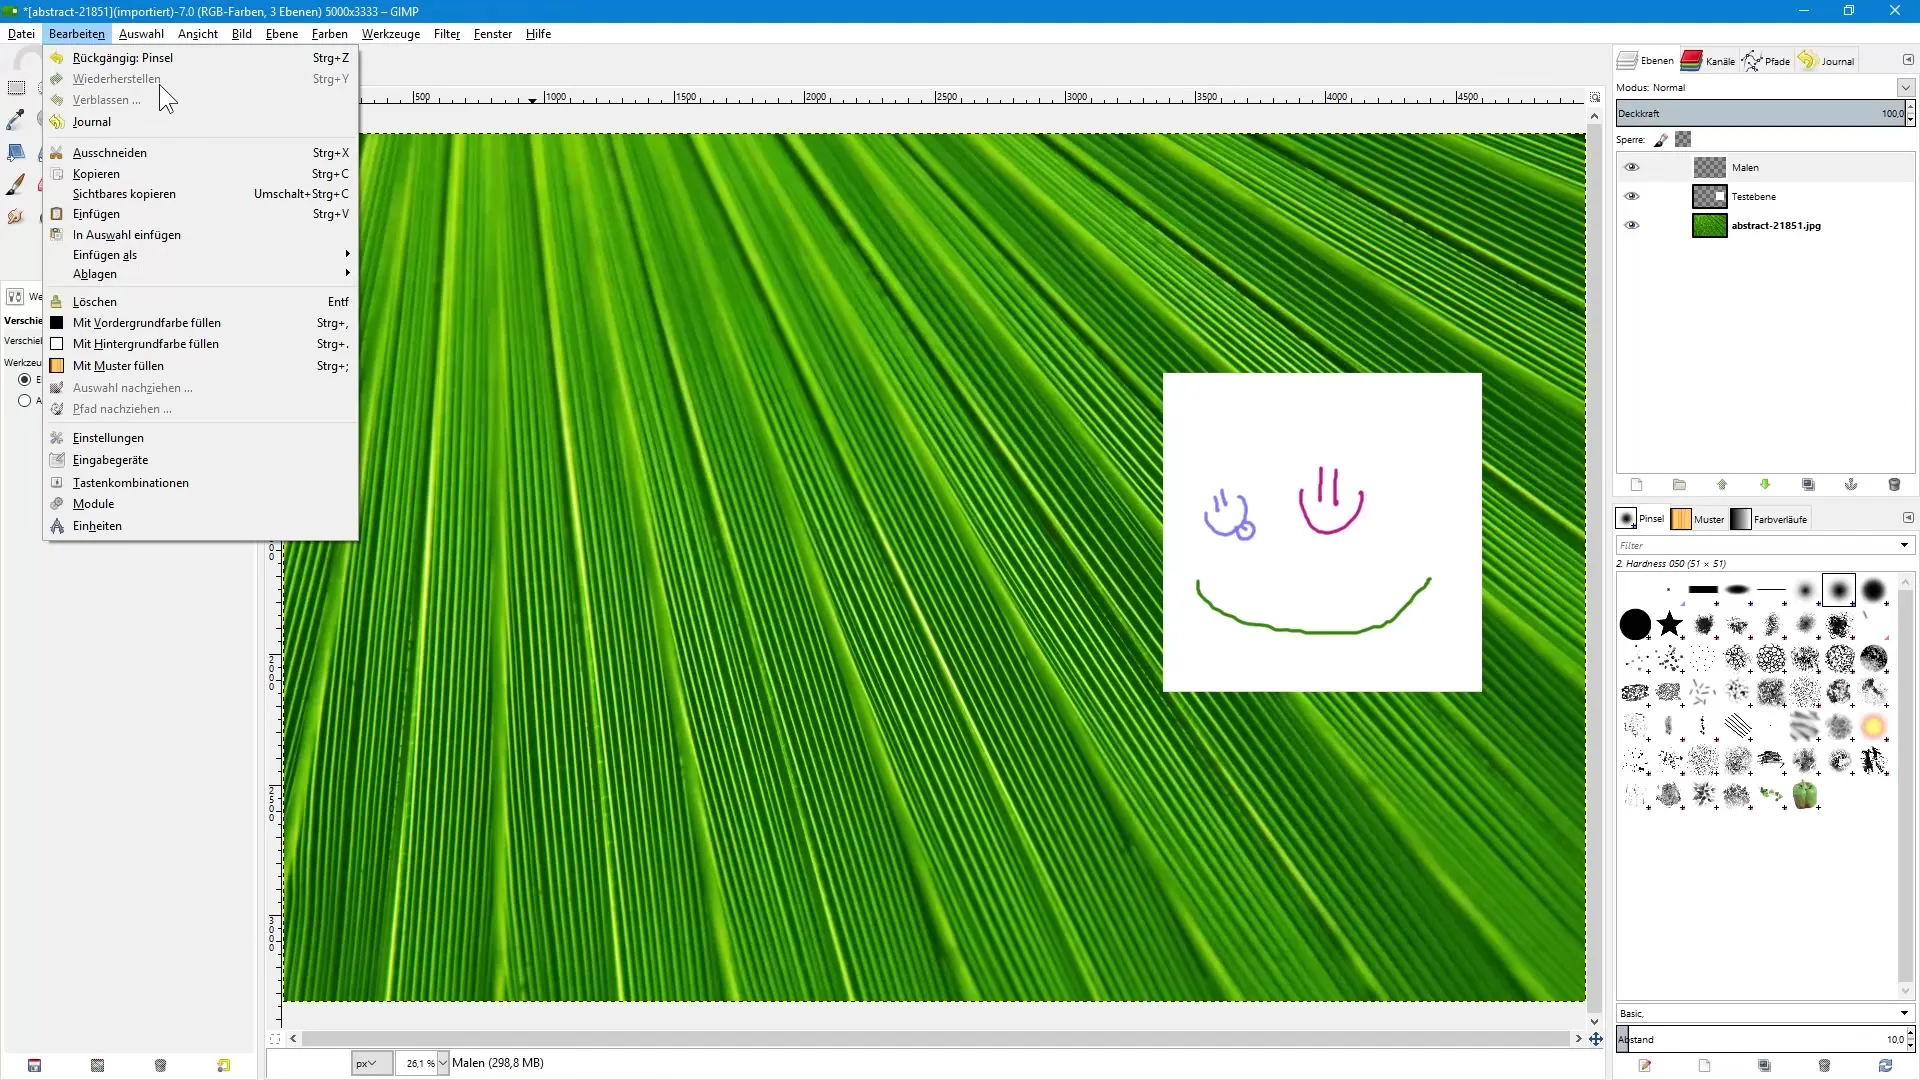
To undo editing steps, you can use the keyboard shortcut Control + Z. This action allows you to revert the most recent change. To restore changes, you can use Control + Y to cancel the undo actions. These functions are essential for ensuring a smooth and effective editing process.
Using the Journal
You will find the Journal in the menu under the tab "Journal". If you do not see this tab, you can easily add it. Click on the arrow icon and select "Add Tab" followed by "Journal". Now you have direct access to all saved states of your image.
Displaying States in the Journal
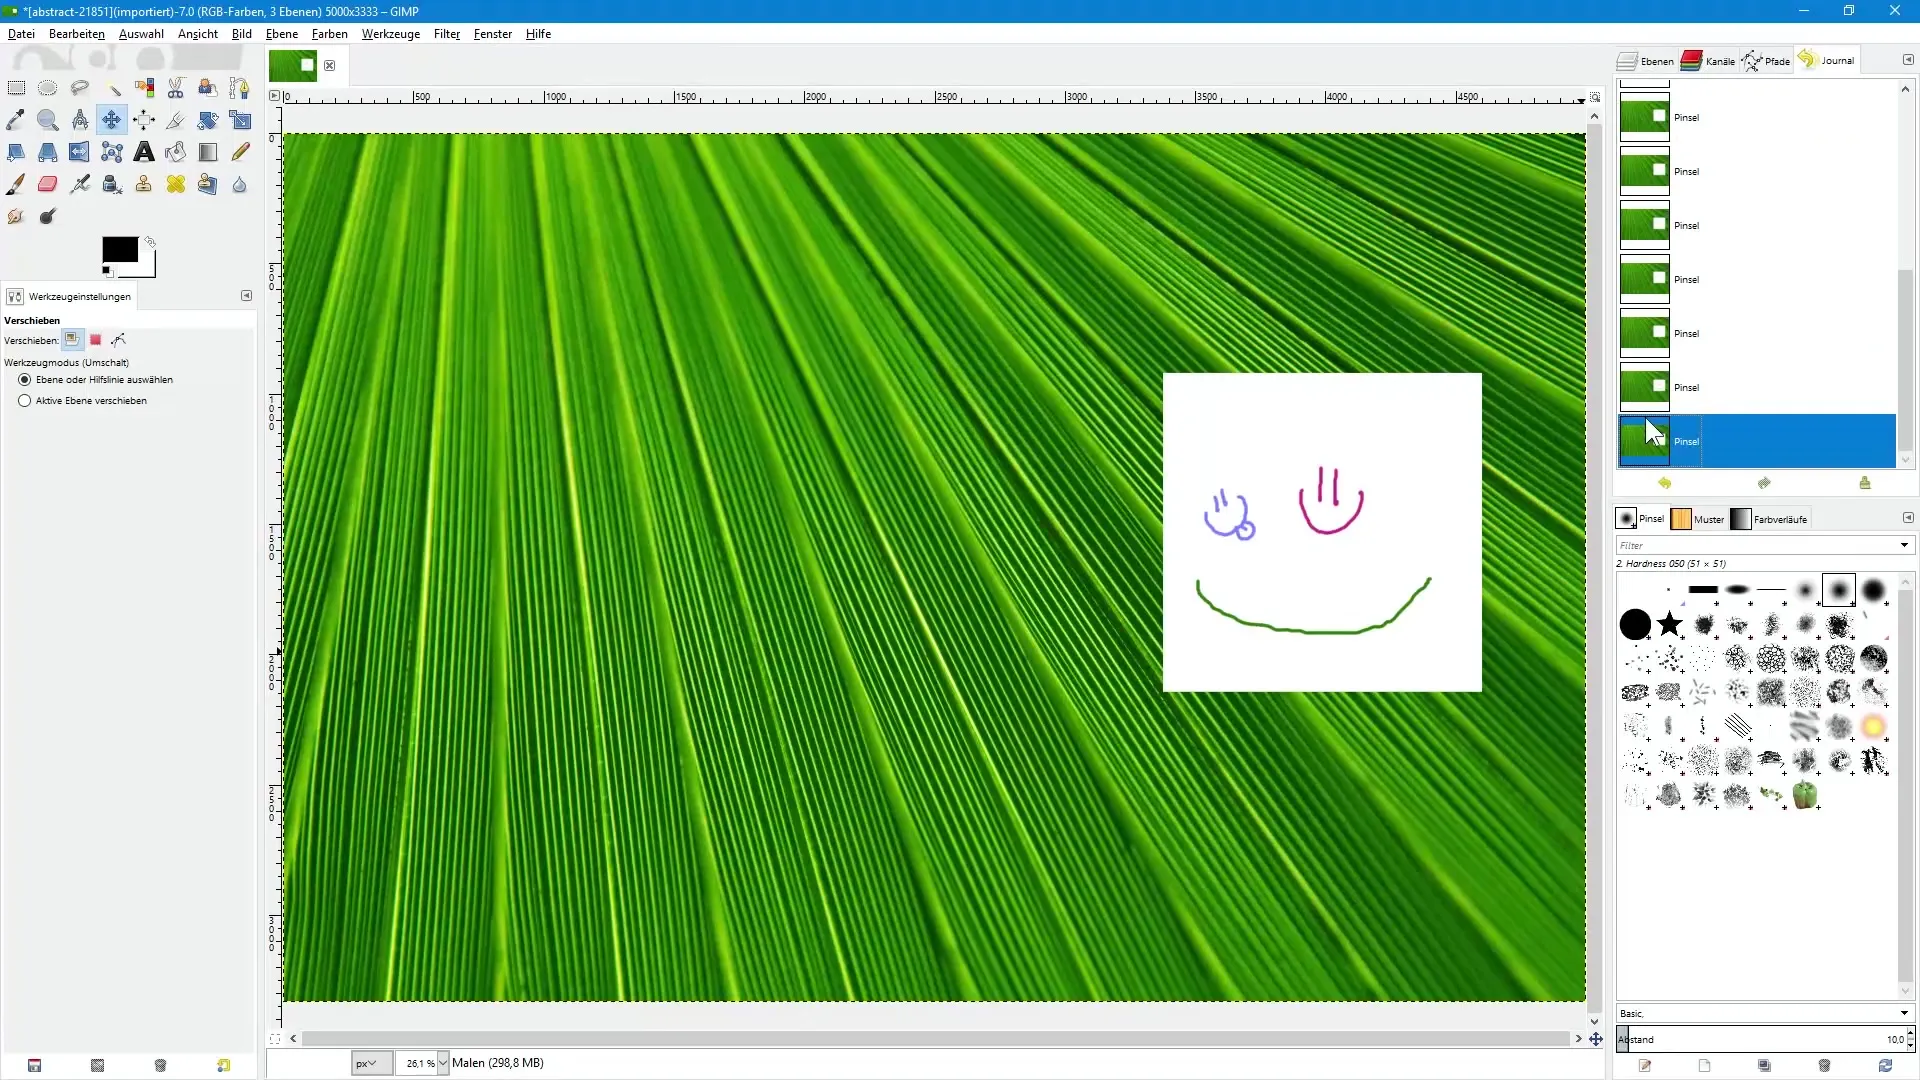
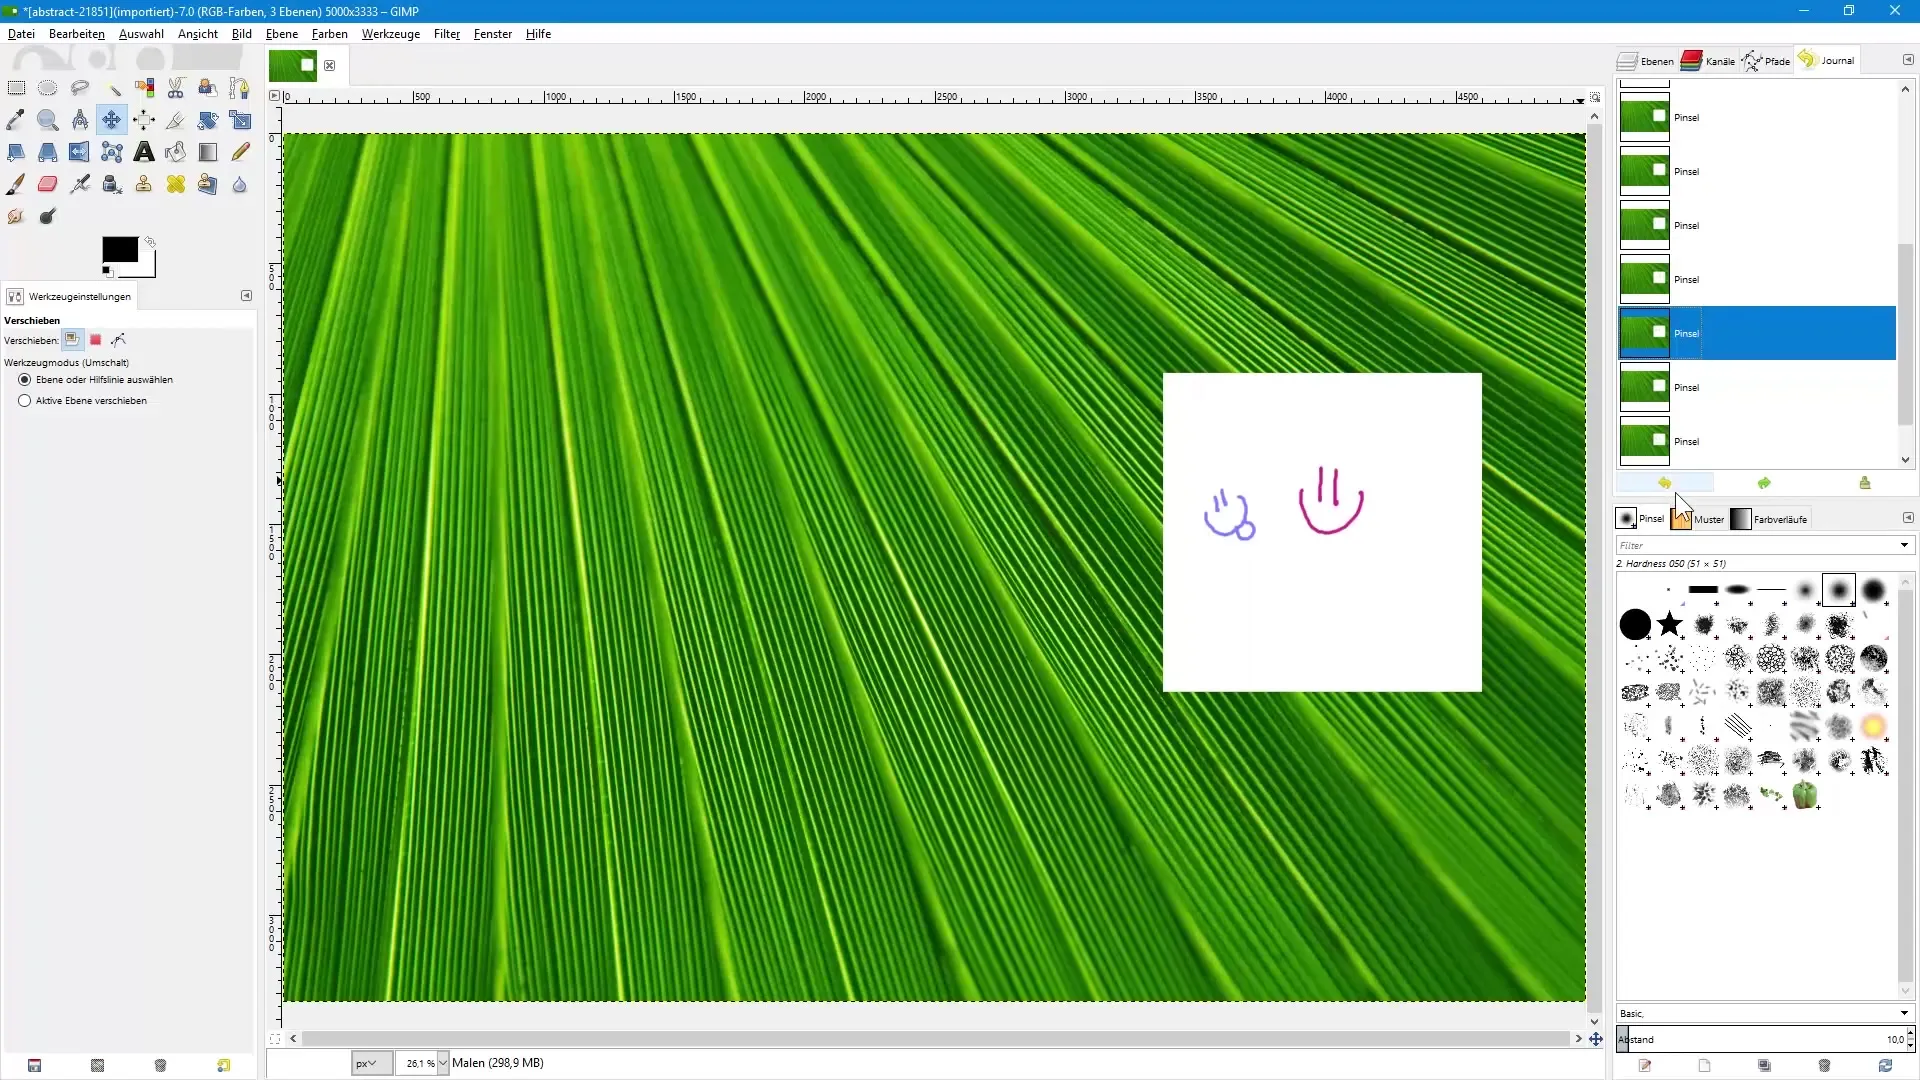
When you click on the Journal tab, you will see a list of the various states of your current document. By simply scrolling, you can navigate between the states and see how your image looked during the editing process.
Undo and Restore States
When the Journal is open, you can also browse through your changes using the arrow icons. The yellow arrow stands for undo and the green arrow for restore. These functionalities are simple and efficient for managing your edits.
Clearing the Journal
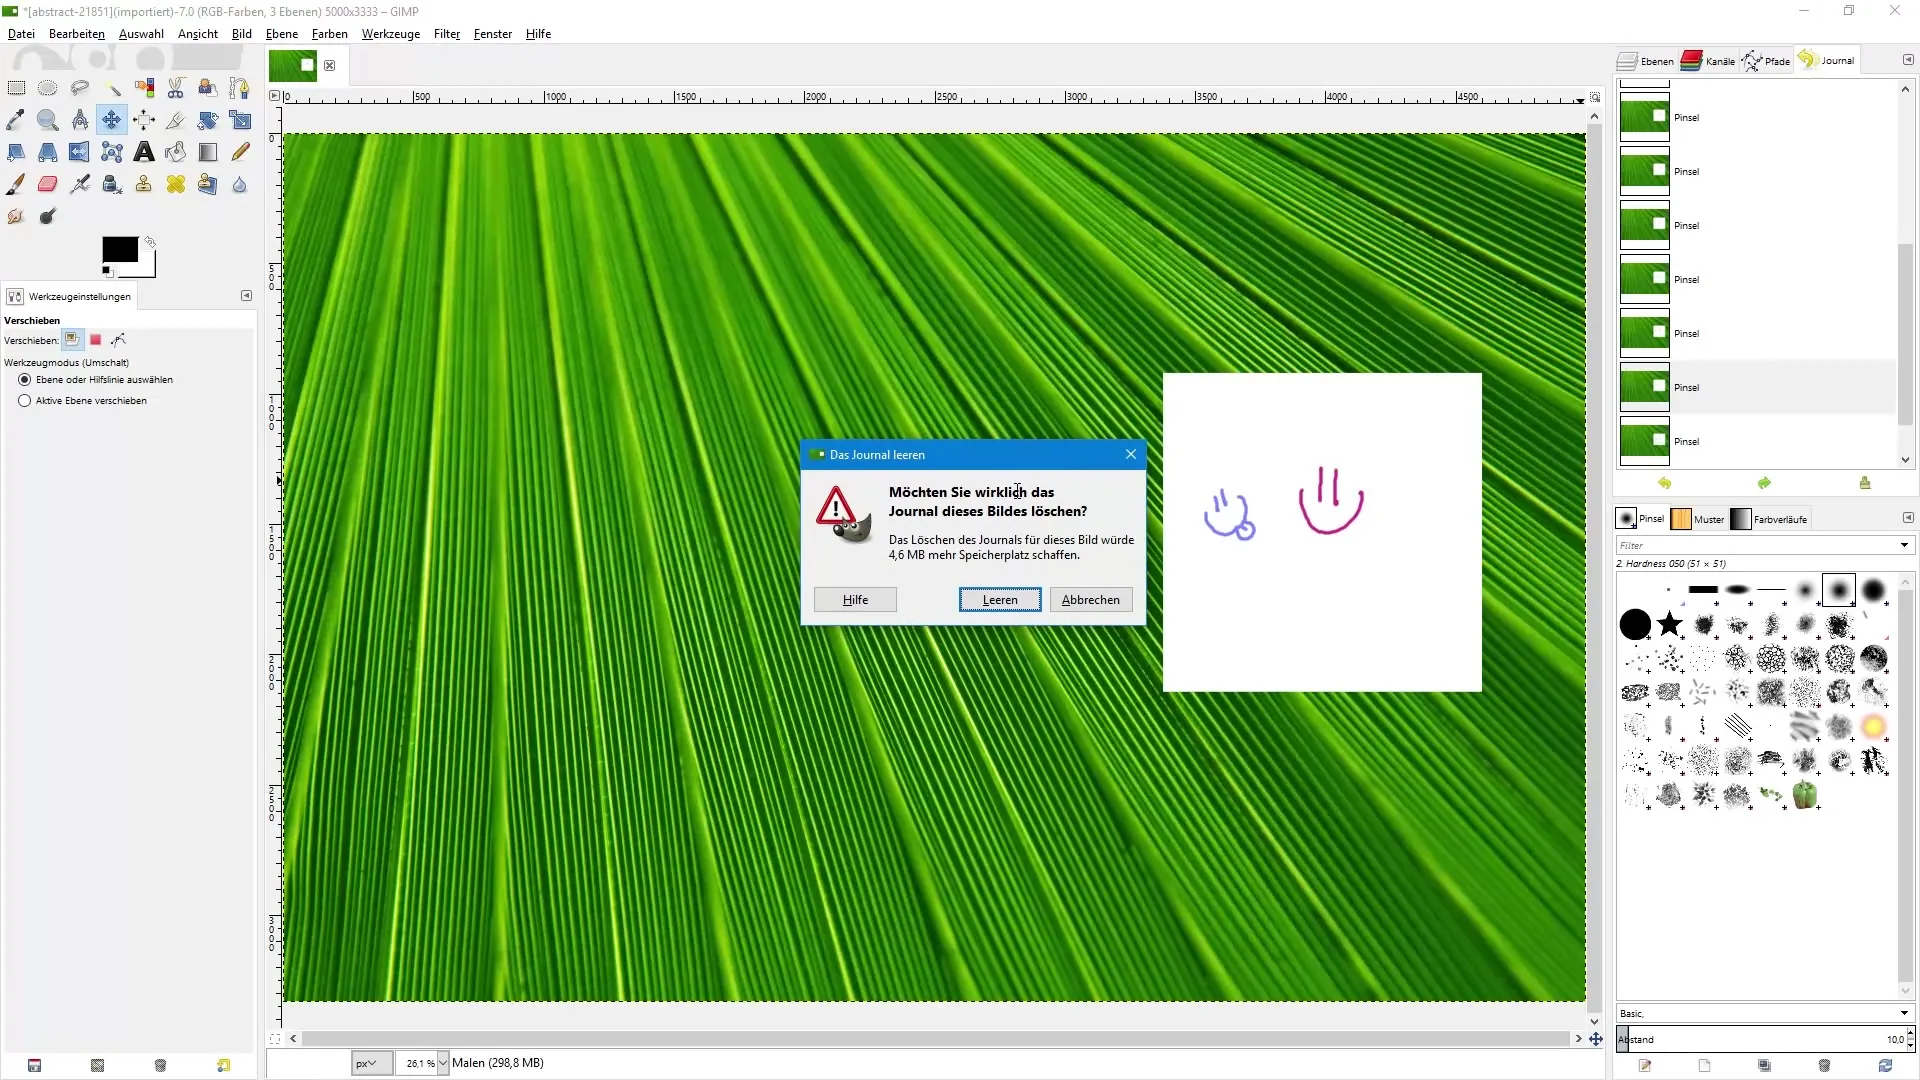
If you want to clear your Journal, you can do so as well. Click on the button to clear the Journal. Note that this will trigger a warning informing you that clearing the Journal frees up storage space but also means that you can no longer recover any of your previous changes.
Current Image & Working in the Journal
After clearing the Journal, all future changes will be recorded again. However, when you start painting again in the image after clearing, the Journal will be filled again. This can be useful for clearly tracking new changes and comparing them with older states if necessary.
Using the Journal for Creative Freedom
The Journal is especially useful when you encounter things you don't like during editing. Instead of starting the entire editing process again, the Journal allows you to backtrack specific steps and easily undo unwanted changes. This way, you maintain control over your creative process and can let your ideas flow freely.
Summary – Image Editing with GIMP: Journal
The Journal in GIMP is a powerful tool that allows you to manage your edits and keep track of them. With the steps mentioned above, you ensure that you always have control over your work and can quickly switch back and forth between different states when needed.
Frequently Asked Questions
What is the Journal in GIMP?The Journal saves all changes made to your image and allows you to navigate between different states.
How can I undo changes?You can use the keyboard shortcut Control + Z to undo changes.
How can I clear the Journal?Click on the button to clear the Journal and confirm the warning message.
What happens if I clear the Journal?Clearing the Journal removes all saved states and frees up storage space, but you lose the ability to restore any undone steps.
Can I use the Journal at any time?Yes, the Journal is available throughout your editing process and can be used at any time.
