The use of GIMP opens up numerous possibilities for image editing. One of the essential skills you can learn is how to save selections for later use. In the following guide, I will show you how to save selections you have already created, so you can easily reuse them. This technique can be especially useful when working on extensive projects or when you want to repeatedly use certain elements of your image.
Key Insights
- You can convert the selection into a layer and save it as a mask.
- Alternatively, you can save your selection in the Channels or Paths palette.
- The working file should be saved in the GIMP format (XCF) to preserve all elements.
Step-by-Step Guide to Saving Selections
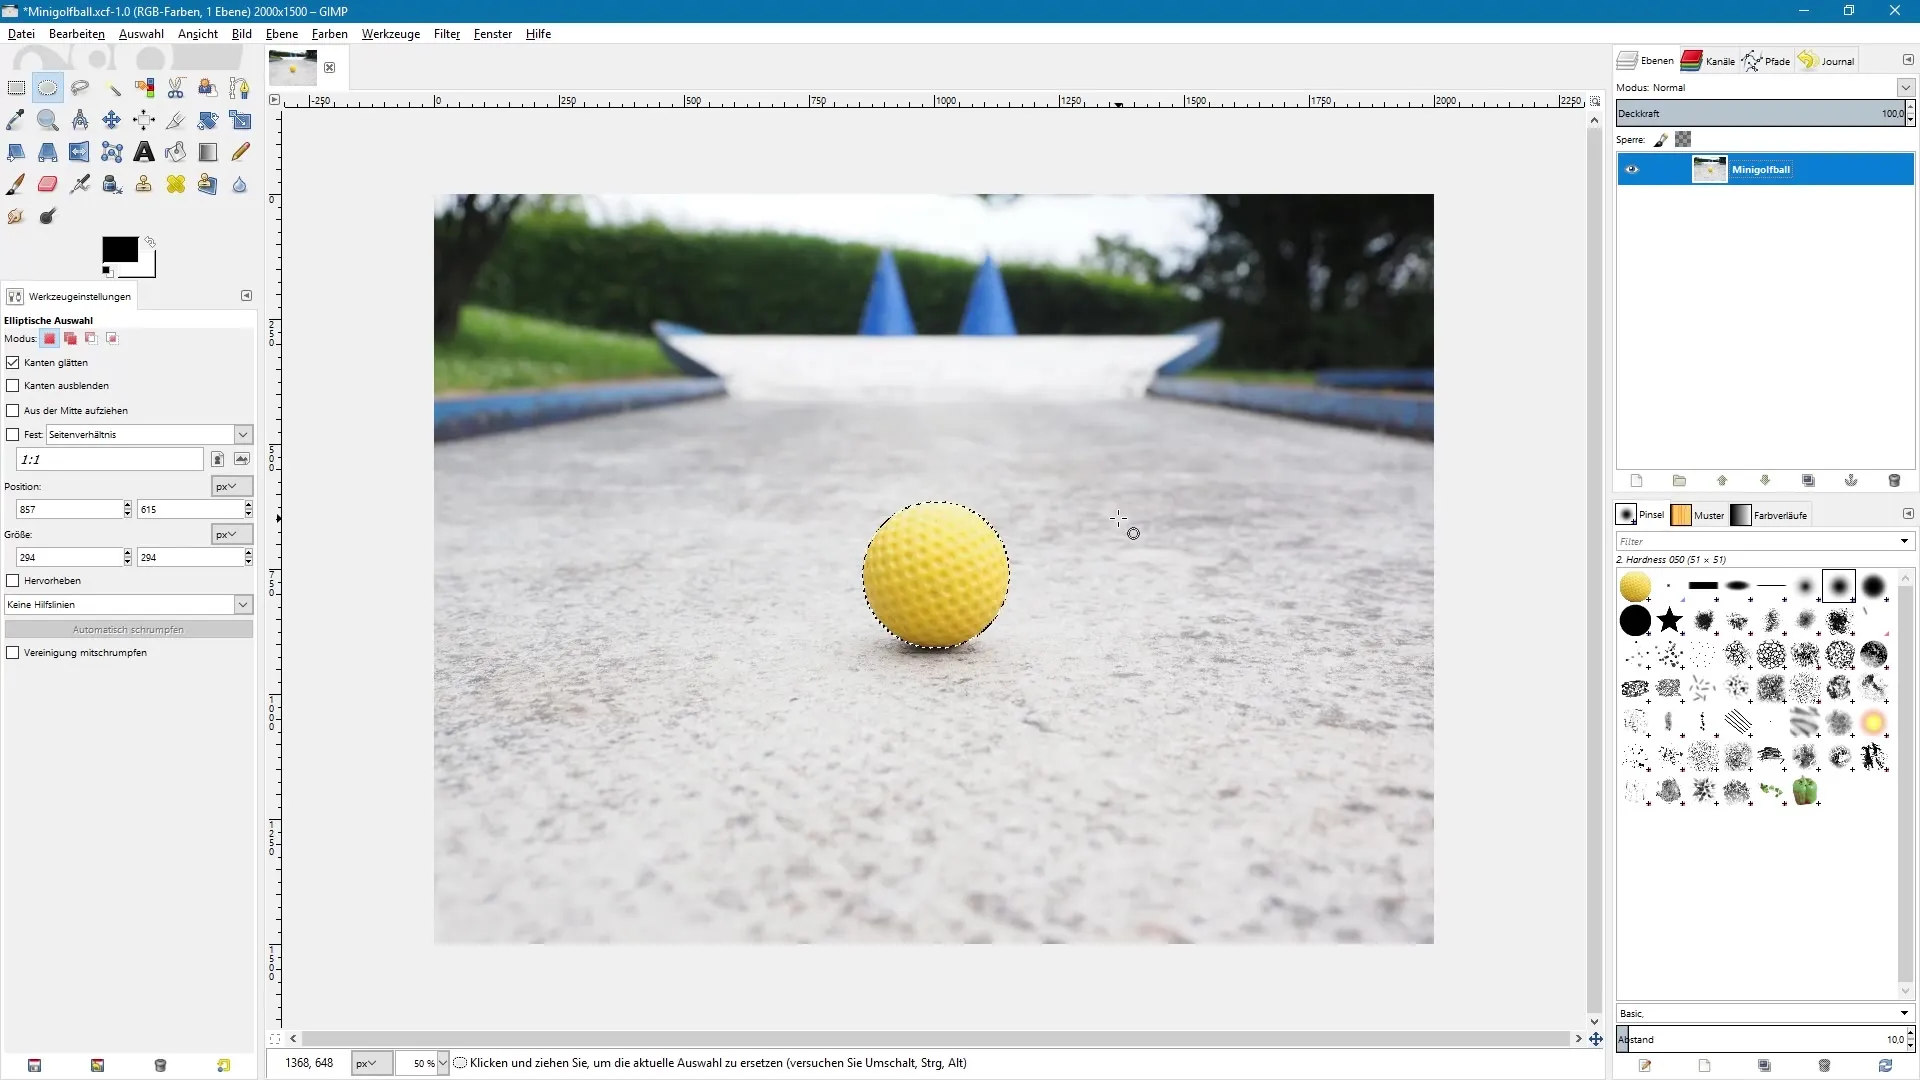
To save your selection, first start by creating your selection. In this case, the ball was selected using the ellipse tool.

Converting to a Mask
Once you have created your selection, you can convert it into a mask. This is done by creating a copy of the layer.
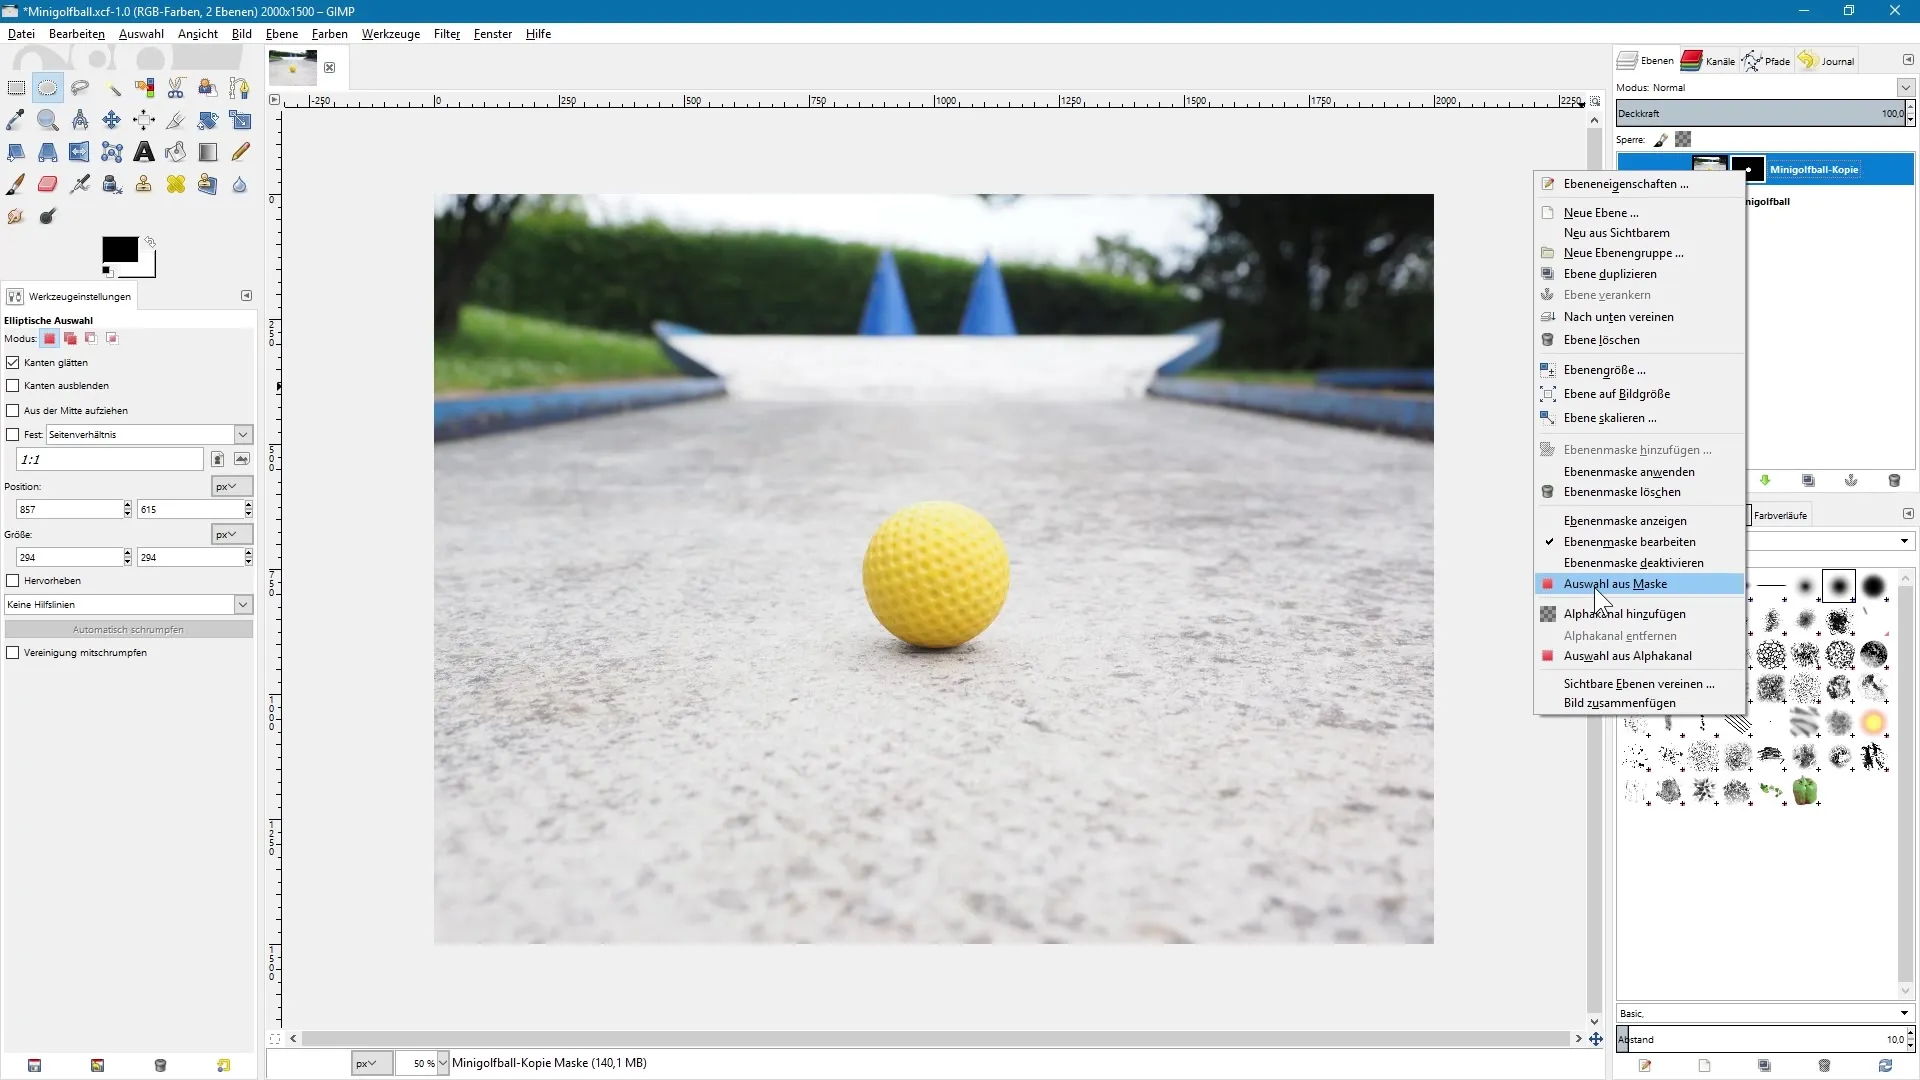
Right-click on the duplicated layer and choose "Add Layer Mask." Then select "Selection" as the option to create the mask based on your selection.
If you have successfully added the mask, you can deselect the selection. This way, you can use the mask to restore the selection later.
Restoring the Selection
To create a selection from the mask again, right-click on the mask and choose "Select from Mask." This will make it easier for you to work with specific elements of the image.

Saving in the Channels Palette
In addition to using masks, you can also save your selection in the Channels palette. To do this, go to "Select" and choose "Save to Channel." You will then be automatically taken to the Channels palette and see a copy of your selection mask here.
It is important to ensure that the current selection remains active before performing these steps so that you can easily restore the selection later.
If you want to bring back the selection later, right-click on your saved selection mask copy in the Channels palette and choose "Select from Channel." This way, you have successfully restored the selection.
Saving in the Paths Palette
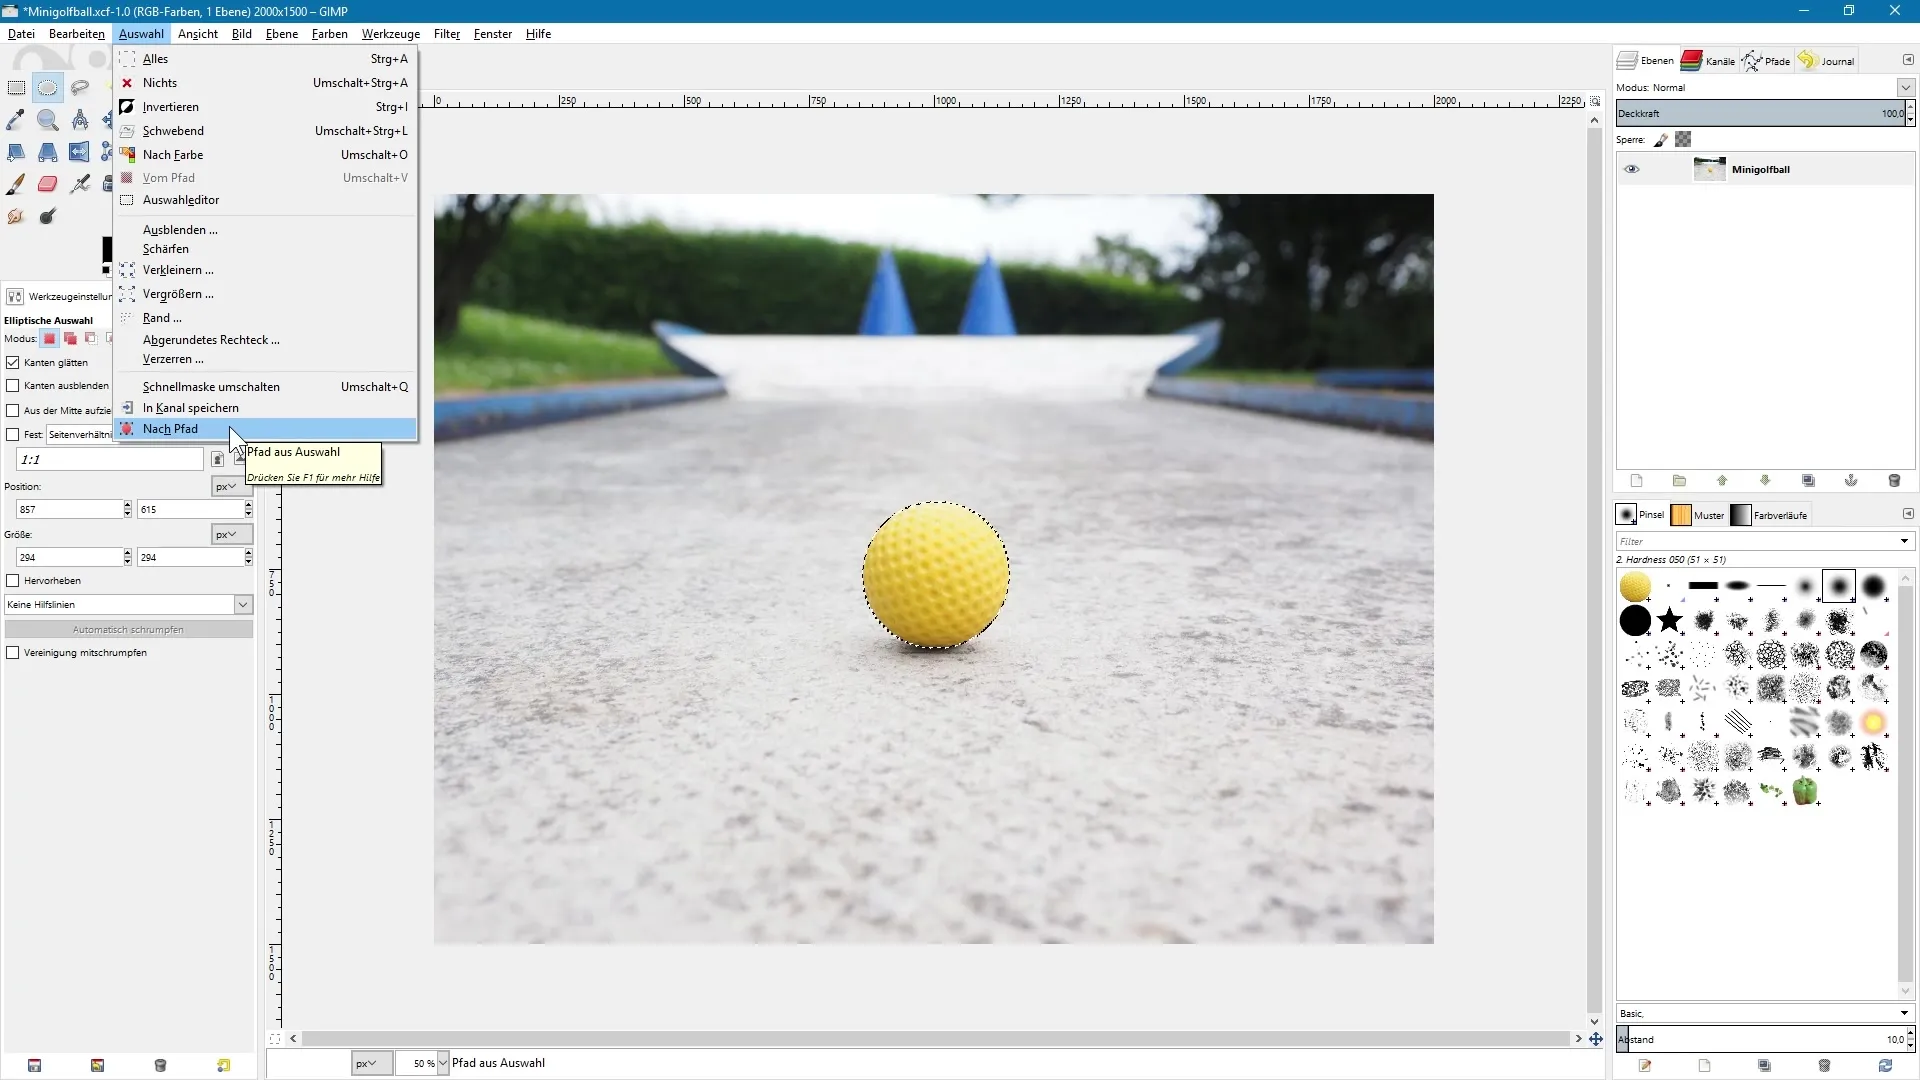
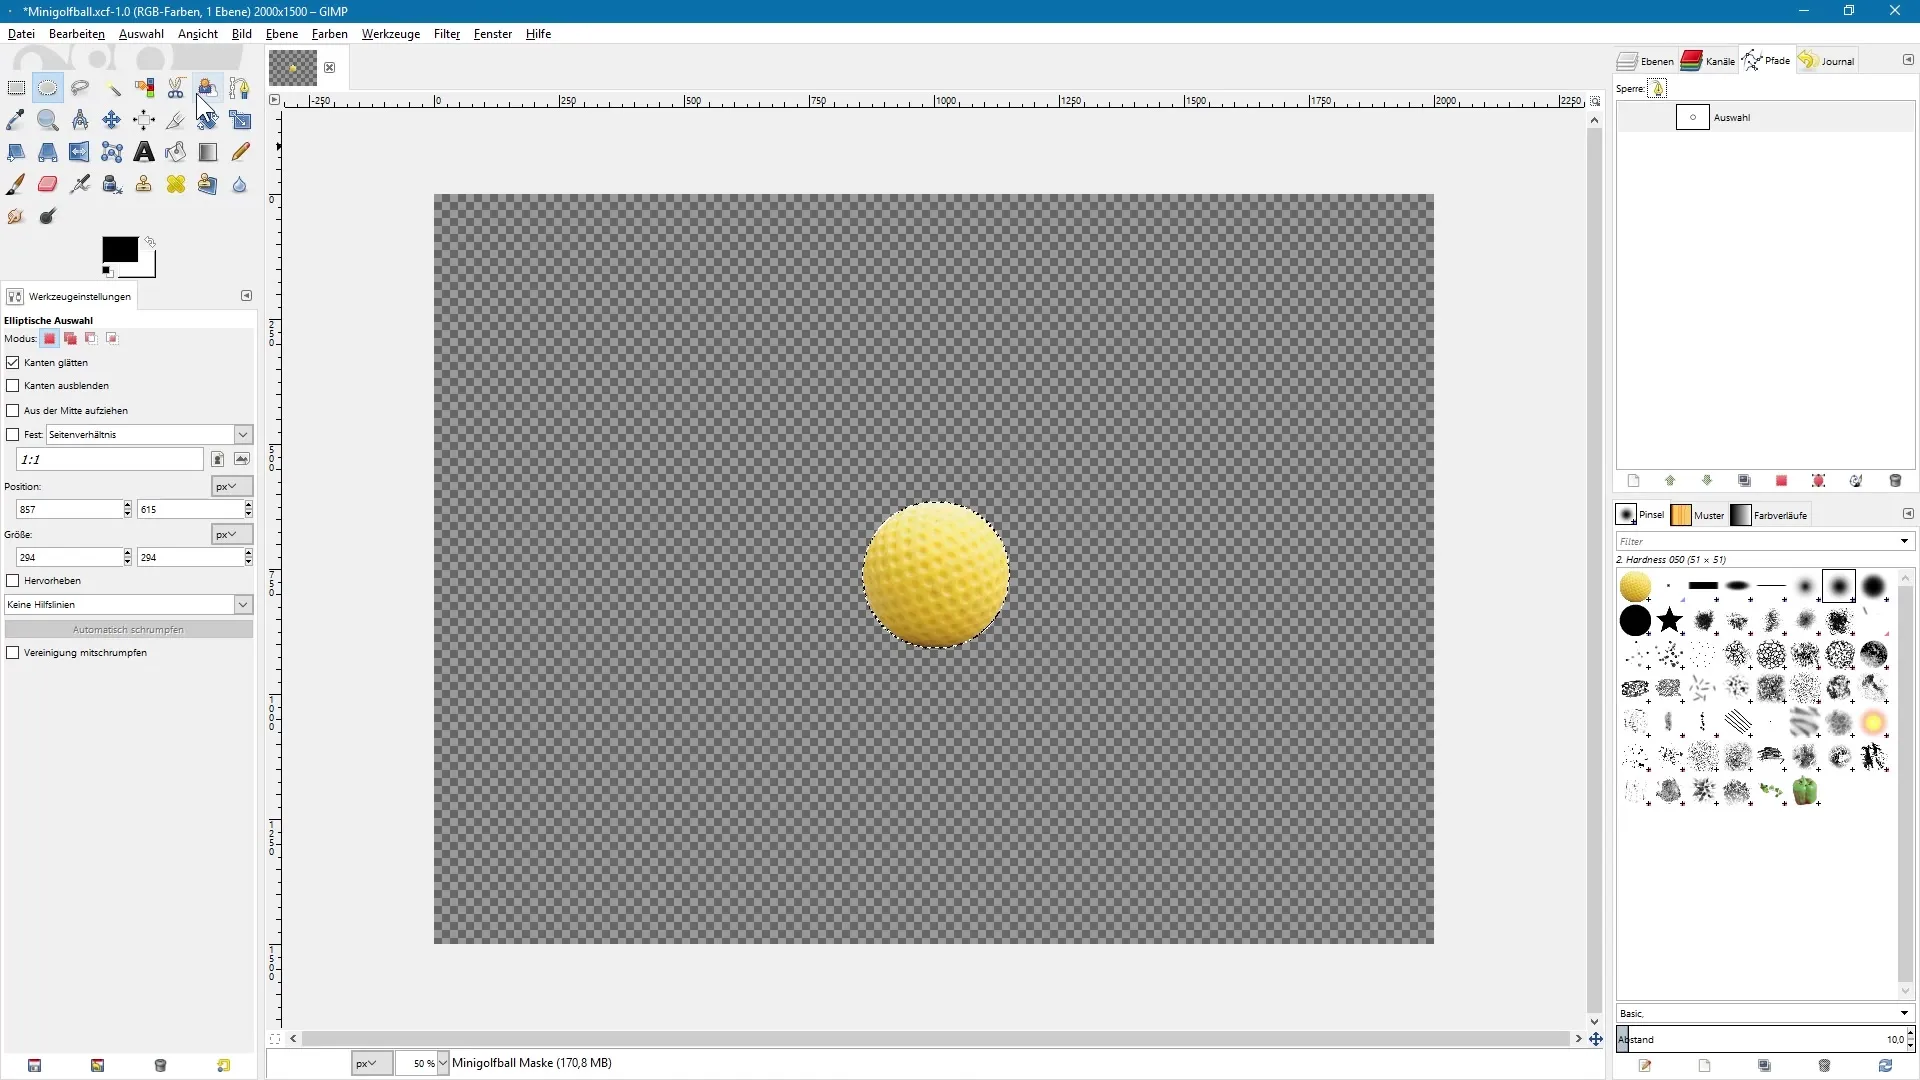
Another way to save your selection is to save it in the Paths palette. To do this, go again to "Select" and choose "To Path." This allows you to manage the selection in the Paths palette as well.

In the Paths palette, you can see the selection that has the same name. Additionally, the outline of the selection remains nicely smoothed if you had the edge options active while creating the selection.
Importance of GIMP's Native File Format
It is advisable to save the working file in GIMP's native format (XCF). This way, you can keep both masks and channels and paths for future work.

Summary – Selection Tools in GIMP: Effectively Saving Selections
In this guide, you have learned important techniques for saving selections in GIMP. You can either convert your selections into masks or manage them in the Channels and Paths palettes. Remember to always save your working file in XCF format to retain all elements for further editing.
Frequently Asked Questions
What are the advantages of using selection masks?With selection masks, you can precisely control and adjust different parts of an image without altering the original image.
How can I permanently save a selection?By saving your selection in the GIMP format (XCF), all selection masks and channels will be preserved.
Can I edit my selection later again?Yes, as long as the selection is saved as a mask or channel, you can return to it anytime and edit it.


