Do you want to accurately determine distances and angles in your images? The ruler tool in GIMP is exactly the right choice for that. With this intuitive feature, you can easily measure the dimensions of objects in your graphics and even determine angles. Below, you will learn step by step how to effectively use the ruler tool to get exactly the information you need.
Key Insights
The ruler tool in GIMP allows you to:
- Precisely measure distances between objects
- Determine angles between lines
- Select different units of measurement (pixels, millimeters, inches)
Step-by-Step Guide
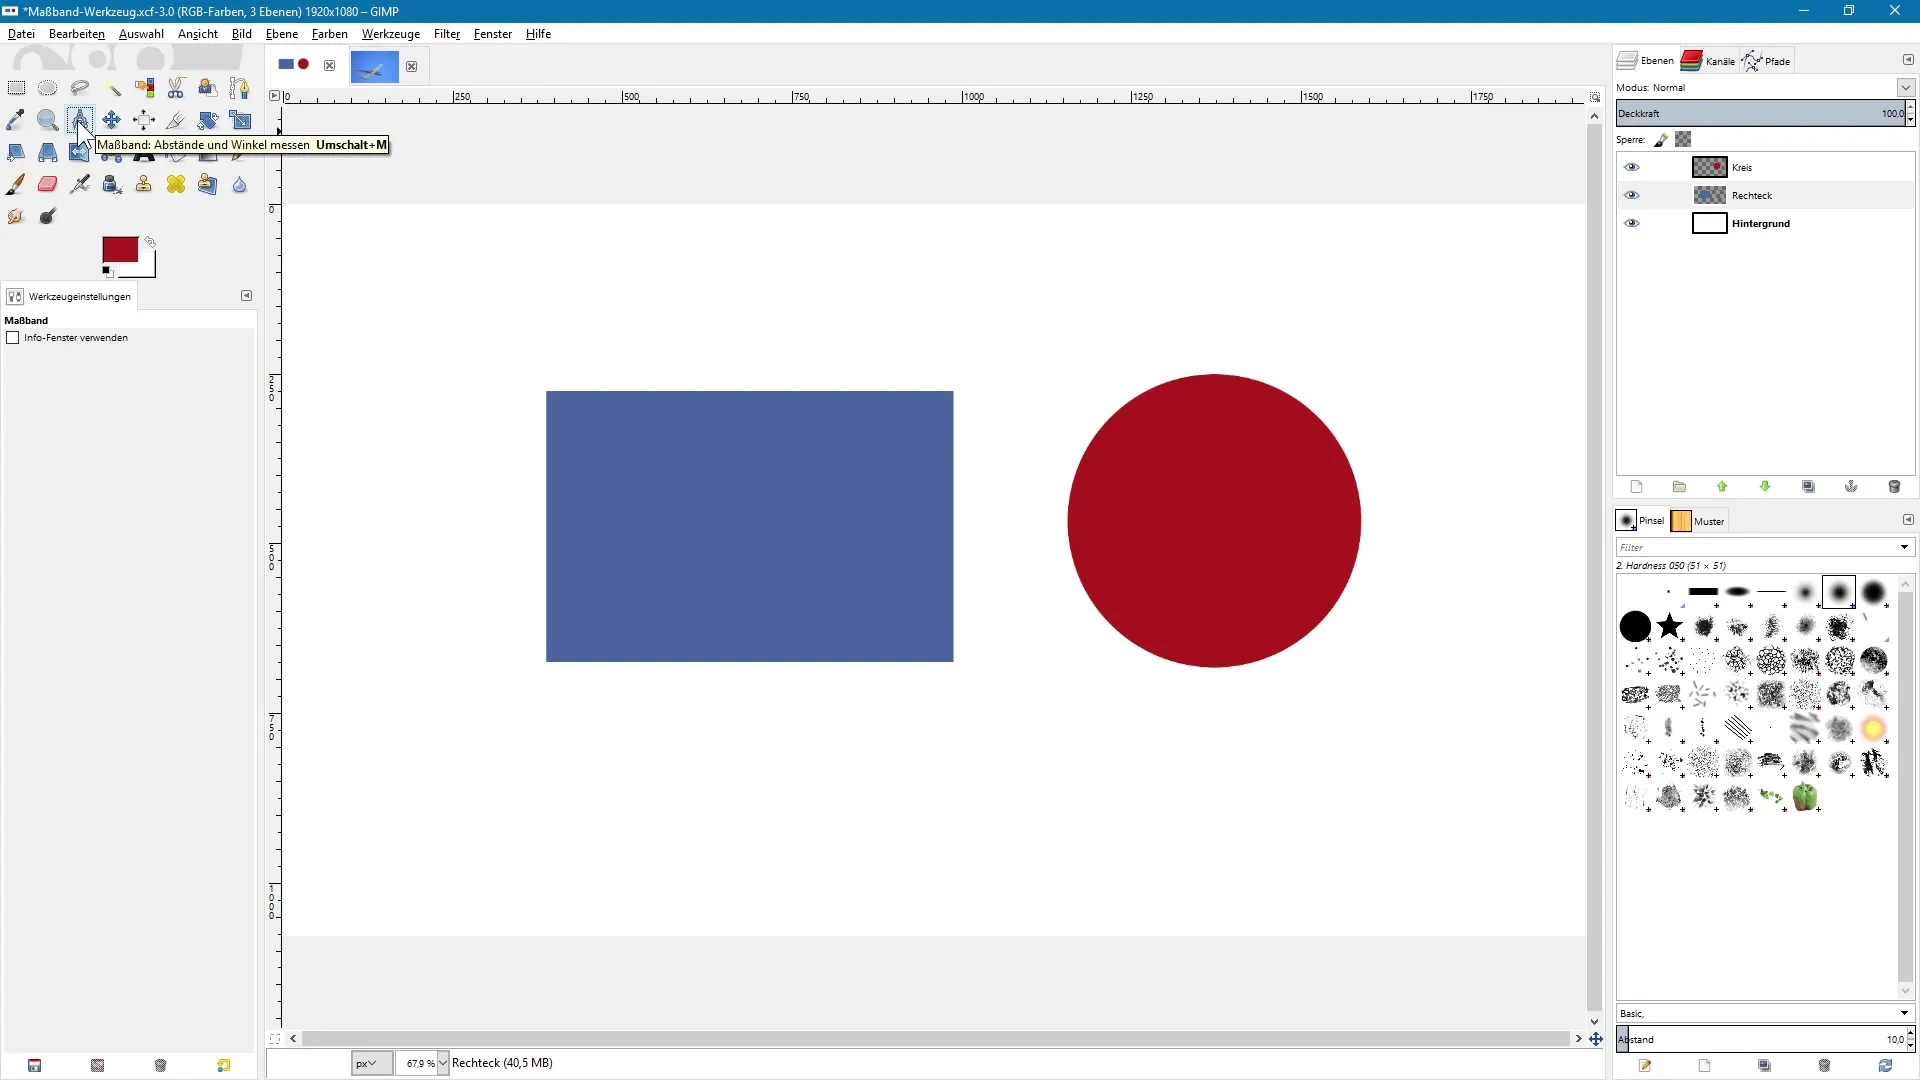
1. Select the Ruler Tool
First, you need to activate the ruler tool. You will find it in the toolbox, indicated by an icon that looks like a ruler. Alternatively, you can also access it by pressing the Shift key and the M key.

2. Activate Info Window
In the next step, you can adjust the settings of the ruler tool. One option is to display an info window. Activate this setting to show the exact measurements while using the tool.
3. Take Linear Measurements
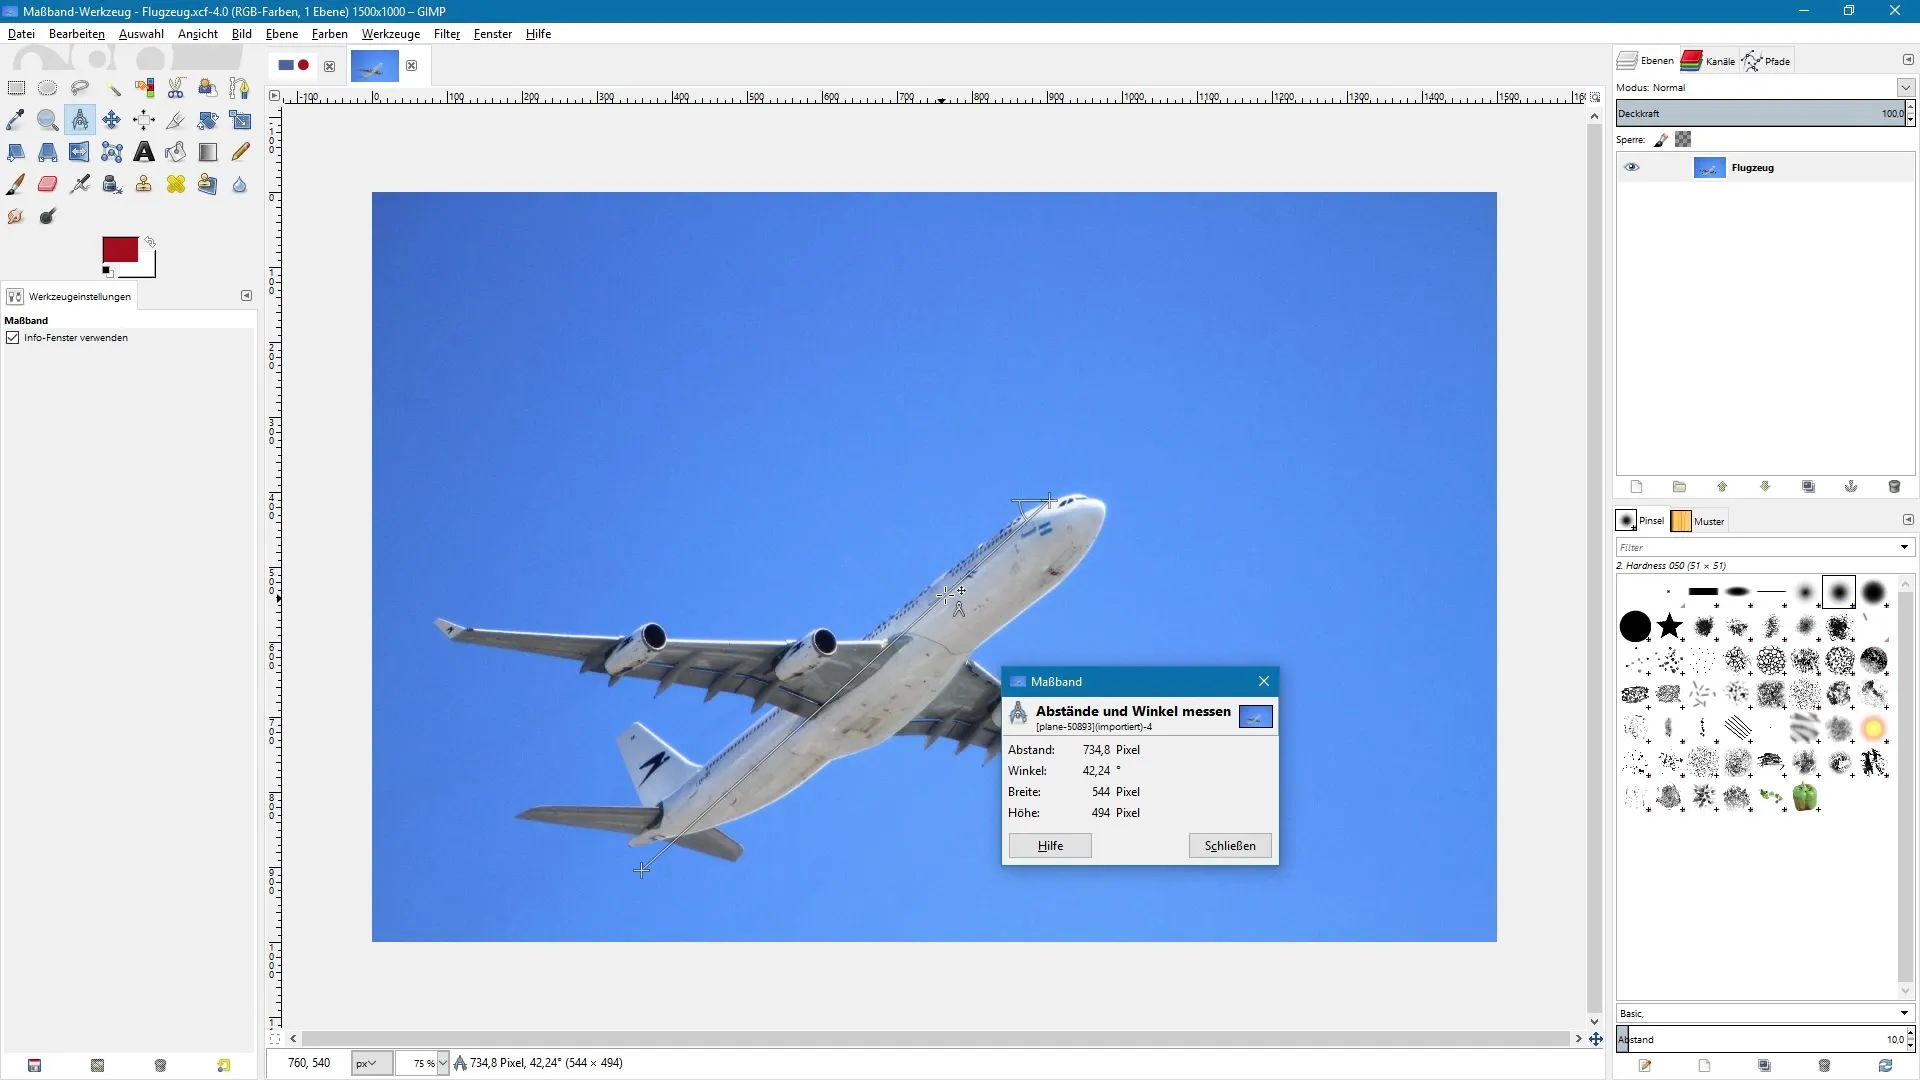
To perform a measurement, first click once in the image. Keep the left mouse button pressed and draw a line to the desired endpoint. Release the mouse button to fix the line. In the displayed dialog box, you will now see the length of this line, among other things.
4. Measure Width and Height of Objects
With the ruler tool, you can not only measure the length but also determine the width and height of a rectangle. GIMP calculates these values based on the distance between the two plus points you have set.
5. Measure Angles
If you want to measure an angle, draw a second line at a point that shows a different direction. GIMP will show you the angle between the horizontal and the diagonal line. This is particularly useful for more precise work.
6. Set Exact Angles
To determine a particularly accurate angle, you can hold down the control key while drawing a line. This allows you to draw a perfectly horizontal line or maintain fixed angle increments.
7. Adjust Line Settings
To move points, hold down the Alt key. The mouse pointer will now show a moved symbol that allows you to change the starting and ending points of the line. This way, you can quickly correct any unwanted measurements.

8. Select Units of Measurement
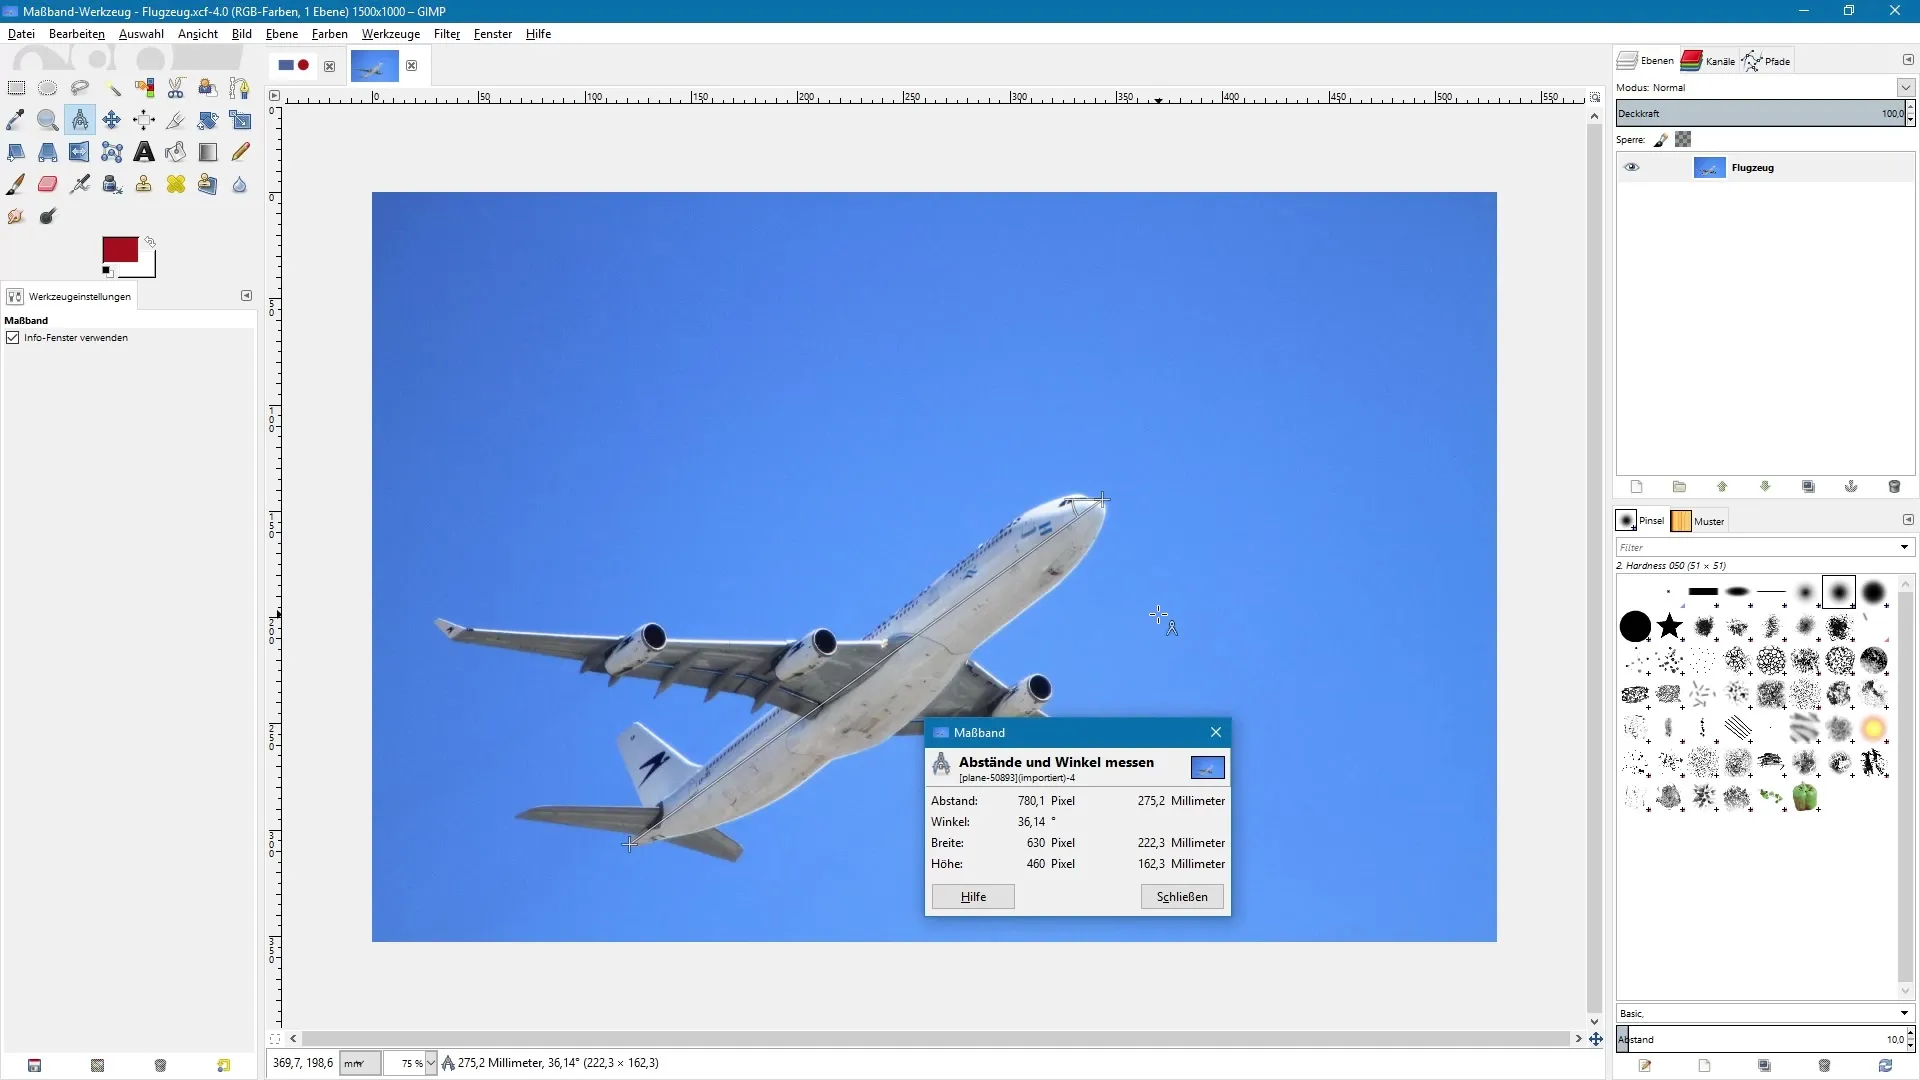
You can measure not only in pixels but also in other units of measurement such as inches, millimeters, or centimeters. To change the unit of measurement, click in the menu below the image and select your desired unit.
9. Use the New Unit of Measurement
Once you have changed the unit of measurement, draw a line again. In the info window, you will now see the dimensions displayed in both pixels and the newly selected unit.

Summary - GIMP for Beginners: Effective Work with the Ruler Tool
The ruler tool in GIMP is a powerful and versatile tool that helps you accurately determine dimensions and angles in your images. You have learned how to activate the tool, take measurements, and adjust the display of units of measurement. With these skills, you are well equipped to work efficiently in GIMP.
Frequently Asked Questions
What is the ruler tool in GIMP?The ruler tool allows you to measure distances and angles in your images.
How do I activate the ruler tool?You can activate the ruler tool by clicking on the icon in the toolbox or by pressing the Shift and M keys.
Can I measure angles with the ruler tool?Yes, the ruler tool allows you to measure angles between two lines.
How do I change the unit of measurement for measurements?You can select the unit of measurement in the menu below the image.
What units of measurement can I use?You can measure in pixels, inches, millimeters, and centimeters.


