GIMP is a powerful image editing tool and offers a variety of color tools that let you comprehensively influence the color effect of your images. In this tutorial, I will explain the usage of the color tools “Threshold”, “Levels”, “Curves”, “Posterize” and “Desaturate” in more detail. You will learn how to achieve effective results with these tools.
Key Takeaways
- With the Threshold tool, you can distinguish between black and white gradations.
- The Levels tool allows you to adjust the brightness and contrast of an image.
- With Curves, you can refine color values and achieve creative effects.
- Posterize reduces the number of colors and can create exciting visual effects.
- Desaturate turns your image into a black and white image.
Step-by-Step Guide
Threshold Tool
The Threshold tool in GIMP allows you to set the color values of an image to purely black and white. You get a simple histogram displayed that helps you identify the darkest and brightest areas of your image.
Move the black slider to the right to display the darkest areas in the image. The white slider determines the brightest areas. If you move the black slider all the way to the left edge, the overall image will become brighter. To see where the darkest points in the image are located, you should move the slider carefully until artifacts become visible.
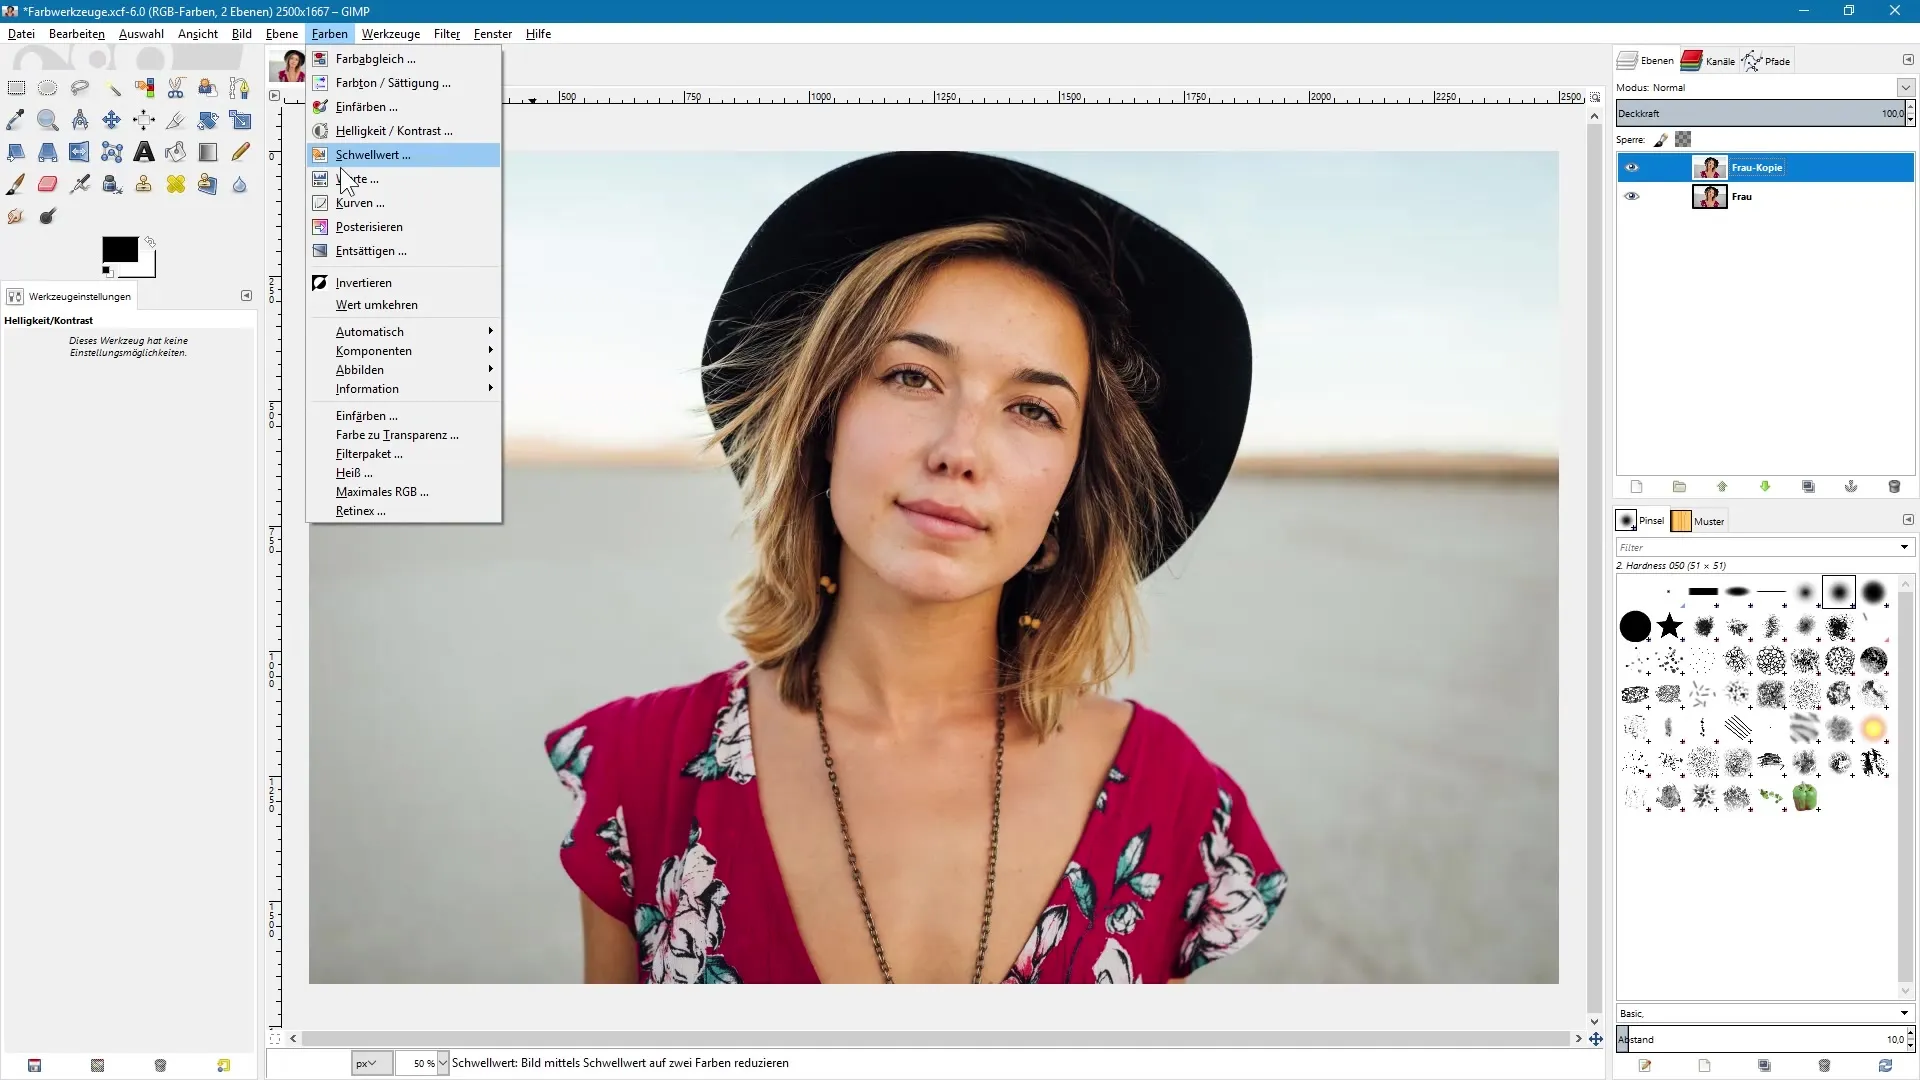
Now enable the preview to observe the changes. Note that Threshold not only helps you find the brightest and darkest areas, but also provides the basis for creating layer masks.
Levels Tool
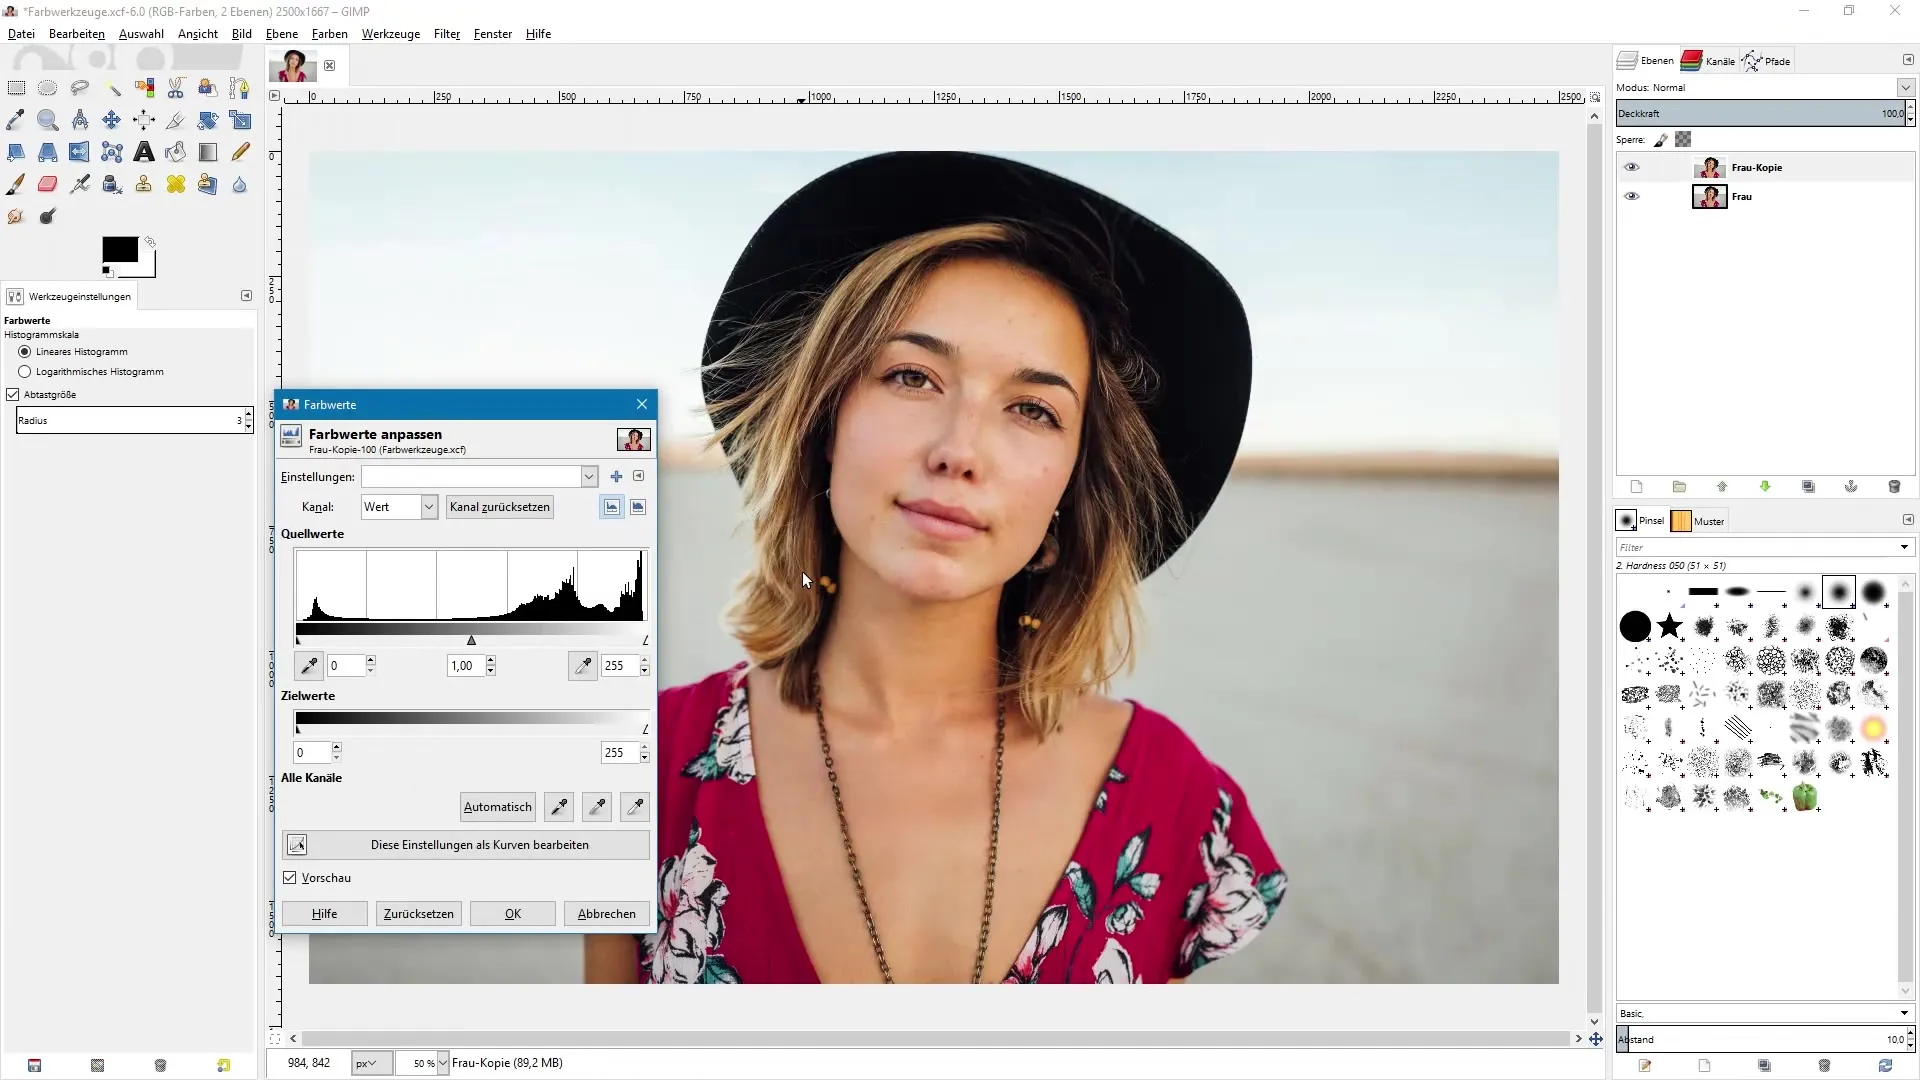
The Levels tool, also known as tonal correction, allows you to control the contrasts in the image. The histogram area in the dialog shows the distribution of dark and light color values. You can darken the dark areas and brighten the light areas to achieve better contrast.
To increase contrast, drag the black slider to the right and the white slider to the left. You will see the enhancement effect immediately. This raises the extreme areas in the image, greatly improving the overall impression.
For more control, you can also adjust the output levels and define how the darkest and brightest points of the image should appear. Experiment with these sliders to achieve the desired effect.
Curves Tool
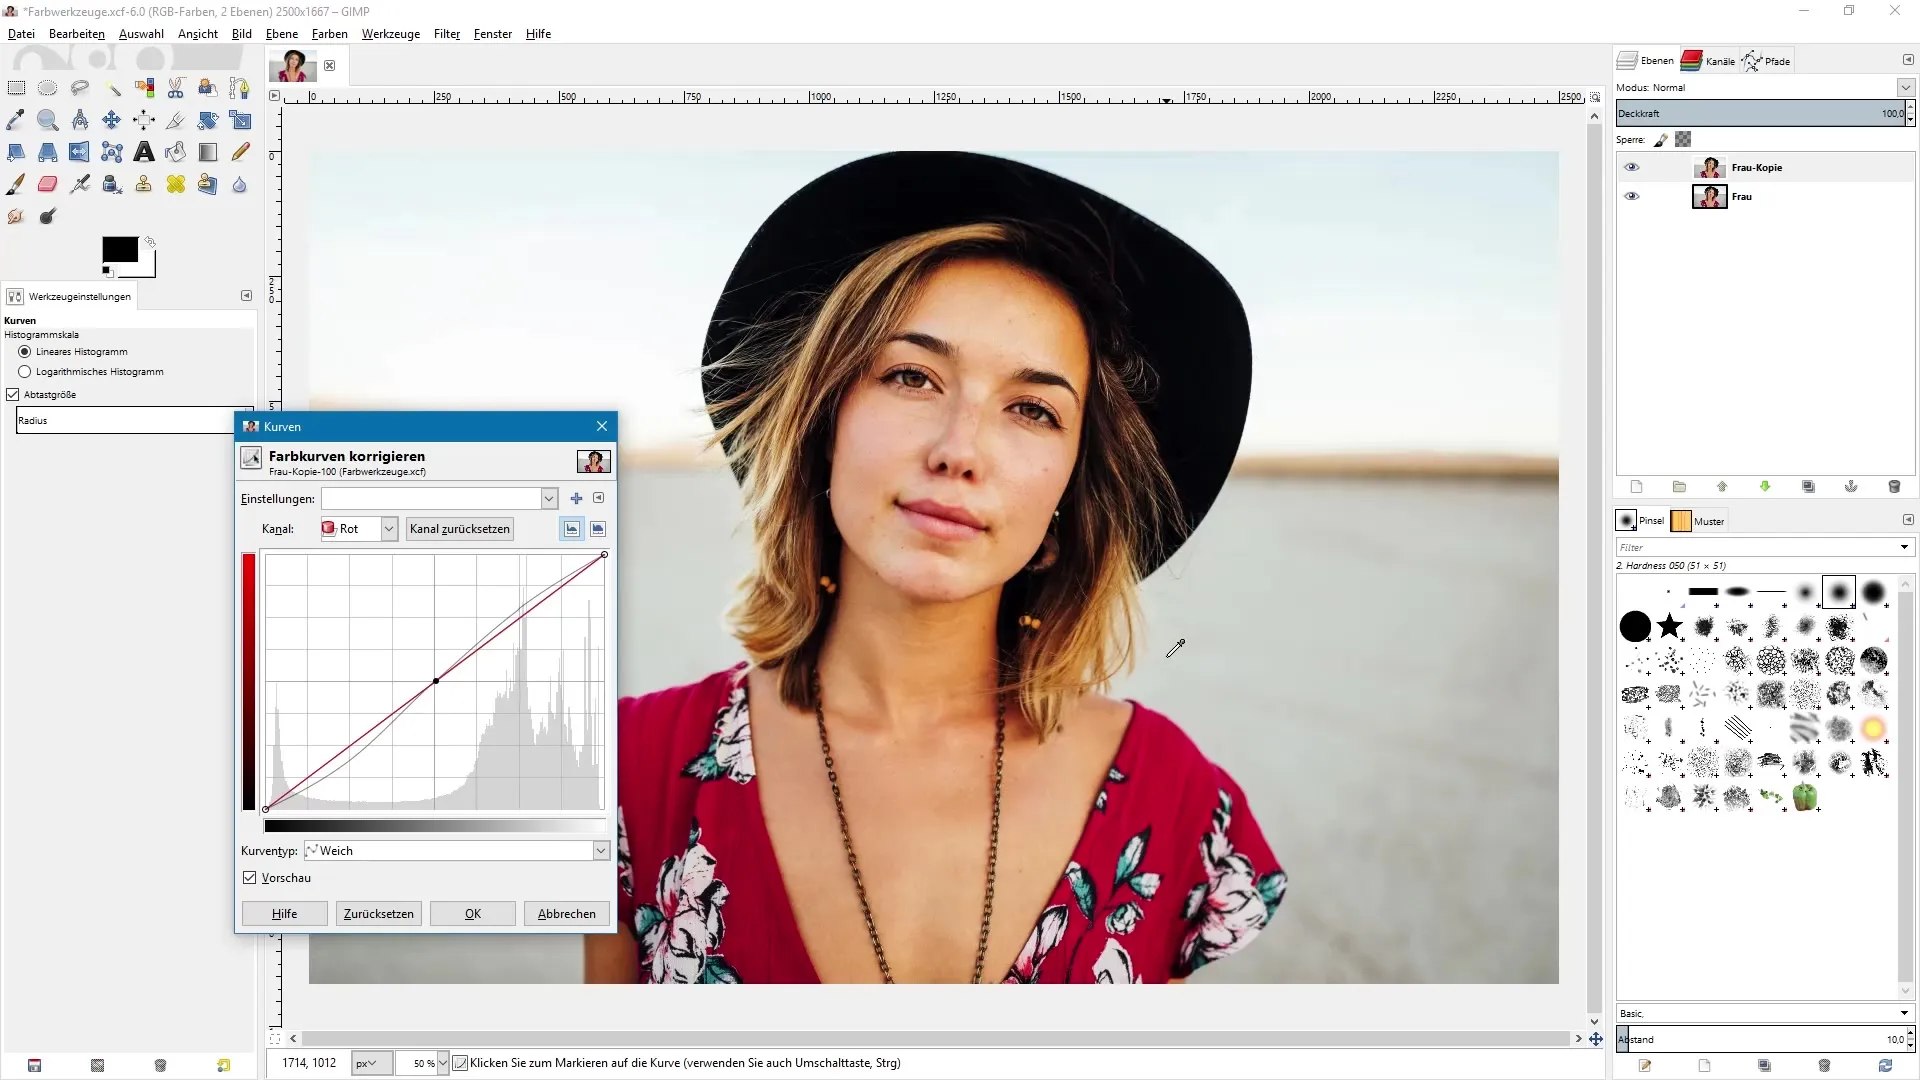
The Curves tool allows you to adjust the color values via a curve that you see directly in the graph. This tool gives you the advantage of being able to influence specific color ranges of the image.
Click in the middle of the line and drag it up or down to adjust the midtones. If you want to darken the shadows and lighten the highlights, create an S-curve.
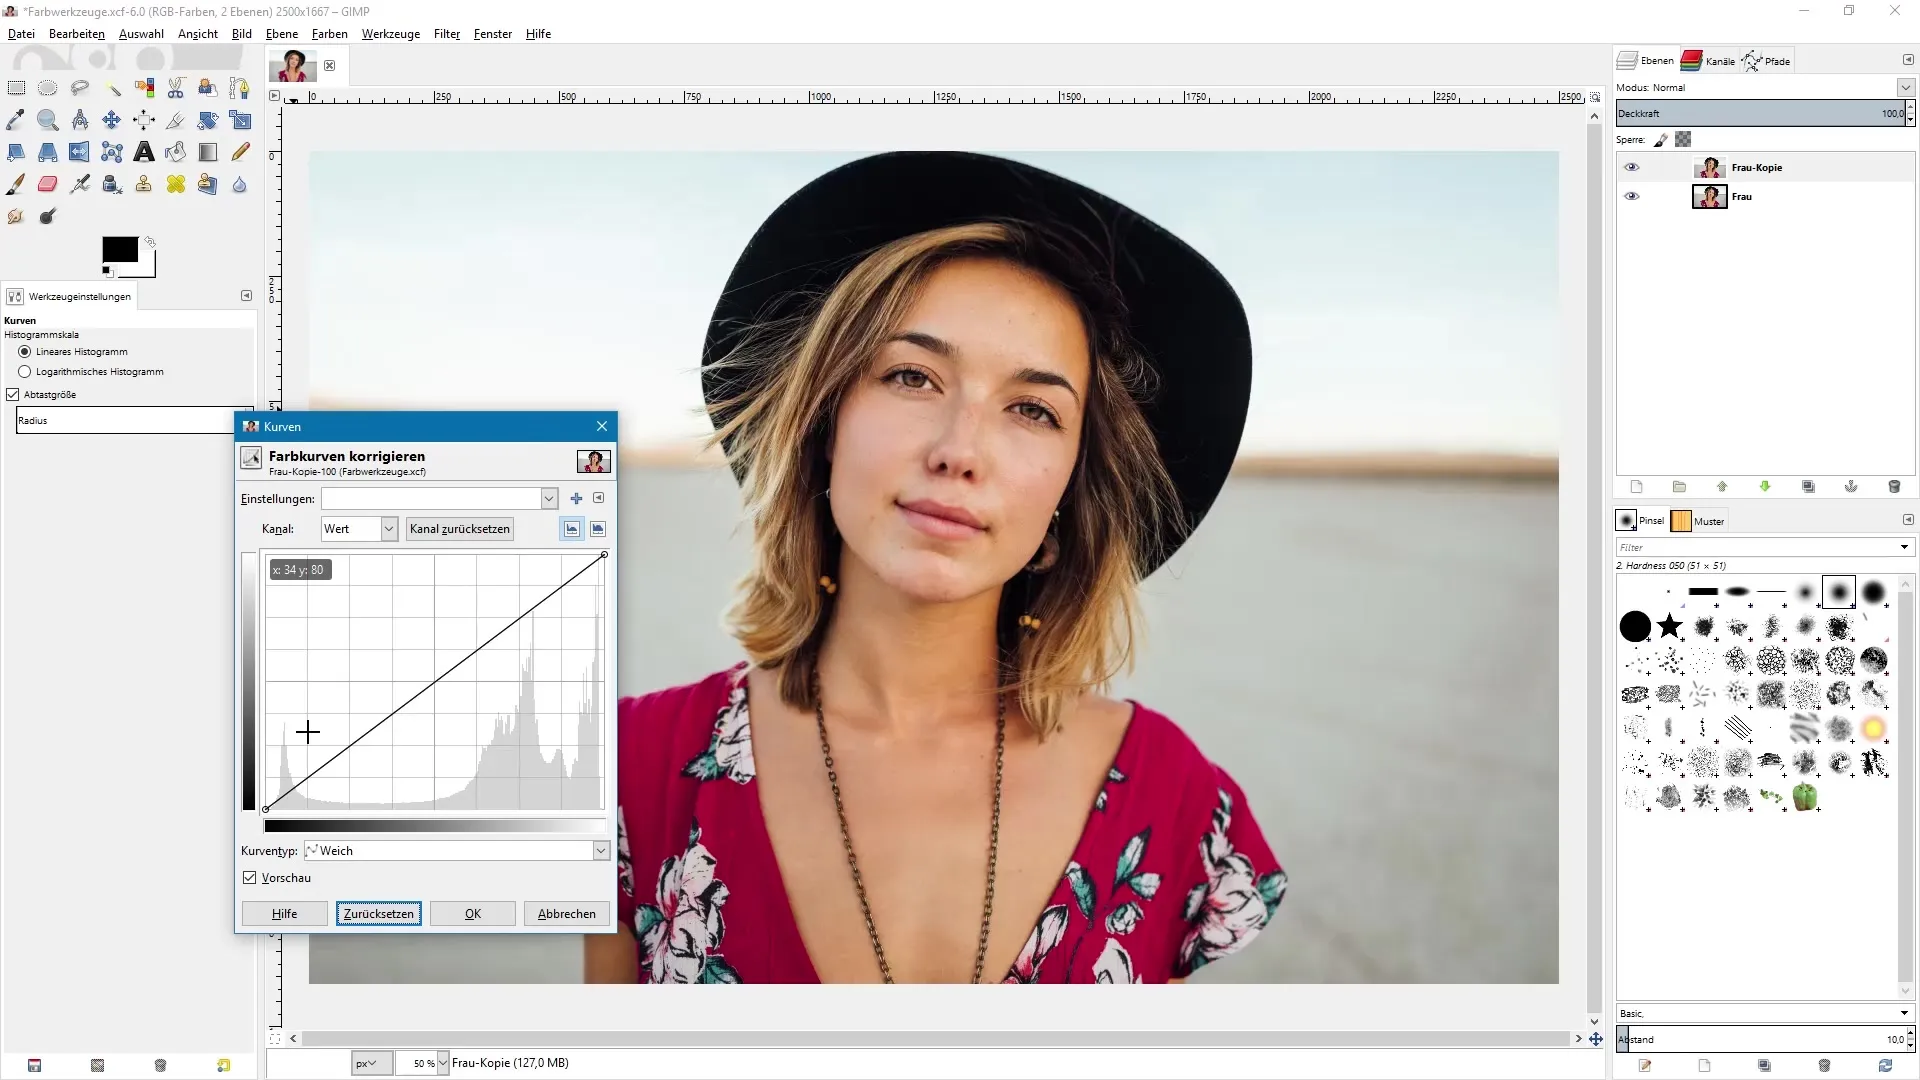
This way, you can significantly boost the contrast while keeping saturation balanced. Don’t forget to adjust the colors of the individual channels separately for even more creative results.
Posterize
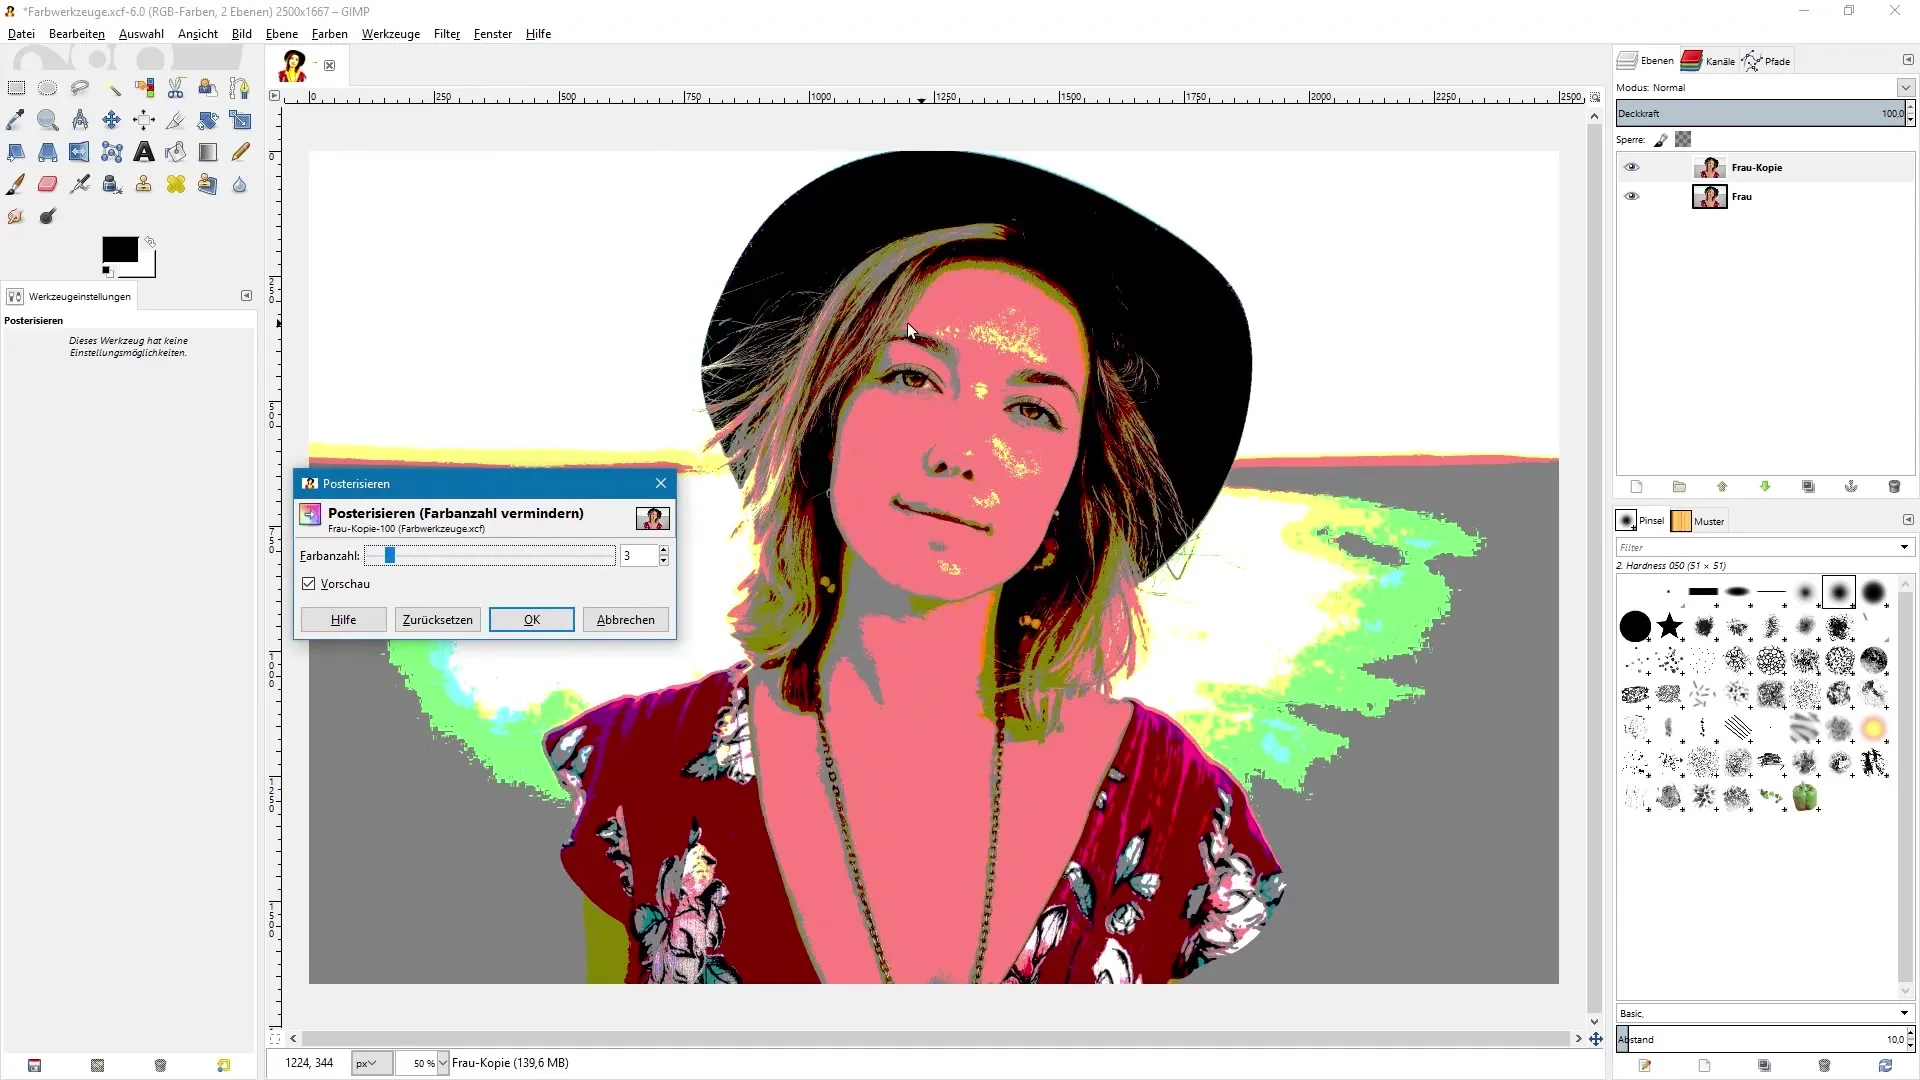
With the Posterize tool, you can drastically reduce the number of colors in your image. This often leads to interesting effects. Move the slider to the left to further decrease the total number of colors.
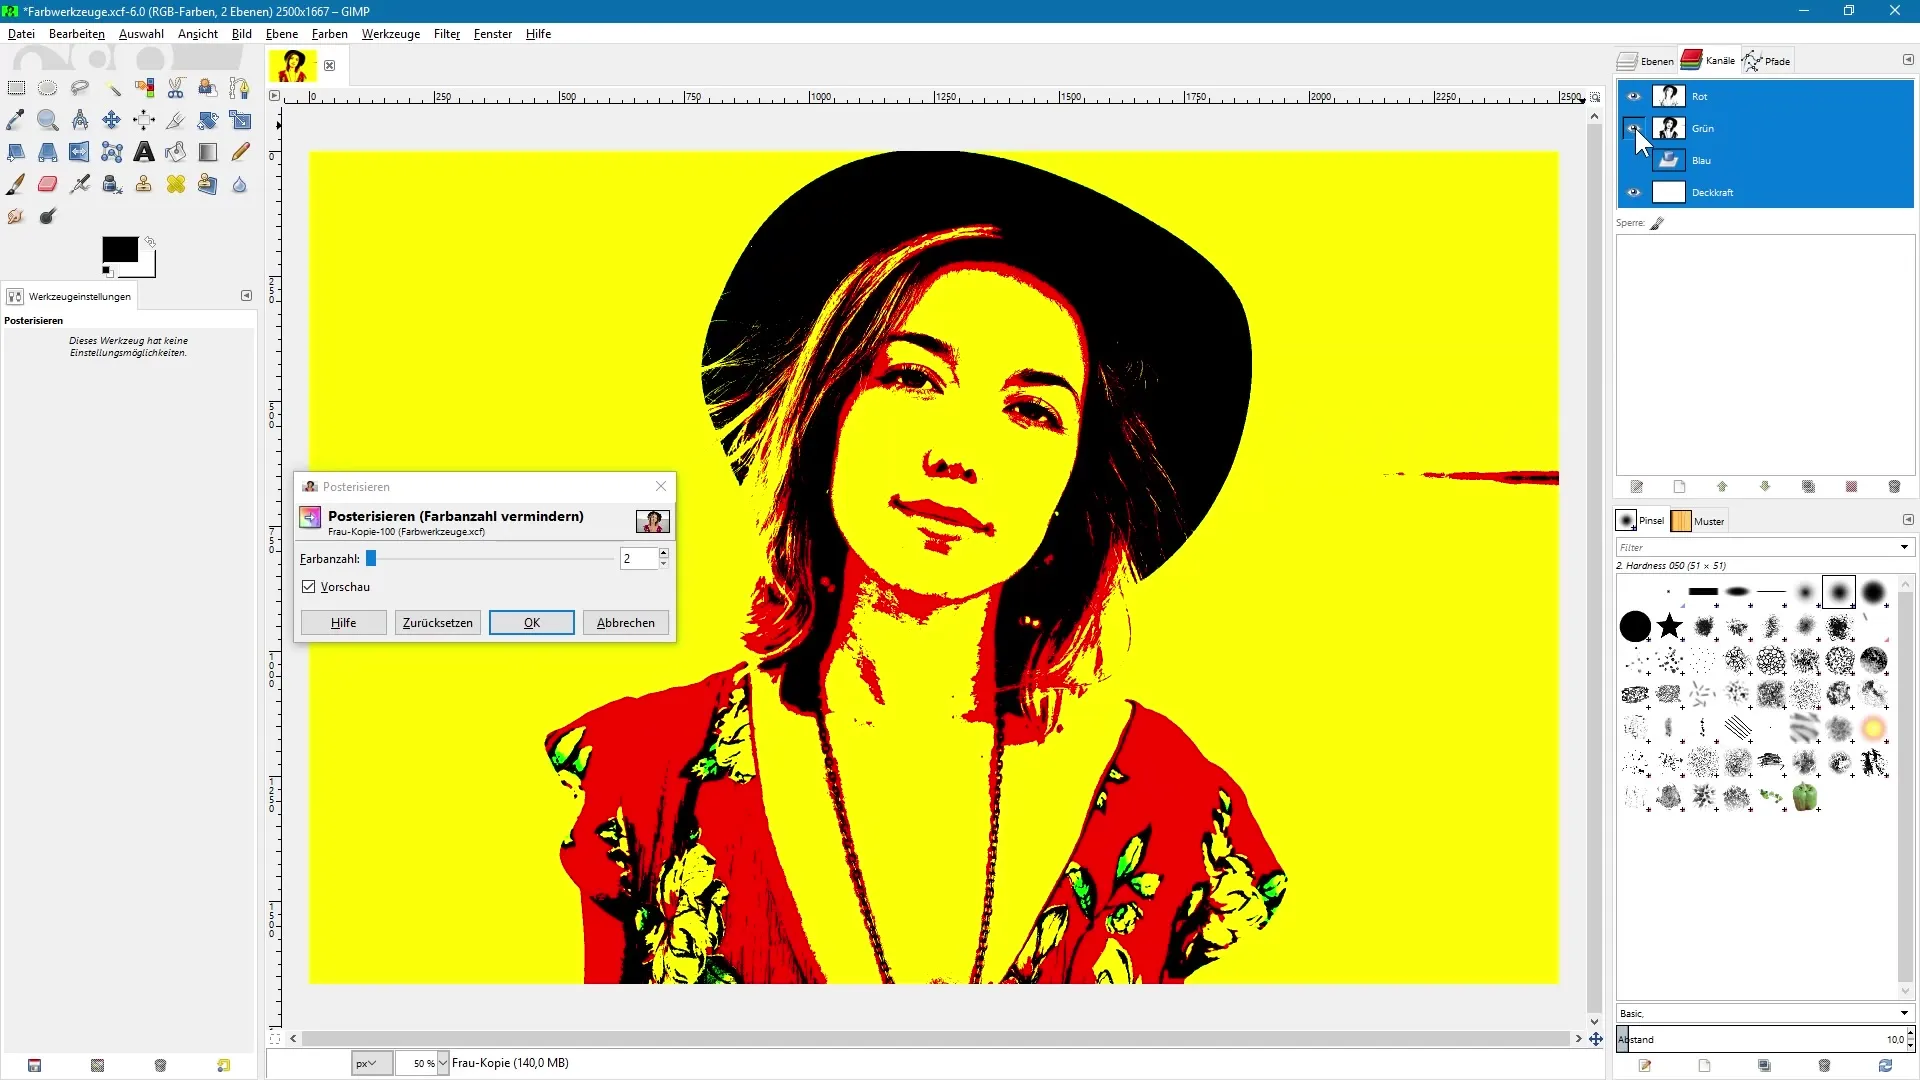
A result with only two colors per channel often yields a strong visual effect. Experiment with the channels to test different combinations.
Desaturate
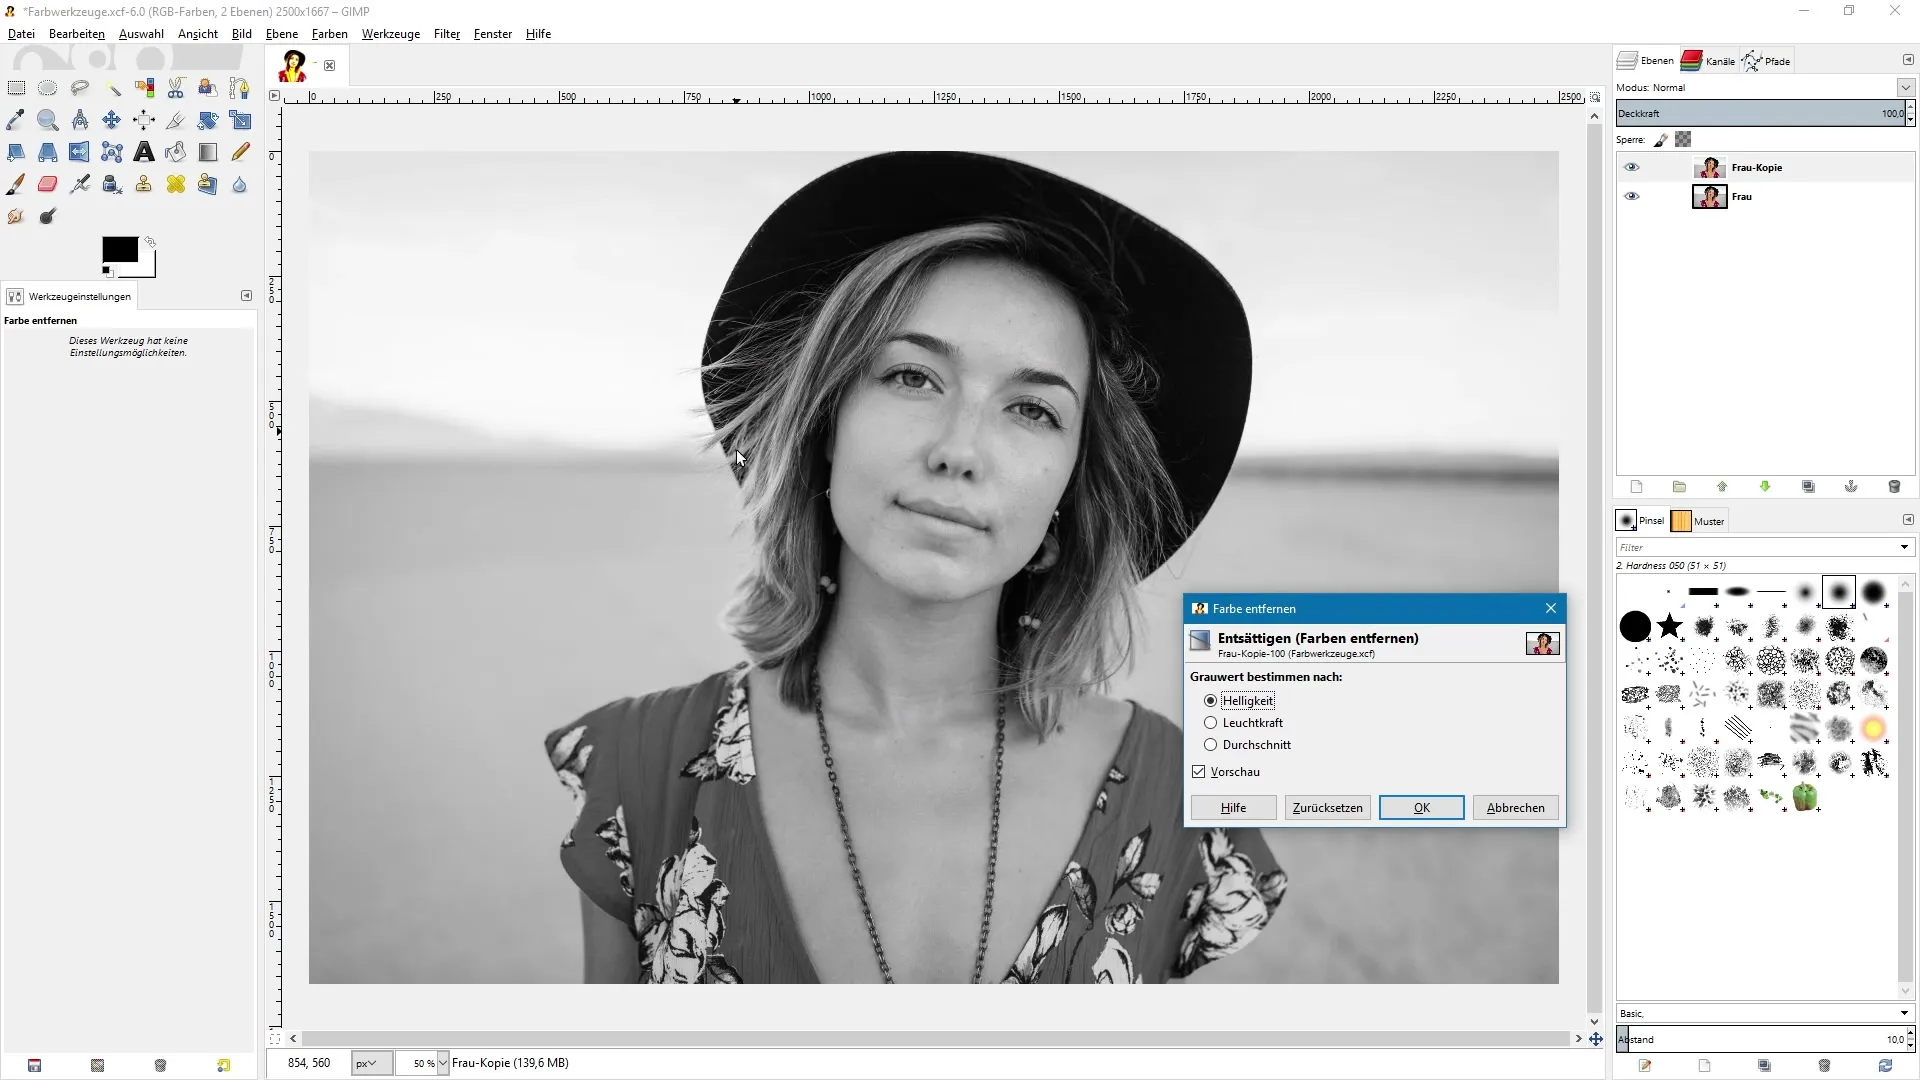
The Desaturate tool converts your image into a black and white image. Here you have the option to switch between different desaturation modes that vary in tonality and contrast.
Find the best setting for your image by trying out the different options. Sometimes it can be worthwhile to integrate this step into your final image editing.
Summary - Color Tools in GIMP: Step-by-Step Image Editing Guide
In this tutorial, you have learned how to efficiently use the color tools in GIMP to enhance your image editing.
Frequently Asked Questions
What is the Threshold tool?The Threshold tool displays only black and white areas in the image and allows you to find the darkest and brightest points.
How does the Levels tool work?It allows you to control the brightness and contrast of an image by adjusting dark and light areas.
What can I do with the Curves tool?You can specifically influence the colors and contrasts in your image by placing and adjusting points on a curve.
How can I reduce colors with the Posterize tool?By adjusting a slider, you significantly reduce the number of colors in the image and create interesting effects.
What does the Desaturate tool do?It converts your image to black and white and offers different modes for tonality.
