Would you like to give expression to your creativity when drawing? GIMP, the powerful and free image editing program, offers you an excellent tool with the Ink Tool. This tutorial shows you how to make the most of the Ink Tool, especially in combination with a graphics tablet. You will learn how to adjust the various settings of the tool and thereby improve your drawings and calligraphic work.
Key Takeaways
- The Ink Tool is ideal for calligraphic work and is easy to use with a graphics tablet.
- You can adjust the opacity, size, and tilt of the line continuously.
- Differences in the pressure applied to the graphics tablet affect the appearance of your lines.
- The tool’s tip can be customized to achieve different effects.
Step-by-Step Guide
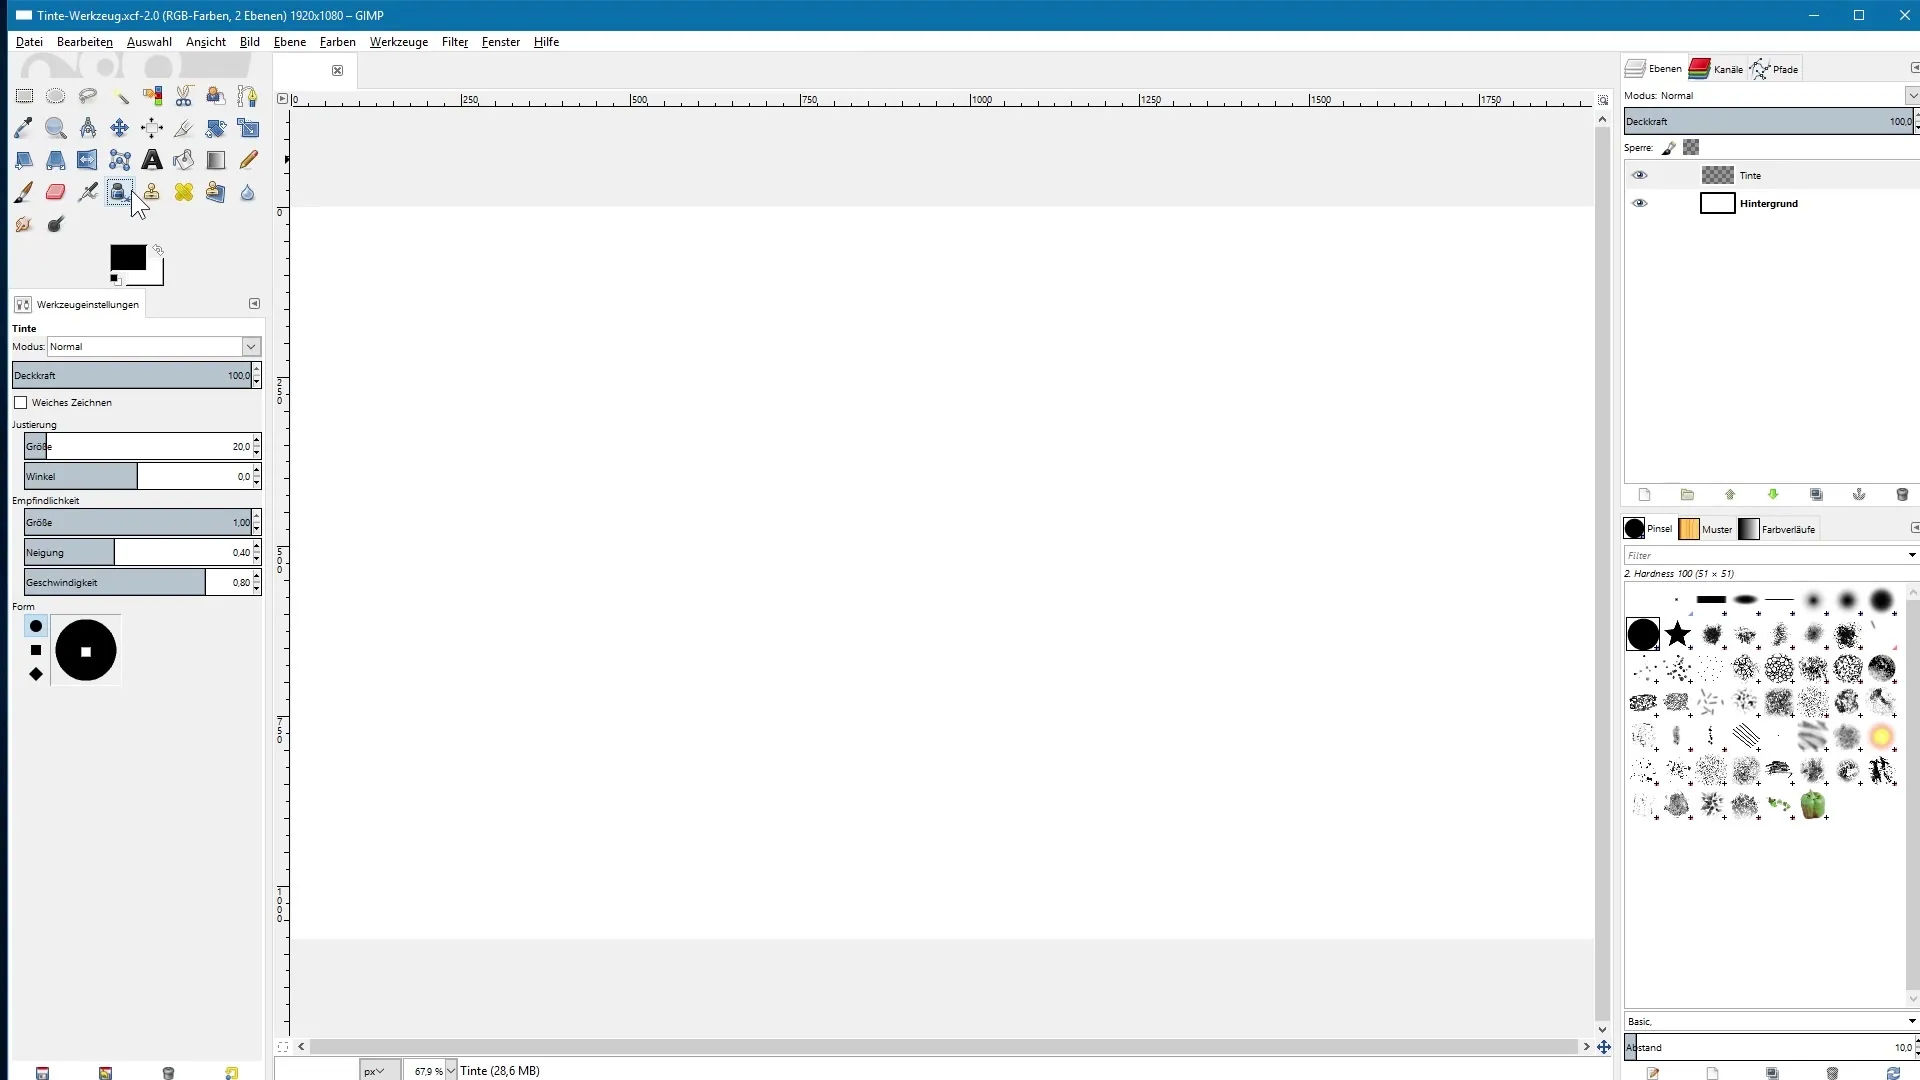
Start by opening GIMP and selecting the Ink Tool. You can find the Ink Tool icon in the toolbox, and you can quickly activate it using the shortcut K.

The Ink Tool allows you to draw calligraphic strokes. I recommend using a graphics tablet and pen to achieve optimal results. In this example, I started with a black stroke.
In the tool options, you can set the opacity of your Ink Tool. Currently, the opacity is set to 100%, meaning the stroke is fully opaque. To experiment with less opacity, you can select a lower value and draw again.
When you lower the opacity and draw again, the stroke becomes semi-transparent. This effect allows you to create nuances and shading in your drawings.
The Ink Tool also offers basic settings that affect the use of the graphics tablet. With the adjustment, you can set the size of the so-called calligraphy nib, as well as change the angle of the tip.
The sensitivity of the Ink Tool has a significant effect on the size and shape of your lines. Depending on how hard you press the pen against the graphics tablet, the appearance of the drawn line varies. Press firmly to produce a thick stroke, and press lightly to get a thinner stroke.
If you reduce the sensitivity as much as possible, you may notice little difference between heavy and light pressure. This makes it clear that sensitivity regulates to what extent the difference between maximum and minimum pressure occurs.
The tilt of the pen also has a significant impact on your lines. You can adjust how sensitive the Ink Tool is to tilt, giving you even more creative freedom. When you hold the pen vertical above the tablet and place a point, you get a round circle, whereas with a tilt you create an oval shape.
With different tilt settings, you can significantly reduce the effort required to vary between a curve or a straight line. Try out how tilt affects the appearance of your lines.
Finally, it is important to also adjust the shape of your calligraphy nib. Unlike conventional painting tools, the Ink Tool does not rely on preset brushes. You can customize the shape of the nib yourself. Currently, the circle is selected as the shape. You can adjust this shape by clicking and dragging the white square.
Additionally, you can choose different shapes, such as a square or a diamond shape, which can also be easily adjusted. This gives your drawings an individual look.
After this comprehensive explanation, I wish you lots of fun drawing and calligraphy with the Ink Tool in GIMP!
Summary - Image Editing with GIMP: Making the Most of the Ink Tool
In this tutorial, you have learned the key functions and settings of the Ink Tool in GIMP. You now know how to adjust opacity, sensitivity, and tilt to get the most out of your drawings.
Frequently Asked Questions
How do I activate the Ink Tool in GIMP?You can activate the Ink Tool via the icon in the toolbox or the K shortcut.
Why should I use a graphics tablet?A graphics tablet gives you more control and precision when drawing and doing calligraphy.
What settings can I adjust for the Ink Tool?You can adjust opacity, size, sensitivity, and tilt of the line.
How does pressure on the graphics tablet affect the lines?The pressure affects the thickness and style of the lines; the harder you press, the thicker the stroke.
Can I change the shape of the pen tip?Yes, you can customize the tip shape to achieve different effects.


