Editing images can be a demanding but also creative task. A central element of image editing in GIMP is the layers panel. Here you manage your layers, edit them, and create order in your project. Read on to learn how to effectively use the layers panel to optimize your edits.
Key Insights
- The layers panel is the central control unit for all layers in your GIMP project.
- Layers can be created, renamed, and organized to maintain a better overview.
- The visibility and order of layers can be easily adjusted.
- Various functions like blending modes and opacity adjustments expand your editing possibilities.
Getting Started with the Layers Panel
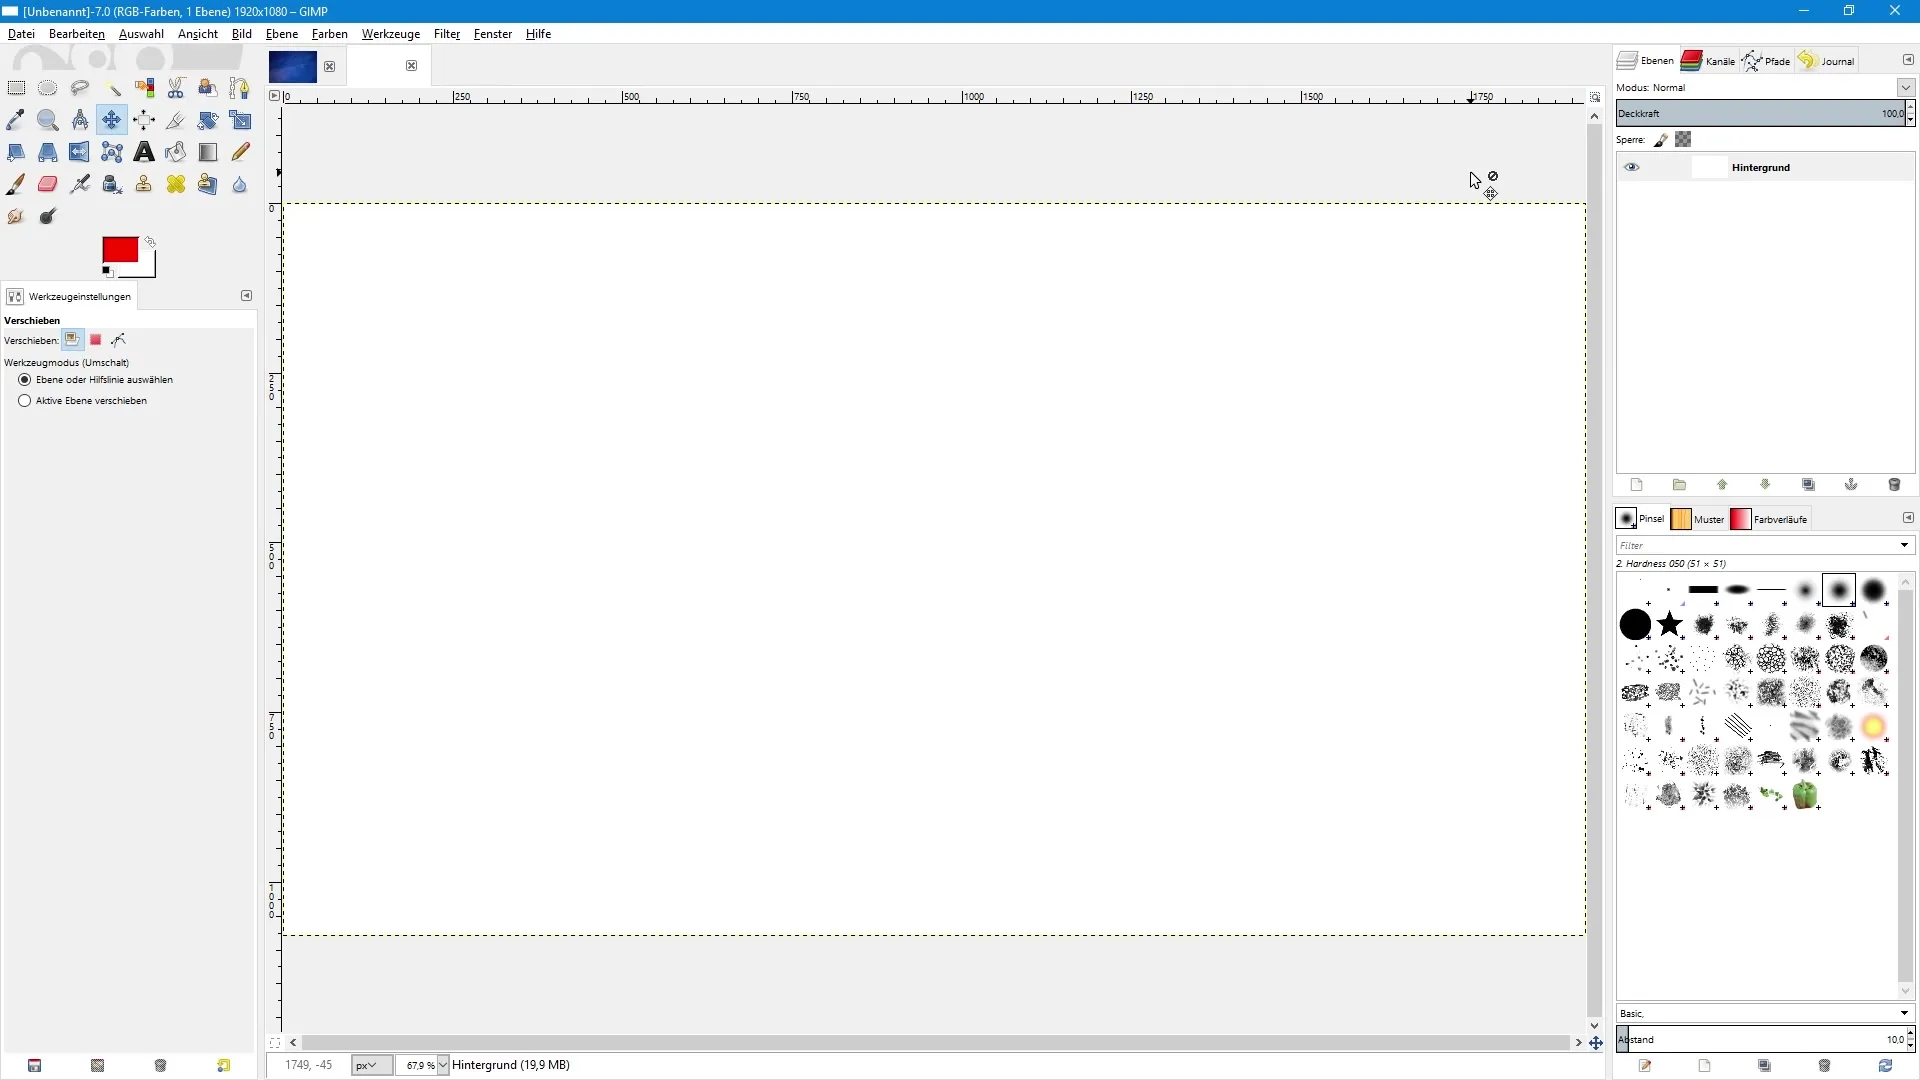
The layers panel is located by default on the right side of the GIMP interface. If it is not visible, you can restore it by clicking on the arrow icon at the top and selecting "Add Tab." Then choose "Layers" to open the panel.

Initially, the layers panel only shows one layer, the default background layer. This appears when creating a new document with a white background. You can control the visibility of this layer by clicking on the eye icon. Hiding the layer does not delete it; it merely hides it.
Creating New Layers
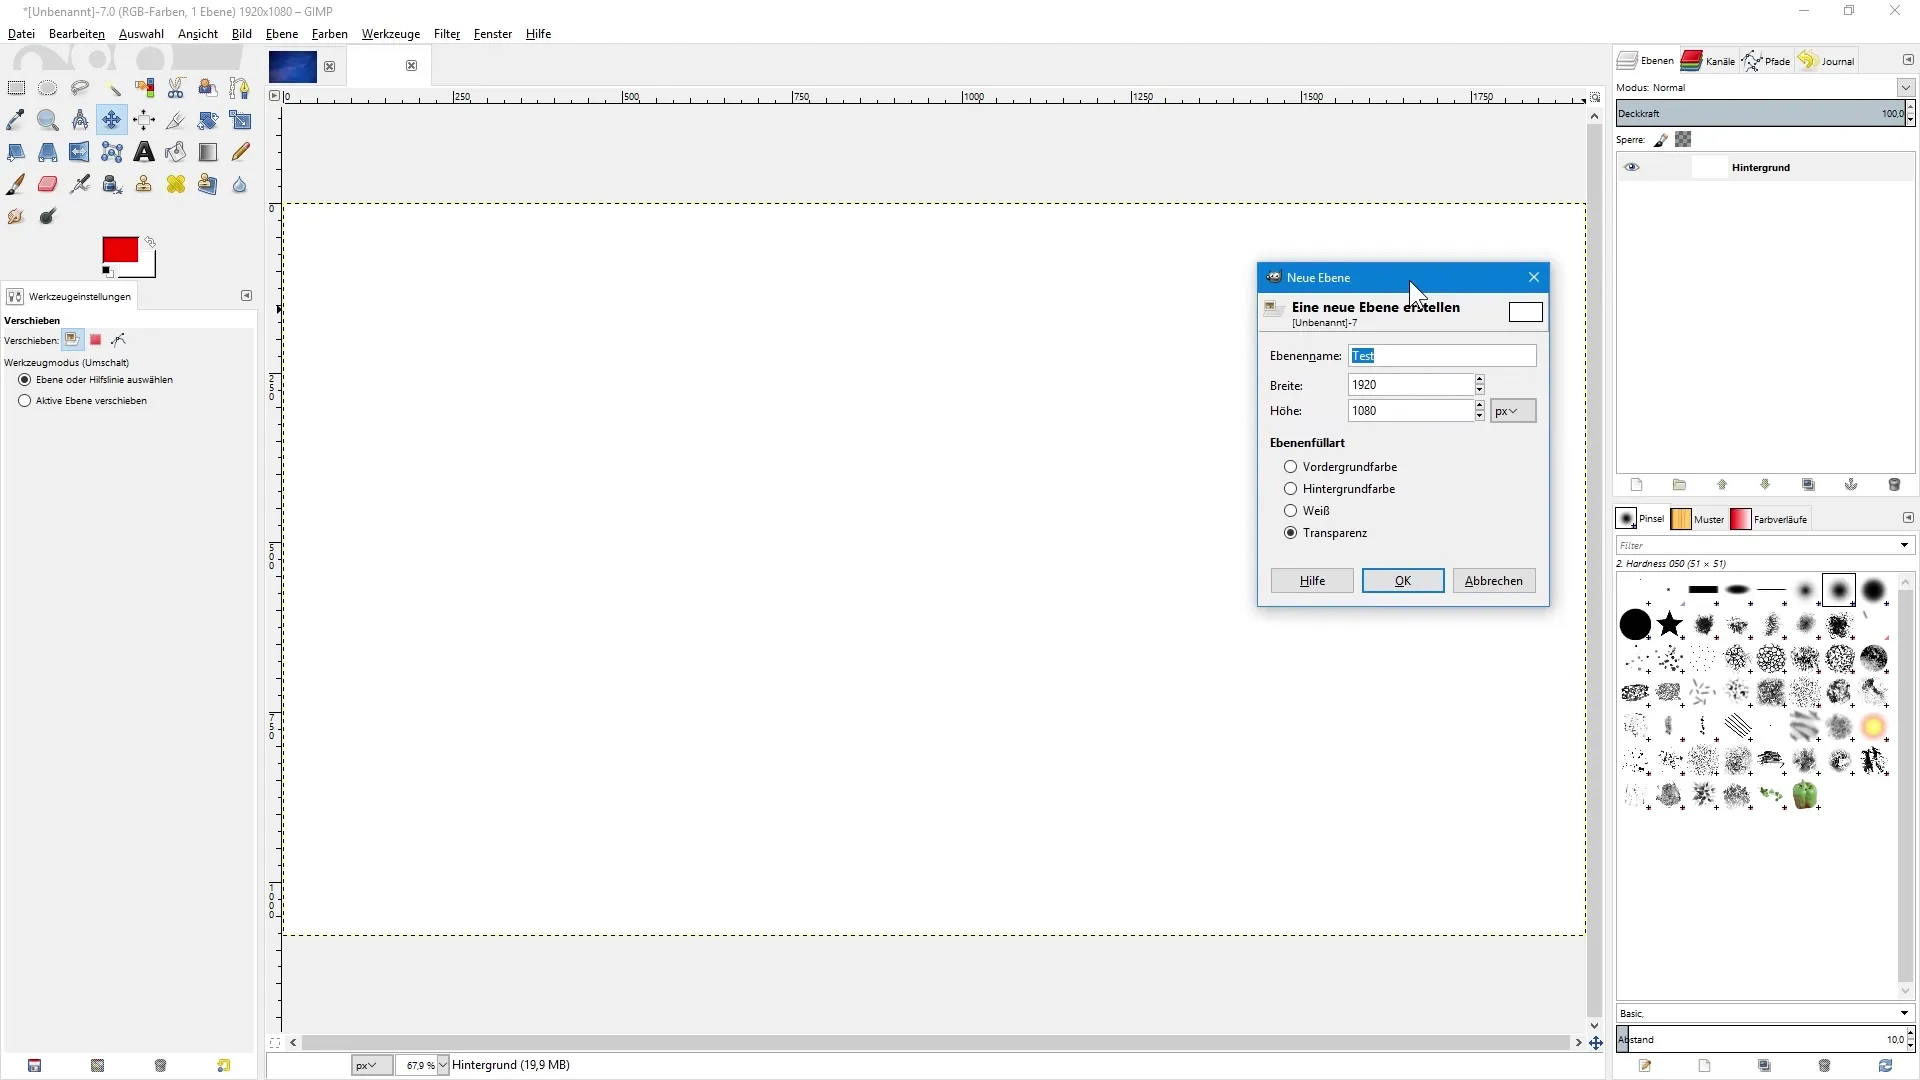
To create a new layer, click on the paper icon in the layers panel. In the dialog that opens, you can enter the name of the new layer, as well as set the width and height. Typically, it makes sense to use "Test" as an example name. You can optionally select the foreground or background color as the fill option for the new layer or create a transparent layer.

When you create a transparent layer, it will be displayed above the previously selected layer. Note that GIMP automatically numbers new layers. To improve clarity, I recommend naming these layers right away. Simply double-click on the name and rename them, for example, to "Example Layer."
Using Layer Groups
An efficient way to maintain visibility is by using layer groups. To create a group, click on the folder icon. You can also rename the group by double-clicking on the name. To pull a layer into this group, click on the layer, hold down the left mouse button, and drag it into the group.
If you want to change the order of your layers, you can do this by clicking on a layer and dragging it to the desired position. You can also use the arrow icons in the layers panel to move the selected layer up or down.
Working with Floating Selections
If you create a selection on a layer and want to move it, you can easily do this with the move tool. After you copy and paste the selection, a floating selection is created. To anchor it in a specific position, simply click on the empty space in the layers panel or use the corresponding anchor icon.
Adjusting Layers with Blending Modes and Opacity
A special feature in GIMP is the ability to change the blending mode of a layer. The blending mode allows you to control the interaction between different layers. To do this, select the layer, click on the menu, and choose a suitable blending mode from the available options.
Additionally, you can adjust the opacity of the layer. With the slider in the layers panel, you can control the visibility of the layer, allowing you to create a semi-transparent representation. Simply click and drag the slider to decrease or increase the opacity.
Locking Layers
If you want to prevent changes to a specific layer, you can lock the layer. With the "Lock Pixels" function, for example, you can prohibit painting on a layer, while the "Lock Alpha Channel" symbol ensures that you can only work in already painted areas. This allows you to proceed selectively in your image editing.
Summary – Image Editing with GIMP: The Layers Panel in Detail
In GIMP, the layers panel is an indispensable feature that allows you to work with layers easily and effectively. By creating new layers, using groups, and playing with blending modes and opacity, you gain much more control over your edits, helping you to maintain an overview even in complex projects.
Frequently Asked Questions
How do I find the layers panel in GIMP?You can restore the layers panel via the arrow icon and "Add Tab."
How do I create a new layer?Click on the paper icon, select the name and fill type of the new layer.
How can I control the visibility of a layer?Click on the eye icon next to the desired layer.
Can I organize layers into groups?Yes, click on the folder icon to create a group and drag the desired layers into it.
How do I change the blending mode of a layer?Select the layer, go to the menu, and choose the desired blending mode.
Can I adjust the opacity of a layer?Yes, use the slider in the layers panel to decrease or increase the opacity.
How do I lock a layer?Activate the "Lock Pixels" or "Lock Alpha Channel" function in the layers panel.


