
Imagine you want to cut out a lock on a door and keep only the lower part. With the eraser, you would irreversibly delete pixels. Layer masks solve this problem: they control the visibility of a layer without destroying the original image. In this tutorial, you will learn why the eraser is not ideal here, how to create alpha channels and layer masks, and how to refine masks with the brush, selection, and quick mask.
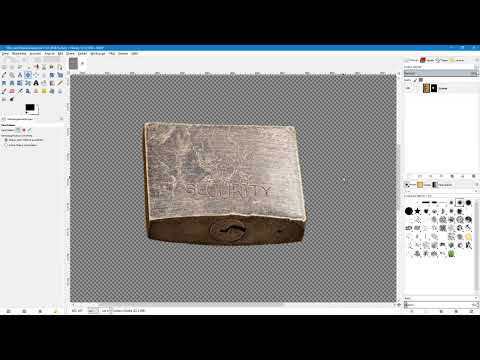
The video is only loaded from YouTube when you play it – data (including your IP address) is then transmitted to YouTube/Google. More in the privacy policy
Key Takeaways
- The eraser works destructively. Removed pixels are lost after saving and reopening.
- An alpha channel determines which areas of a layer are transparent. If it is missing, nothing can be made transparent.
- A layer mask controls visibility: white shows, black hides, shades of gray make things partially transparent.
- You can make improvements on the mask at any time without touching the image pixels.
- The quick mask allows you to simply paint areas and create a selection or mask from them.
- Save projects with masks in XCF format so that all layers and masks are preserved.
Step-by-Step Guide
Step 1: Recognizing the Problem with the Eraser
Open the lock image in GIMP and select the eraser. Drag over an area you want to remove. Instead of transparency, you now see the set background color. The reason: the layer has no alpha channel that could control transparency.

Step 2: Adding an Alpha Channel
In the layers palette, right-click the layer and choose "Add Alpha Channel". Initially, nothing changes in the image. Then switch to the channels palette: a fourth channel called Opacity appears there. Only now can the eraser really make areas transparent.

Step 3: Understanding the Disadvantages of the Eraser
If you create transparent areas with the eraser, you are still working destructively. If you save the image and reopen it later, the deleted pixels are gone forever. Therefore, undo the steps with "Undo" to restore the area.

Step 4: Creating a Layer Mask
Right-click the layer again and choose "Add Layer Mask". In the dialog, you decide how the mask is filled. If you choose "White (full opacity)", the entire image remains visible. The mask is merely an addition that doesn't change anything yet.

Step 5: Creating Transparency with a Black Mask
For the layer mask, now choose "Black (full transparency)". The image disappears completely because the mask is entirely black. So the principle is: black hides, white shows. Undo this test before you continue.

Step 6: Creating a Mask from a Selection
You get to your goal faster if you create a selection beforehand. To do this, take the lasso and roughly mark the area you want to keep. You can recognize the selection by the small marching ants lines. Then choose "Add Layer Mask" and the option "Selection". Everything inside the selection remains visible, everything outside becomes invisible.

Step 7: Working on the Mask with the Brush
First activate the mask by clicking its thumbnail in the layers palette. This is important, because otherwise you would be editing the wrong layer on the image layer. Select the brush tool, make it smaller for fine work, and set black as the foreground color. With black on the mask, you now remove image areas, similar to the eraser, only reversibly.

Step 8: Bringing Back Too Much Masked Area
If you have removed too much, switch the foreground color to white by clicking the small double-arrow icon next to the color swatches. With white, you paint the lost areas back into view, even if they come from the original image. Then switch back to black when you want to continue removing.

Step 9: Create partially transparent areas with shades of gray
A mask knows not only black and white, but also all the shades of gray in between. A medium gray makes an area only half visible. If you then want to reset the default colors black and white, click the small icon below the color swatches or press the D key.

Step 10: Display the mask for checking
To work cleanly, it is worth taking a look at the mask itself. Right-click the layer mask and select "Show Layer Mask". Now you can see the mask large and recognize where you have worked sloppily. White is visible, black is transparent.

Step 11: Refine the mask and quickly switch the foreground color
You remove small imperfections by touching up the mask with the brush. With the X key, you swap lightning-fast between foreground and background color. In this way, you can correct gray edges in a targeted manner. When you are satisfied, activate the view of the image again via "Show Layer Mask".

Step 12: Move the image layer or the mask
If you want to move the castle later, pay attention to which layer is active. With the Move tool, you only move the image if the image layer is active. If, on the other hand, you are on the mask, you move the mask, and the result often no longer fits. An undo will then help you.

Step 13: Apply the mask permanently
If you want to finalize the mask, right-click the mask and select "Apply Layer Mask". The image initially appears unchanged, but the transparent areas are now permanently deleted. You should therefore only choose this step if you are sure that you no longer need the mask.

Step 14: Activate the Quick Mask
Another method uses the Quick Mask. To do this, click the dashed square at the bottom left of the image. The image is now overlaid with red. After clicking, you can paint to mark areas. With a second click on the square, you leave the Quick Mask again.

Step 15: Set the Quick Mask options
A right-click on the square opens the options. There you decide whether the mask should be created from the selection or from the inverted selection. By default, the inverted selection is active. Then you paint with white those areas that should remain visible.

Step 16: Create a layer mask from the Quick Mask
Once you have left the Quick Mask, a dashed selection is created. Right-click the layer, select "Add Layer Mask" and choose the "Selection" option. With a click on "Add", the selection becomes the mask, and the areas you painted remain visible.

Step 17: Work with the Quick Mask and the "Mask from Selection" option
For the second variant, you switch the foreground color to black, for example with the X key. It is important to activate the Quick Mask beforehand, otherwise only a black stroke is created. You now paint the areas you want to keep visible in black with the Quick Mask active. The result is the same selection, just with different logic.

Step 18: Adjust the Display of the Quick Mask
The red overlay may bother you. Right-click the Quick Mask icon and select "Configure Color and Opacity". There you can, for example, choose a shade of green and reduce the opacity. This only changes the display, not the mask itself.

Step 19: Remove a Layer Mask Again
If you want to discard a mask, right-click the layer and select "Delete Layer Mask". Afterwards you will see the complete original image again, so you can start over with a different method.

Step 20: Save the Project in XCF Format
Finally, one thing is crucial: Save your image in GIMP's native XCF format if you want to continue editing masks and layers later. Only this format preserves all layers and layer masks. Other formats such as JPEG or PNG reduce the project to the final result.

Summary ??? Layer Masks in GIMP: Non-Destructive Cutouts for Beginners
You have seen that the eraser removes pixels irrevocably, while a layer mask only hides areas. With an alpha channel, black, white, and gray mask areas, as well as brush, selection, and Quick Mask, you control visibility flexibly. Save your projects as XCF so that you can make improvements at any time.
FAQ
Why isn't the eraser working properly on my layer?The layer probably has no alpha channel. Add it via right-click in the Layers panel, then transparency becomes possible.
What do the colors of a layer mask mean?White makes the area completely visible, black hides it completely. Shades of gray make it partially transparent.
How can I tell whether the mask or the image is active?The active layer or mask is highlighted in the Layers panel. Click the mask's thumbnail to work on it.
Can I still change a layer mask later?Yes, as long as the mask has not been applied. Applying it is irreversible, so you should only do it for final results.
What is the difference between applying a layer mask and showing a layer mask?Showing makes the mask visible so you can check it. Applying permanently transfers the mask into the image layer.
Why should I save the project in XCF format?Only XCF saves all layers and layer masks. Other formats save the result, but not the editing steps.


