
Eye color is one of the most striking features of a face. When you change it in an image, every unclean edge is immediately noticeable. A clean way of working is therefore all the more important. Keep in mind that birthmarks or other identifying features should only be altered in agreement with the person depicted.
The video is only loaded from YouTube when you play it – data (including your IP address) is then transmitted to YouTube/Google. More in the privacy policy
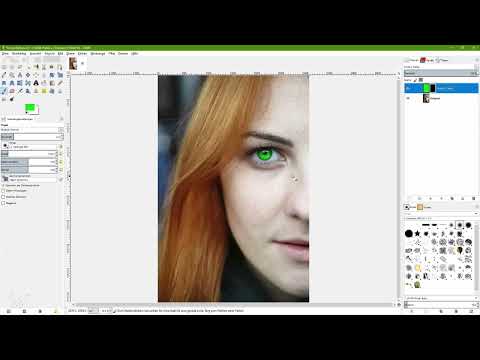
In this tutorial, you will learn how to recolor the iris in GIMP in several ways without destroying the original image. The centerpiece is layer masks, which you reuse for all variants. You will work with the layer modes Color and Soft Light, the Colorize tool, and the Curves. In the end, you can adjust or remove any layer at any time.
Key Takeaways
- Layer masks ensure that you can correct the recoloring at any time without changing the original image.
- A black mask hides a layer completely, while white brush strokes make the recoloring visible only where you need it.
- Layer modes such as Color or Soft Light determine how the hue is blended with the original photo.
- With opacity, hue, saturation, and curves, the effect can be fine-tuned.
Step-by-Step Guide
Step 1: Open the Example Image and Choose a Color
Open your example image in GIMP. In the layers palette, you see the image as the background layer. Before you change anything, you define the color with which you want to recolor the iris. To do this, click on the foreground color. In the dialog box, you can choose any hue, for example a bright green. After confirming with OK, the chosen color appears as the foreground color.


Step 2: Fill a New Layer with the Color
Now create a new layer above the original layer. In the dialog for the layer fill type, select the foreground color. The layer is thereby completely filled with your green tone. Name it later, once you have finished editing. For the moment, this layer covers your entire image, which will be corrected in the next step.

Step 3: Add a Layer Mask
So that only the iris is affected, you first hide the layer with a layer mask. To do this, right-click on the layer and select "Add Layer Mask". Choose the option "Black" and confirm with "Add". A black mask means: the content of this layer is invisible. You see your original image again.

Step 4: Activate the Mask and Zoom In on the Area
Make sure that the layer mask and not the image layer is selected. Only then will your brush strokes affect the mask. Next, switch to the Zoom tool and drag a frame around the iris while holding down the left mouse button. This way you can see the details better and work more precisely.

Step 5: Prepare the Brush
Select the Paintbrush tool and set the foreground color to white. White on the black mask means: the layer becomes visible at that spot. In the tool options, it is recommended to set the dynamics option to "Off". Otherwise, the opacity and size of the brush constantly change while painting. With dynamics turned off, you keep full control. Adjust the brush size to roughly the diameter of the iris. In the example, the value was around 93 pixels.


Step 6: Set the Layer Mode to Color
So that the green tone is not simply laid over the drawing but blends with the original photo, you change the layer mode. Click on the layer, open the layer mode menu, and select "Color". Nothing is visible on the black mask yet; that changes in the next step.

Step 7: Mask the iris
Now you paint over the iris on the mask. With the double arrow next to the color swatches, you swap the foreground and background colors so that white is in front. Paint over the area of the iris. The recoloring appears immediately, but still looks unnatural. Be careful not to paint into the white of the eye.

Step 8: Correct mistakes
A big advantage of this method is that you don't change anything irreversibly. If you have painted too far over an area, switch the foreground color to black and repaint the affected area. For this, reduce the brush size to also reach small areas at the edge of the iris cleanly.

Step 9: Make transitions softer
Hard transitions quickly look artificial. Therefore, significantly reduce the opacity of the brush and choose a very soft brush. Enlarge it slightly. Then paint over the edge areas with black, for example at the eyelashes or at the transition to the pupil. Lift the brush repeatedly and paint over the same spots several times. This way the green flows gently into the original image.

Step 10: Check the overall view and adjust the opacity
With the keyboard shortcut Ctrl+Shift+J, you display the entire image. This way you can better assess the effect. The green usually looks too bright at first. Therefore, reduce the opacity of the layer until the result looks natural. A value of about 23 to 25 percent usually works well. Then rename the layer by double-clicking on the name, for example to "Color mode". That way you keep an overview once you have created several variants.


Step 11: Alternative with the Soft Edges mode
There is another layer mode with which you can achieve a similar recoloring. To do this, duplicate the current layer using the icon at the bottom of the layers palette and hide the original layer. Set the copy to the "Soft Edges" mode. Here too you can increase the opacity. In the area of the pupil, more of the brown tone of the original is retained. Both modes differ in their effect, and which one you like better depends on the image.


Step 12: Reuse the layer mask
For the next variants you need the same mask. You don't have to draw it again. Create a copy of the original layer and drag it to the very top. Add a black layer mask to it. Then click on the finished mask of the previous layer and copy it with Ctrl+C. Switch to the new mask and paste it with Ctrl+V. You can then simply delete the floating selection. Hold down the Alt key and click on the new mask to check the mask. If the area is correct, you have transferred the mask correctly.


Step 13: Colorize the iris with the colorize tool
Now switch to the image layer of the copy, not to the mask. Under "Colors", open the "Colorize" tool. With the preview active, you can see directly how the iris changes. In the example, a cool blue was created at first. With the hue slider, you pull the color toward green. Then adjust the saturation so that the result is less bright. A slight reduction in brightness can make the result even more natural. Confirm with OK and later reduce the opacity of the layer, for example to about 70 percent. Then name the layer appropriately, for example "Colorize".


Step 14: Brighten the iris with tone curves
Tone curves are also suitable for recoloring or significantly changing the iris. Create a copy of the original layer again, paste in the mask from the previous step, and select "Colors" and "Curves" on the image layer. Click in the middle of the diagonal line and drag it upward. This creates a bright iris, which looks especially interesting in composites with fantasy motifs. Don't overdo it. Confirm with OK and rename the layer, for example, to "Curves (light)".


Step 15: Darken the iris with tone curves
For a more menacing effect, you instead pull the curve downward. Here too, create a new copy of the original layer, paste in the mask, and open the tone curves on the image layer. The iris then looks darker and more mysterious. Confirm with OK and name the layer, for example, "Curves (dark)".


Step 16: Control color via the individual channels
With tone curves, you can also specifically change individual color channels. To do this, switch to the blue channel under "Channel" and pull the curve strongly upward. Then select the green channel and raise it slightly as well. The result is a cool blue. If needed, you can exaggerate the effect even more and use the before-and-after comparison to check the result. Confirm with OK and rename the layer, for example, to "Curves (color)".

Step 17: Combine variants
You can also combine the variants with each other. For example, the blue tone curve can be set to a brightening layer mode such as Screen. The iris then becomes brighter but keeps its blue tone. If you want to soften the effect, reduce the opacity or choose the Soft Light mode again. Compare the variants side by side until you have found the right result. In the example, the decision fell on the normal variant, which looked the most natural.


Summary ??? Recoloring the iris in GIMP: Step by step with layer masks
In this tutorial, you have learned how to recolor a person's iris in GIMP in different ways. You saw how to hide a color layer with a black layer mask and make the iris visible with white brush strokes. With the Color and Soft Light modes, you blend the hue with the original photo. The Colorize tool and the tone curves offer further ways to change the eye color. Since every layer, every mask, and every opacity remains adjustable afterward, you work non-destructively throughout.
FAQ
Question: Why should I work with layer masks?Answer: Layer masks allow you to undo changes at any time without altering the original image.
Question: What does a black layer mask mean?Answer: A black mask completely hides the content of the layer, so the image underneath remains visible.
Question: Why should the brush dynamics be turned off?Answer: When turned off, size and opacity remain constant, so you can edit the mask more precisely.
Question: Which layer mode is suitable for recoloring?Answer: The Color mode blends the hue with the original photo, while the Soft Light mode produces a slightly different mix in which more of the original tone is preserved.
Question: How can I tone down a hue that is too bright?Answer: Reduce the layer's opacity or adjust the saturation and brightness in the color tool.
Question: How do I transfer a layer mask to another layer?Answer: Copy the mask with Ctrl+C, switch to the new mask, and paste it with Ctrl+V.
Question: Can I still change the results later?Answer: Yes, every layer can be edited or deleted afterward in terms of opacity, mode, mask, and settings.


