Do you want to take your image editing skills to the next level? With GIMP 2.10, you have access to a new, effective tool: the Warp-Transformation. Similar to the Liquify tool in Photoshop, this tool allows you to move pixels in your image and create impressive effects. In this guide, I will show you step by step how to make the most of the Warp Transformation.
Main Insights
- The Warp Transformation tool offers versatile options for image manipulation.
- It is important to experiment with the tool settings.
- You can use the tool for beauty retouching, model retouching, and more.
- Working with copies of the original layer is recommended to facilitate undoing changes.
Step-by-Step Guide
1. Activate Warp Transformation Tool
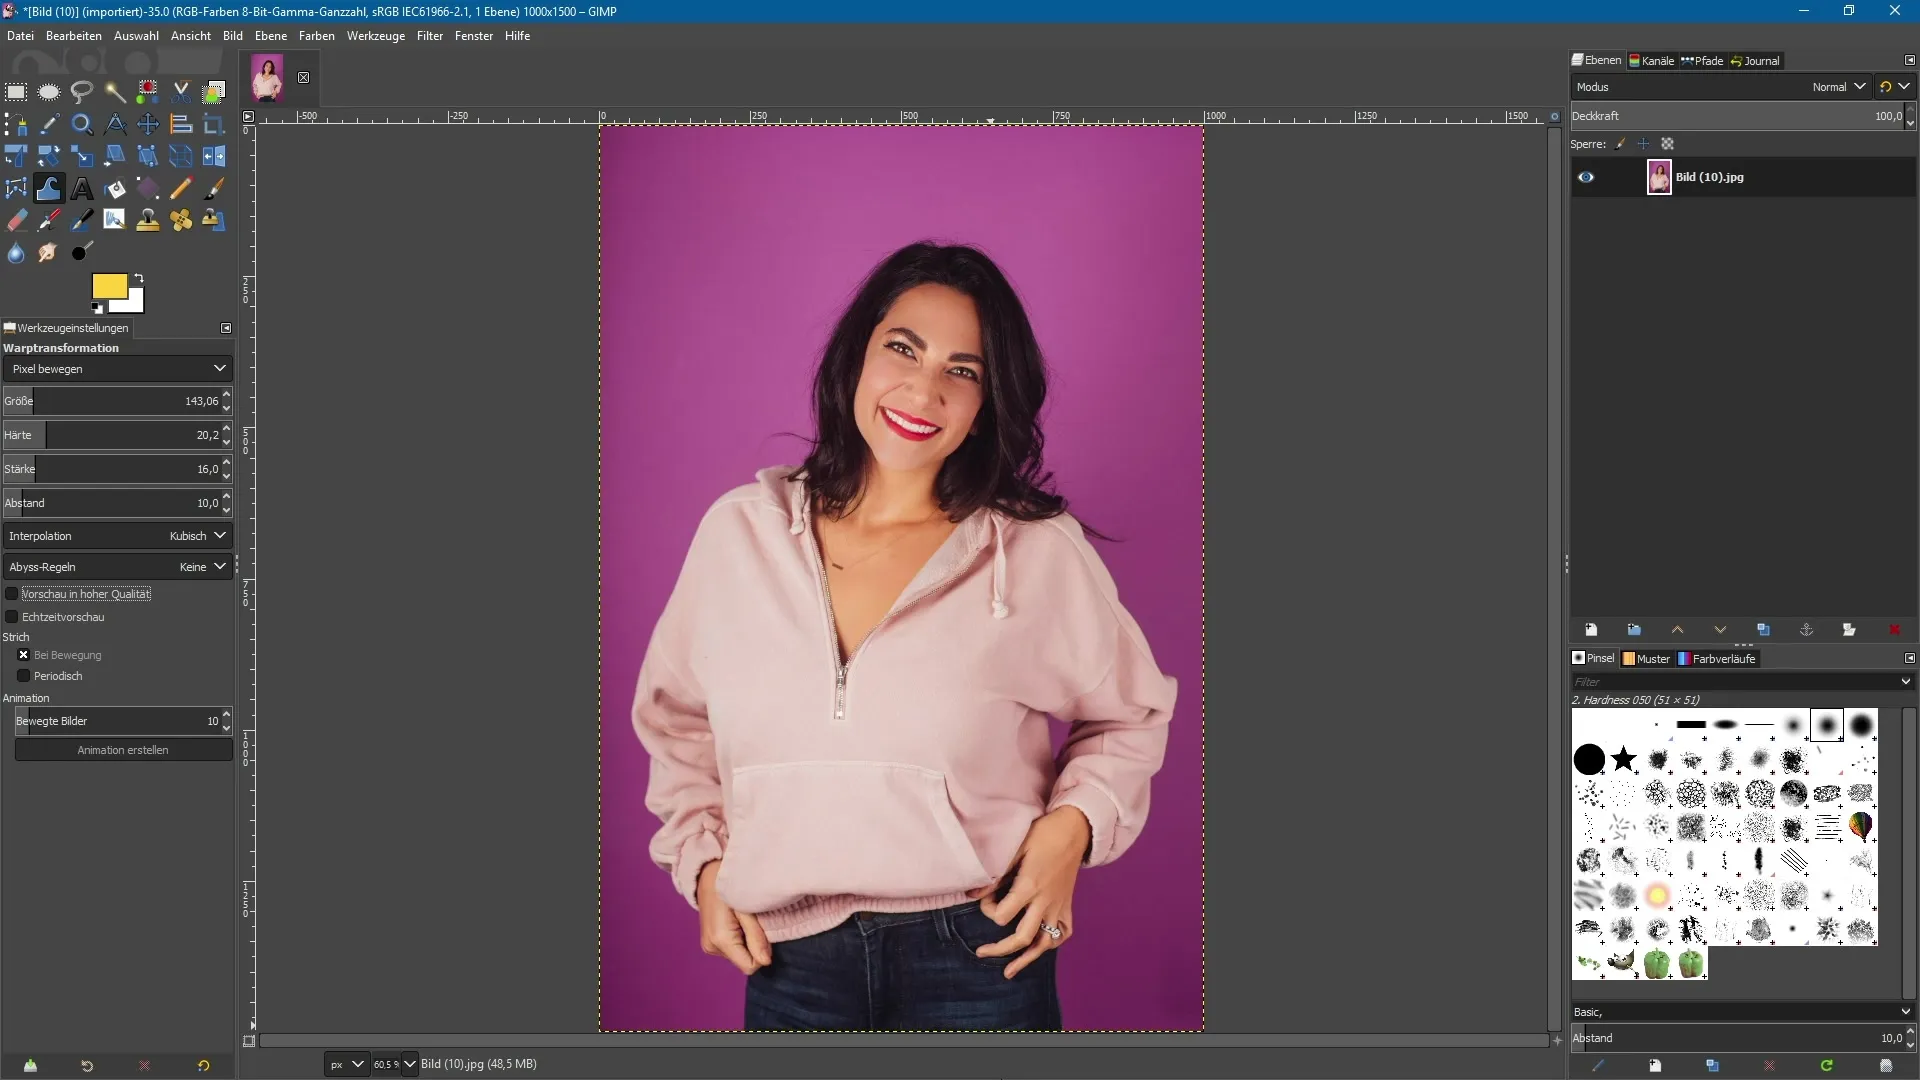
To start with the Warp Transformation, look for the corresponding icon in the toolbox. It may vary slightly depending on your selected icon theme. You can also quickly activate the tool by pressing the “W” key. Once the tool is active, you will see a variety of setting options.

2. Copy Original Layer
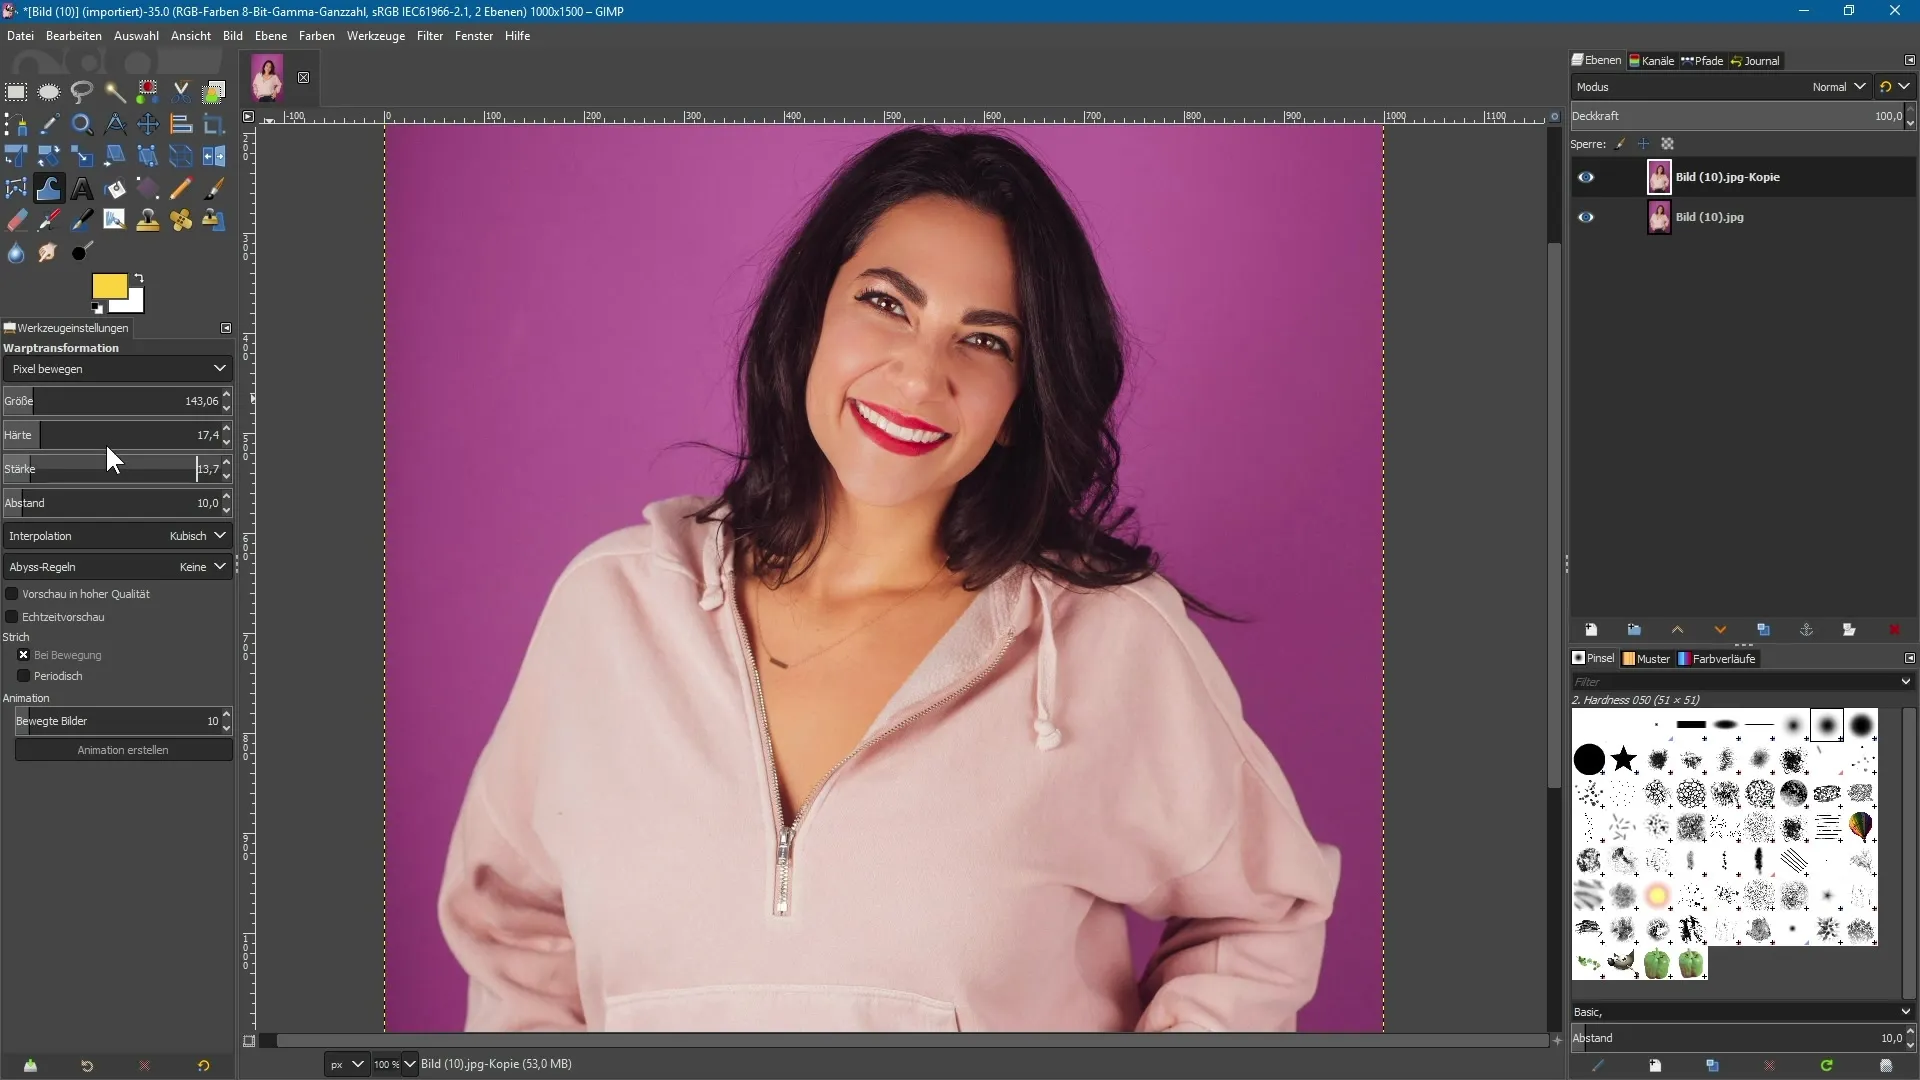
Since the Warp Transformation works destructively, I recommend creating a copy of your original layer. Click on the corresponding icons to create a layer duplication. This allows you to rollback edits if you are not satisfied with the result.
3. Set Up Workspace
In the tool settings, you can now specify exactly what you want to achieve with the Warp Transformation Tool. You have various options including enlarging and shrinking areas, as well as moving pixels. Experiment with the settings for size, hardness, and strength to precisely adjust the desired changes.
4. Move Pixels
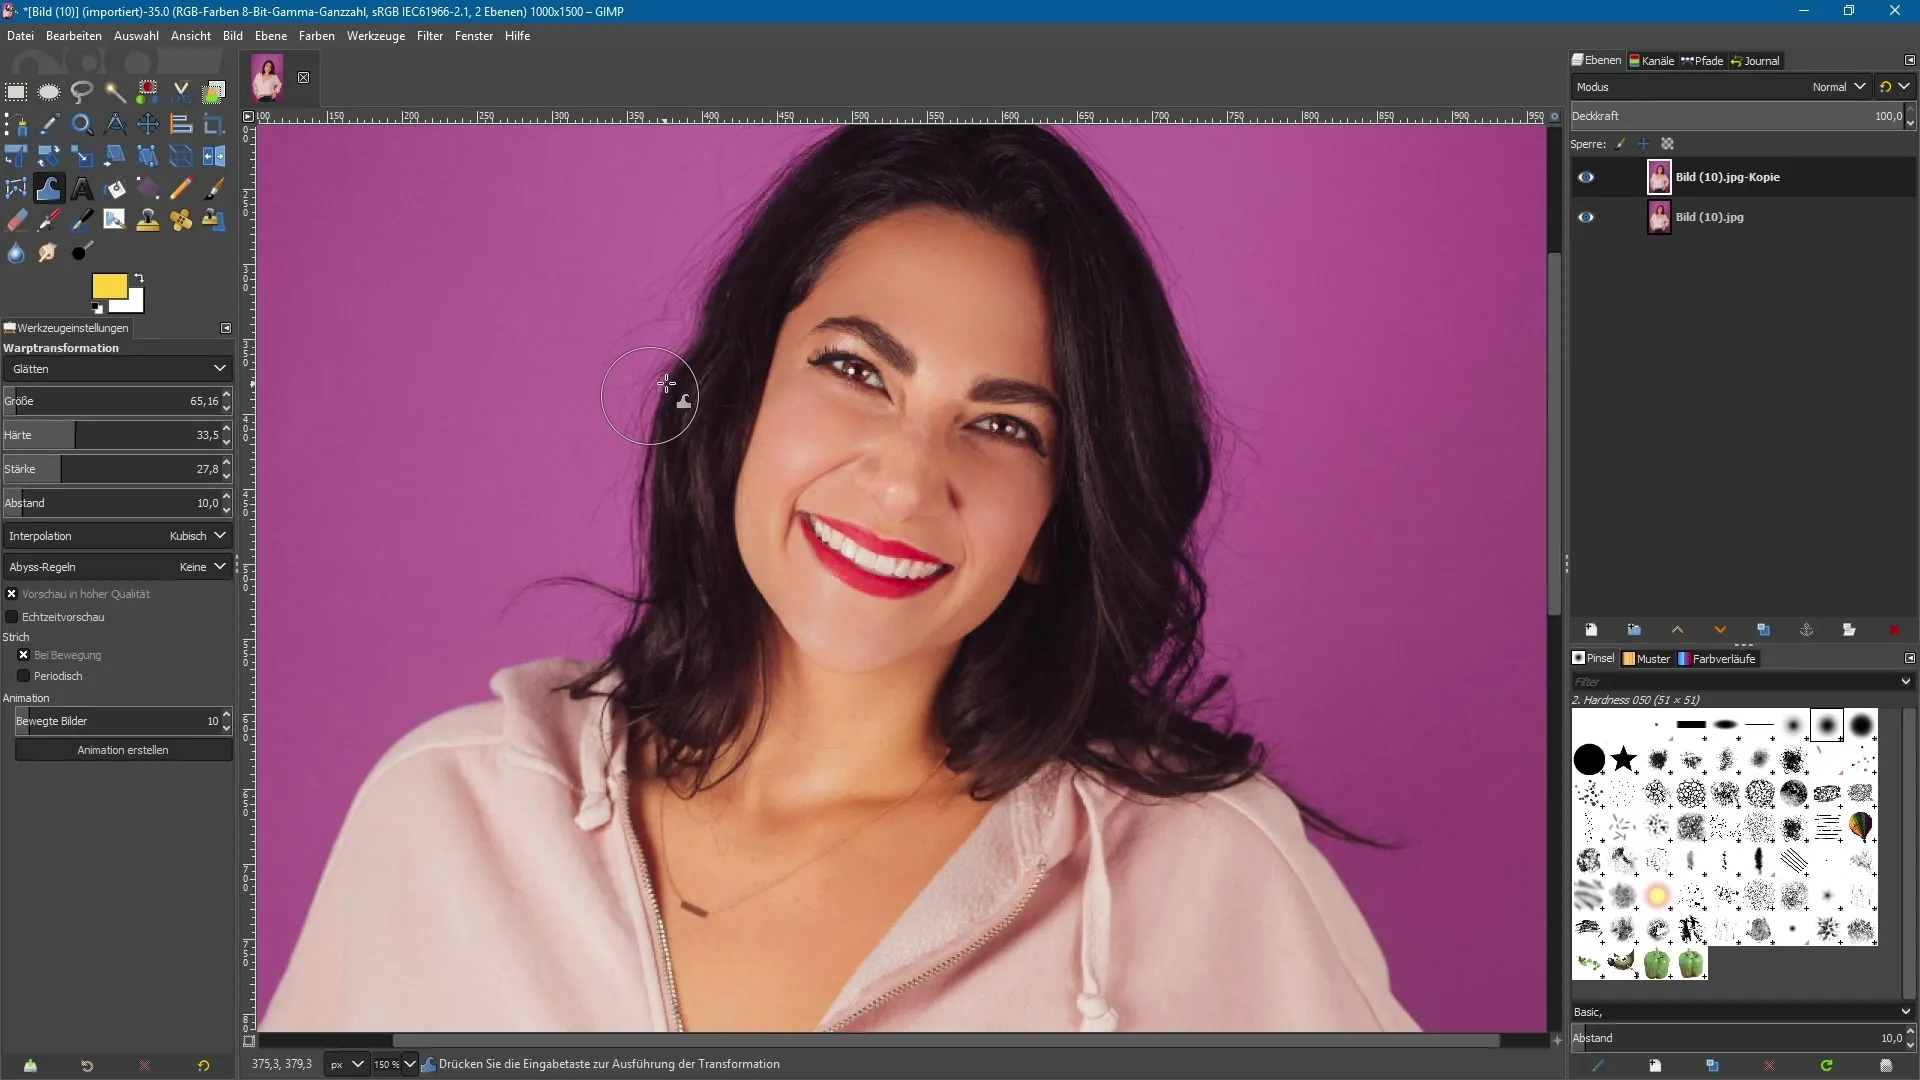
You can now work directly in the image. For example, if you want to slim down a person's hair, you can activate the tool and select the area. Click and drag to the right to manipulate the desired pixels. If the image looks pixelated, enable the high-quality preview to see better results.

5. Corrections and Smoothing
If you are not entirely satisfied with an area or it looks too heavily edited, you have the option to use the smoothing option. This allows you to quickly revert unwanted effects and restore a softer look to the image. Also, experiment with undoing effects to gain more control over your changes.

6. Enlarging and Reducing Areas
With the Warp Transformation Tool, you can also enlarge or reduce areas. If you want to create the effect of larger eyes, select the enlargement option and adjust the brush size for quicker results. Click and drag over the desired area to apply this effect.
7. Rotating Pixels
Another exciting feature is the ability to rotate pixels clockwise or counterclockwise. This option can create interesting and creative effects. Click and drag over the corresponding areas in the image to apply the desired rotation to the pixels.
8. Undo Changes
If you do not like the result, it is easy to reset changes. Click on “Undo Effect” in the menu and paint over the edited areas to correct them. This ensures that you always have control over your edits and can quickly fix unwanted effects.
9. Layer Management
Don't forget that you can hide or delete the edited layer at any time to restore the original image. Use the eye symbol feature in the layer options to keep an overview of your work.
10. Experiment and Perfect
The Schmidt tool provides you with numerous options for customization, especially for beauty retouching and model retouching. Try out different settings and find out what works best for your image. The tool settings are versatile and require some adventurousness.
Summary – Warp Transformation in GIMP 2.10 – Professional Image Retouching Made Easy
With the Warp Transformation in GIMP 2.10, you can effectively retouch and adjust your images. By working with copies of the original layer and utilizing the versatile tool settings, you gain creative control over your image edits. The tool allows you to make both subtle and dramatic changes, making it ideal for beauty and model retouching. You will quickly discover how much easier it is to achieve impressive results with this new tool from GIMP.
Frequently Asked Questions
How do I activate the Warp Transformation tool?You can find the tool in the toolbox or use the “W” key.
Is it possible to undo changes?Yes, you can hide or delete the edited layer at any time to restore the original.
How can I adjust the brush size?You can do this in the tool settings to target specific areas for editing.
Can I use the tool for other effects as well?Yes, you can rotate pixels clockwise or counterclockwise to create interesting effects.
What is the difference between smoothing and undoing an effect?Smoothing reduces the intensity of an edit, while undoing an effect completely removes the edit.


