GIMP 2.10 brings a number of exciting improvements, especially in the area of repair tools. The tools responsible for editing images and removing unwanted elements have made significant progress. From now on, you can work on a transparent layer, giving you more flexibility and control over your changes. Dive into the new possibilities and learn how to use the repair tools efficiently.
Key Insights
- The repair tools, including the clone and heal tools, have been revamped.
- It is now possible to work on a transparent layer, avoiding destructive image editing.
- Changes can be undone or adjusted at any time without affecting the original image.
Step-by-Step Guide
To effectively use the new repair tools in GIMP 2.10 follow this step-by-step guide:
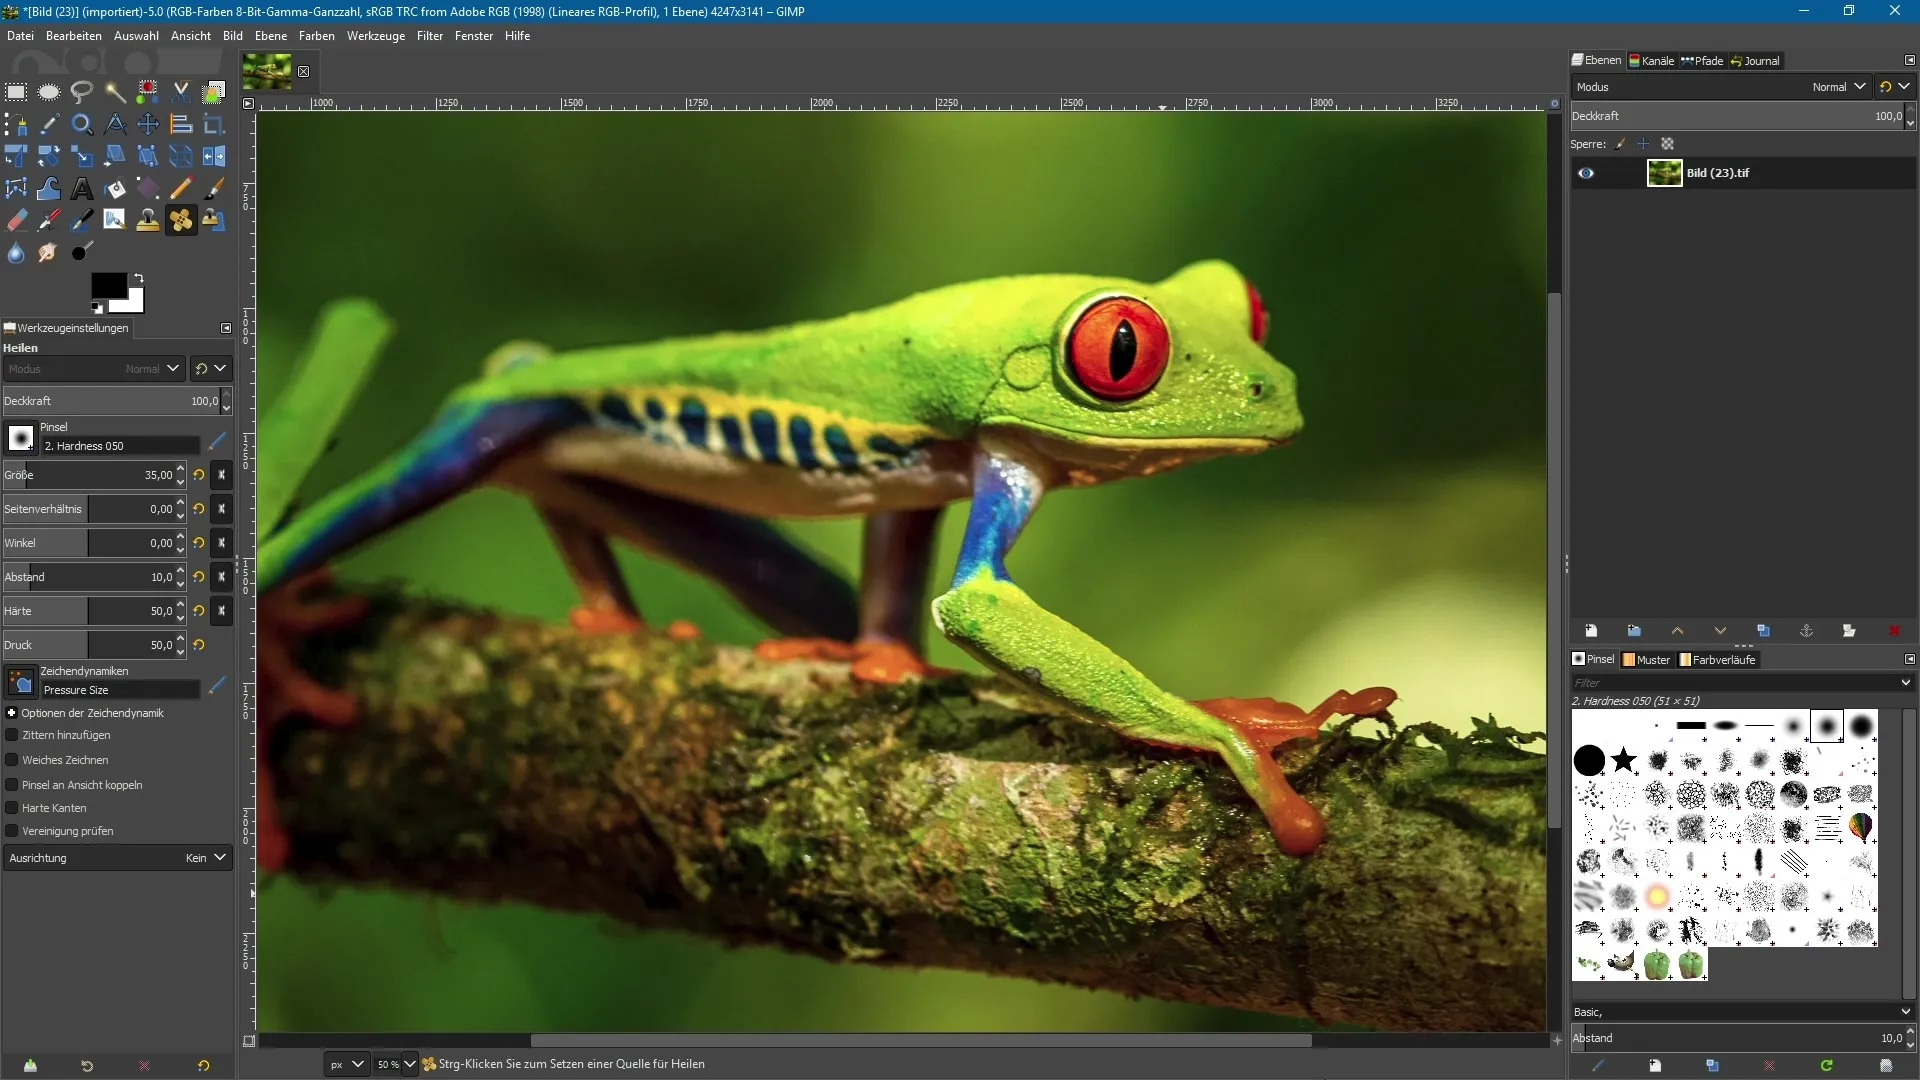
First, open GIMP 2.10 and load the image you want to edit. This forms the foundation of your image editing and allows you a clear view of the planned changes.

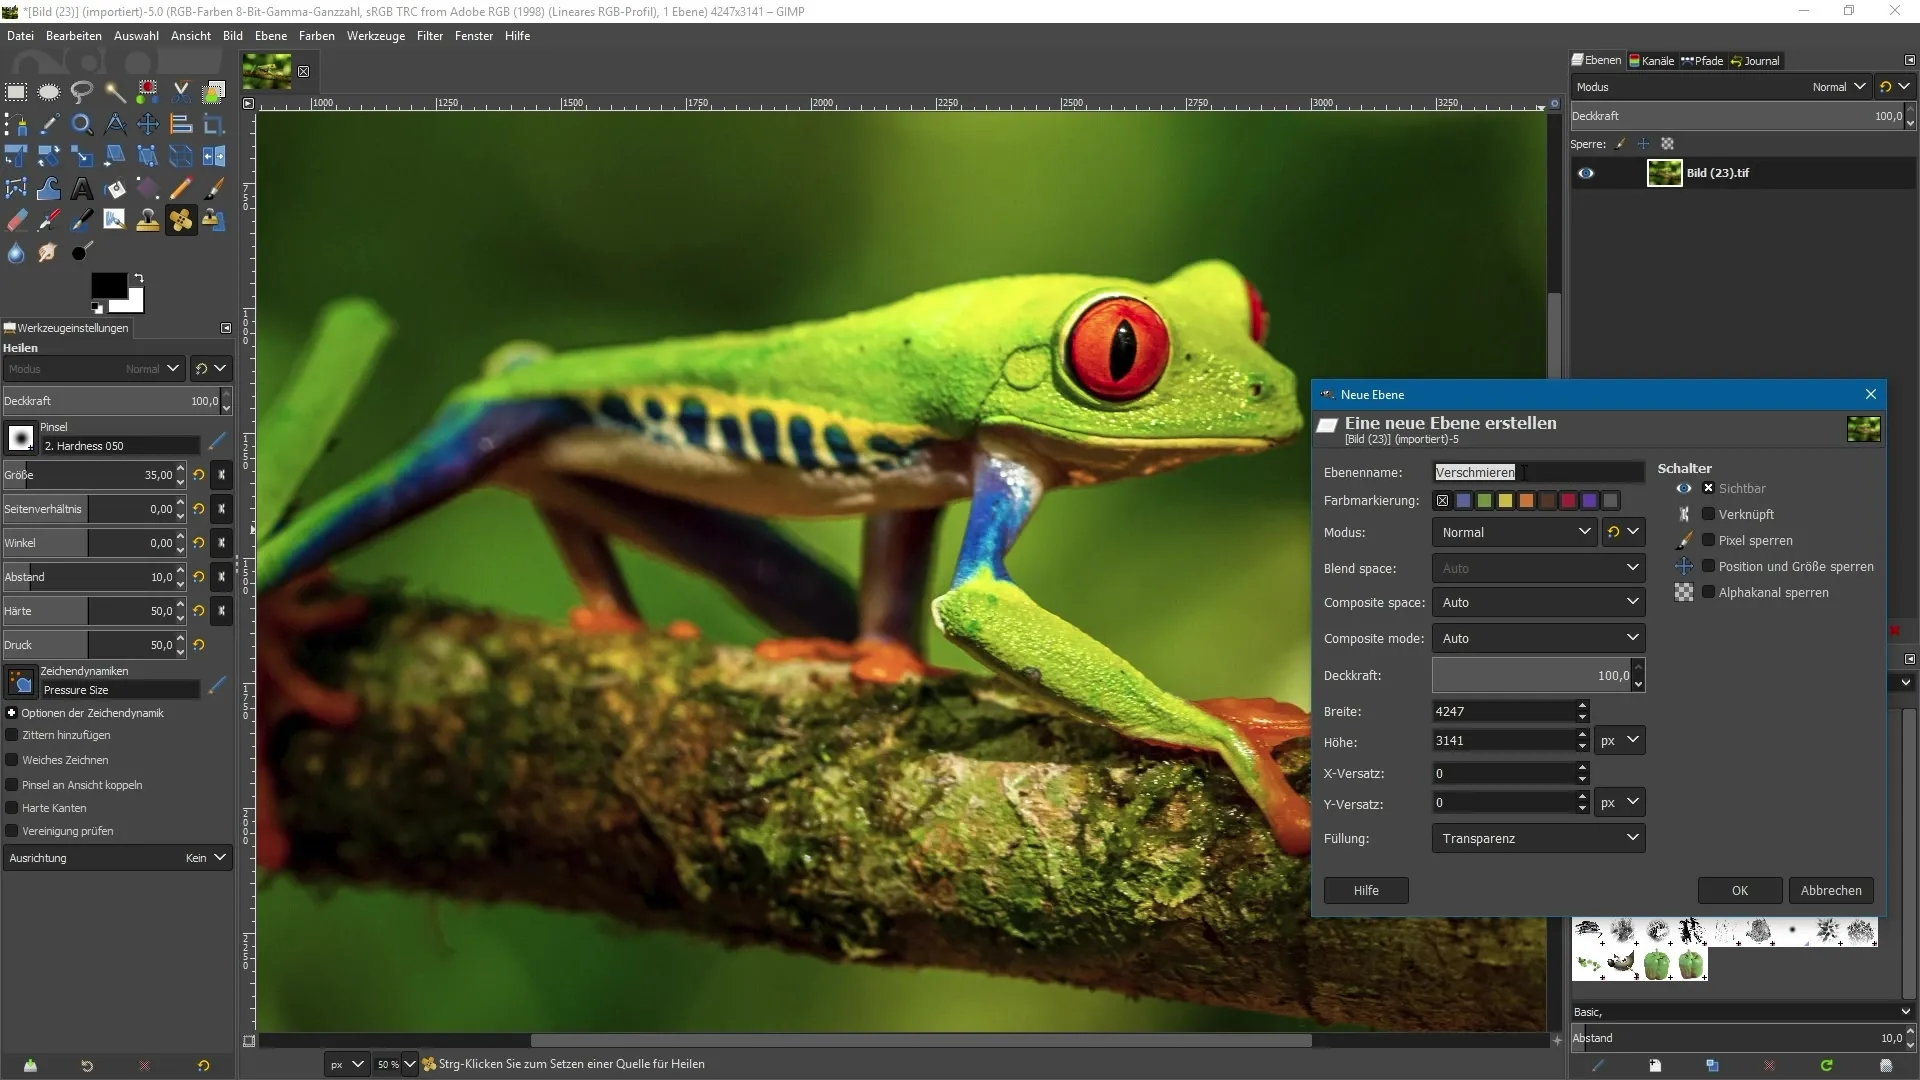
To create a new transparent layer, go to the layers palette and click on “New Layer.” Name the new layer as you wish, for example “Repair,” and make sure to set the fill to “Transparency.” This will insert the new layer over your image, which will later be used for editing.

Now activate the heal tool, which you’ll find in the toolbox. Make sure the brush size meets your needs. You can easily adjust the size of the brush to achieve the best results. A well-sized brush can help you work precisely and edit delicate areas of the image.
One of the new features in GIMP 2.10 is the “Check Union” option. This is especially useful when it comes to selecting specific areas of an image to sample textures or information from other areas. Enable this option to work with the specific selection.
To correct an area, hold down the control key and click on the area of the image that you want to use as a source for your repair. With this technique, you can edit any disturbance or imperfection in the image. Then paint over the area you want to remove, making sure to move your brush smoothly for a clean result.
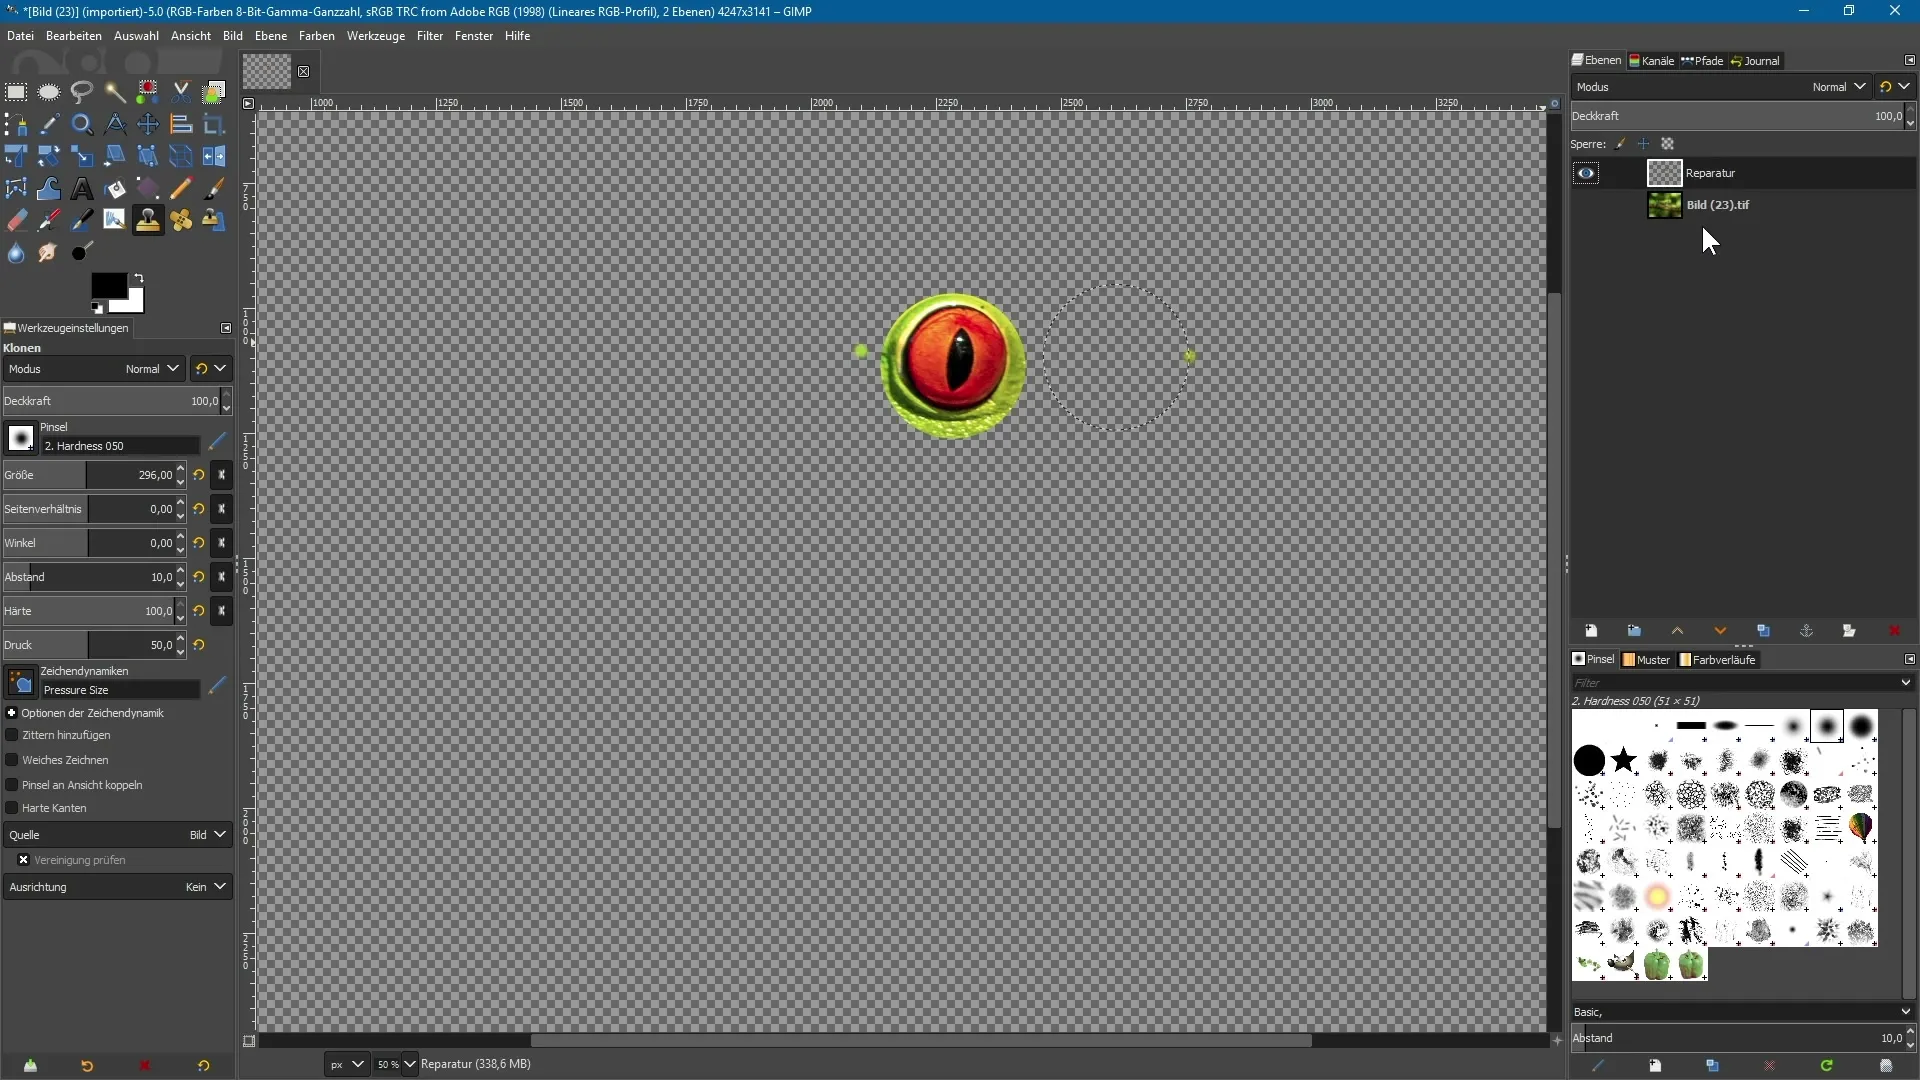
You will notice that the editing is non-destructive, as the area is added to the transparent layer. This means you can hide the repair layer or delete the changes made at any time without affecting the original image.
This allows you to make changes effortlessly. Activate the cloning tool to copy parts of an image one-to-one. Again, adjust the brush size as needed and select the “Check Union” function again. Once you have chosen a source, you can perform the cloning and make your changes.
For more precise editing, make sure to set the hardness of the brush so that you can adjust the edges of the cloning. After each step, it’s advisable to regularly check what the image looks like and if the changes meet your expectations.
Once you are finished with the cloning process, you can hide the transparent layer to see how the edits look combined with the original image. These improvements to the repair tools in GIMP 2.10 allow you a high level of control and detail in your image editing.

Summary – Effectively Using Repair Tools in GIMP 2.10
The new repair tools in GIMP 2.10 offer you flexible options to remove distracting image elements without damaging the original image. You can work on a transparent layer, allowing you to make adjustments or restore areas at any time. These revolutionary features significantly enhance your efficiency in image editing.
Frequently Asked Questions
What are the new features of the repair tools in GIMP 2.10?The repair tools have been improved, particularly the clone and heal tools. You can now also work on a transparent layer.
How do I create a transparent layer in GIMP?Go to the layers palette, click on “New Layer” and choose “Transparency” as the fill.
Can I undo changes?Yes, you can show or hide the transparent layer at any time and make changes to it.
What does the “Check Union” function do?It allows you to define an area in the image whose material will be used as a source for repairs.
How can I use the cloning tool effectively?Activate the cloning tool, select your source, and adjust the brush size and hardness to achieve the desired result.


