The revised Gradient-Tool in GIMP 2.10 allows for a more user-friendly and efficient design of gradients. The fundamental changes make the work more flexible and non-destructive, which means you can make adjustments even after creating the gradient without any hassle. This guide helps you discover and utilize the new features of the gradient tool step by step.
Key Insights
- The gradient tool has been fundamentally revised.
- Projection changes are not immediately permanent.
- Working on separate layers preserves the original images.
Step-by-Step Guide
To use the gradient tool effectively, follow these steps:
1. Create Transparent Layer
To draw your gradients, start by creating a new transparent layer. Click on the corresponding icon or use the keyboard shortcut “g” to activate the gradient tool. To create the new layer, click on the layers menu and select “New Layer.” Name it, for example, “Gradient” and click “OK.”
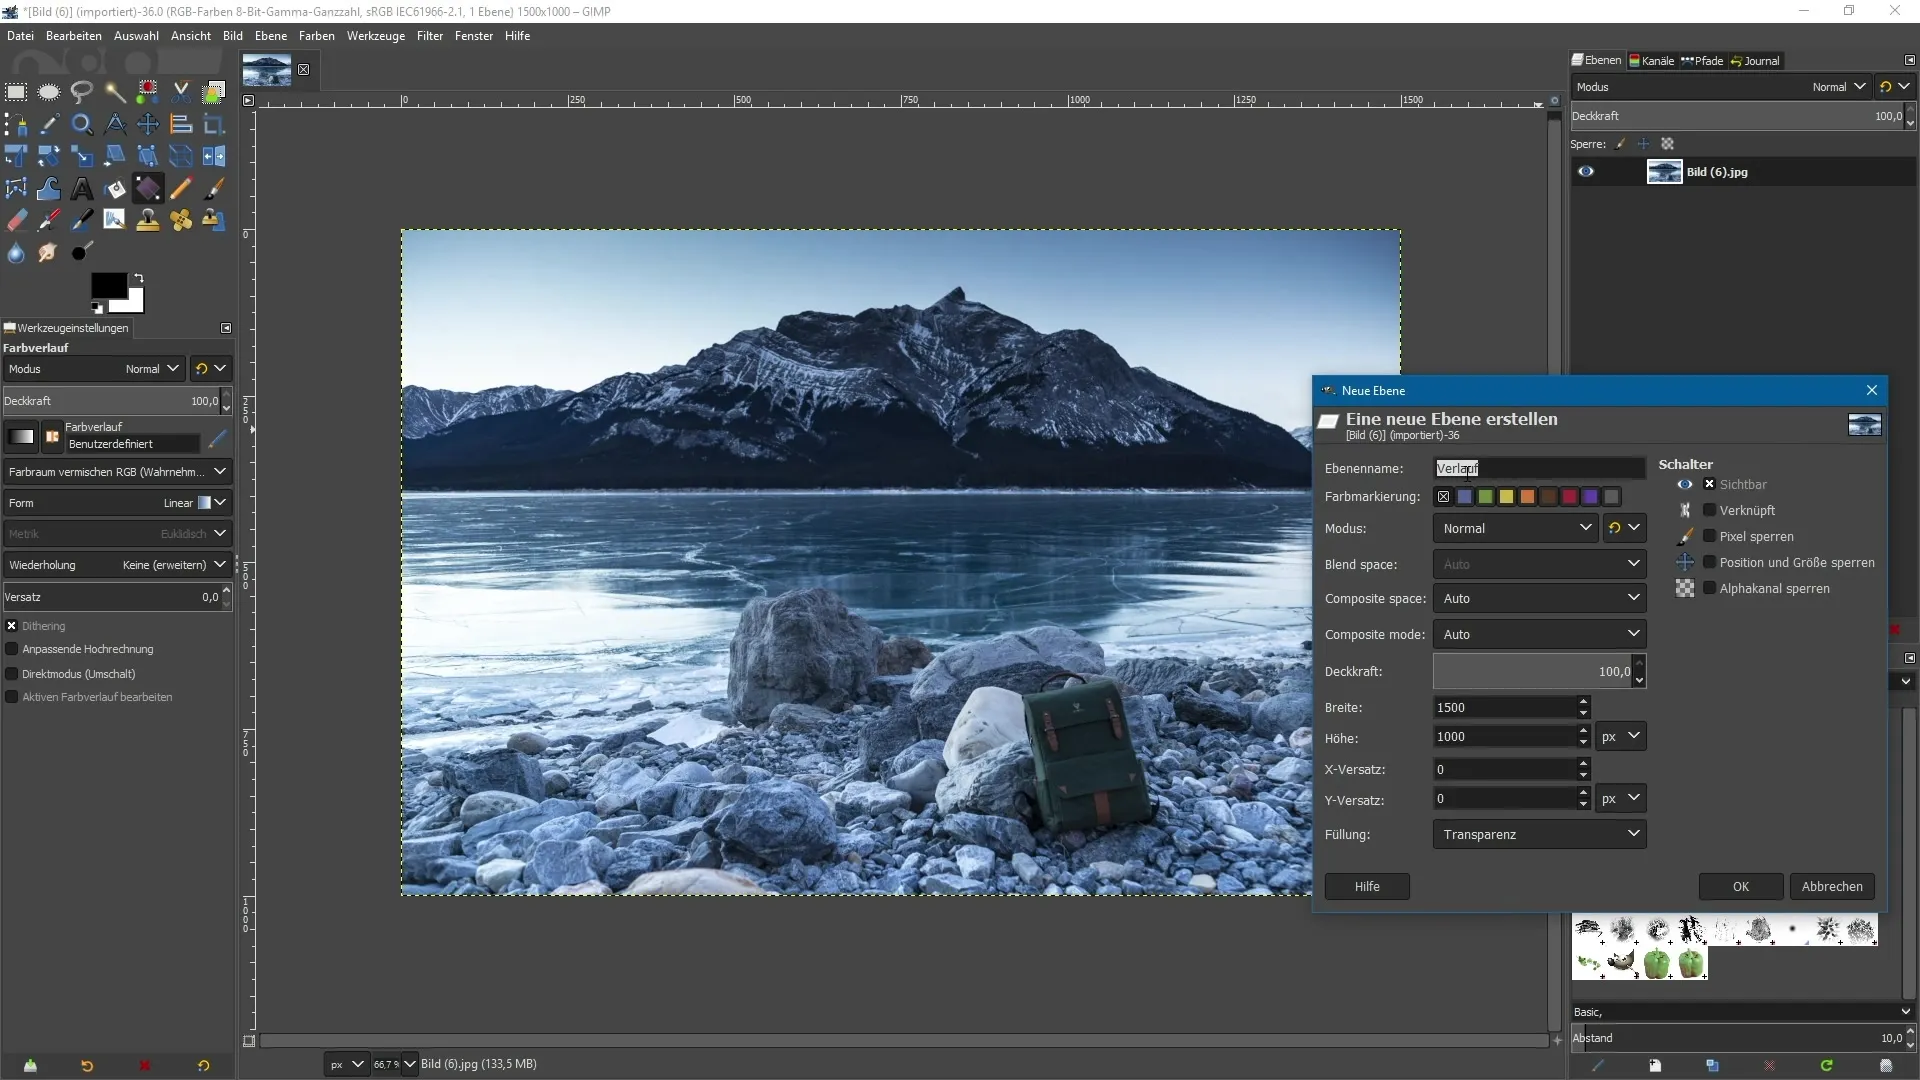
2. Select Gradient Modes
Now you can select your gradient mode. When in the tool options, you have the option to choose from various layer modes. For the current project, leave it set to “Normal.” This mode is useful when the gradient is to affect the layers beneath.
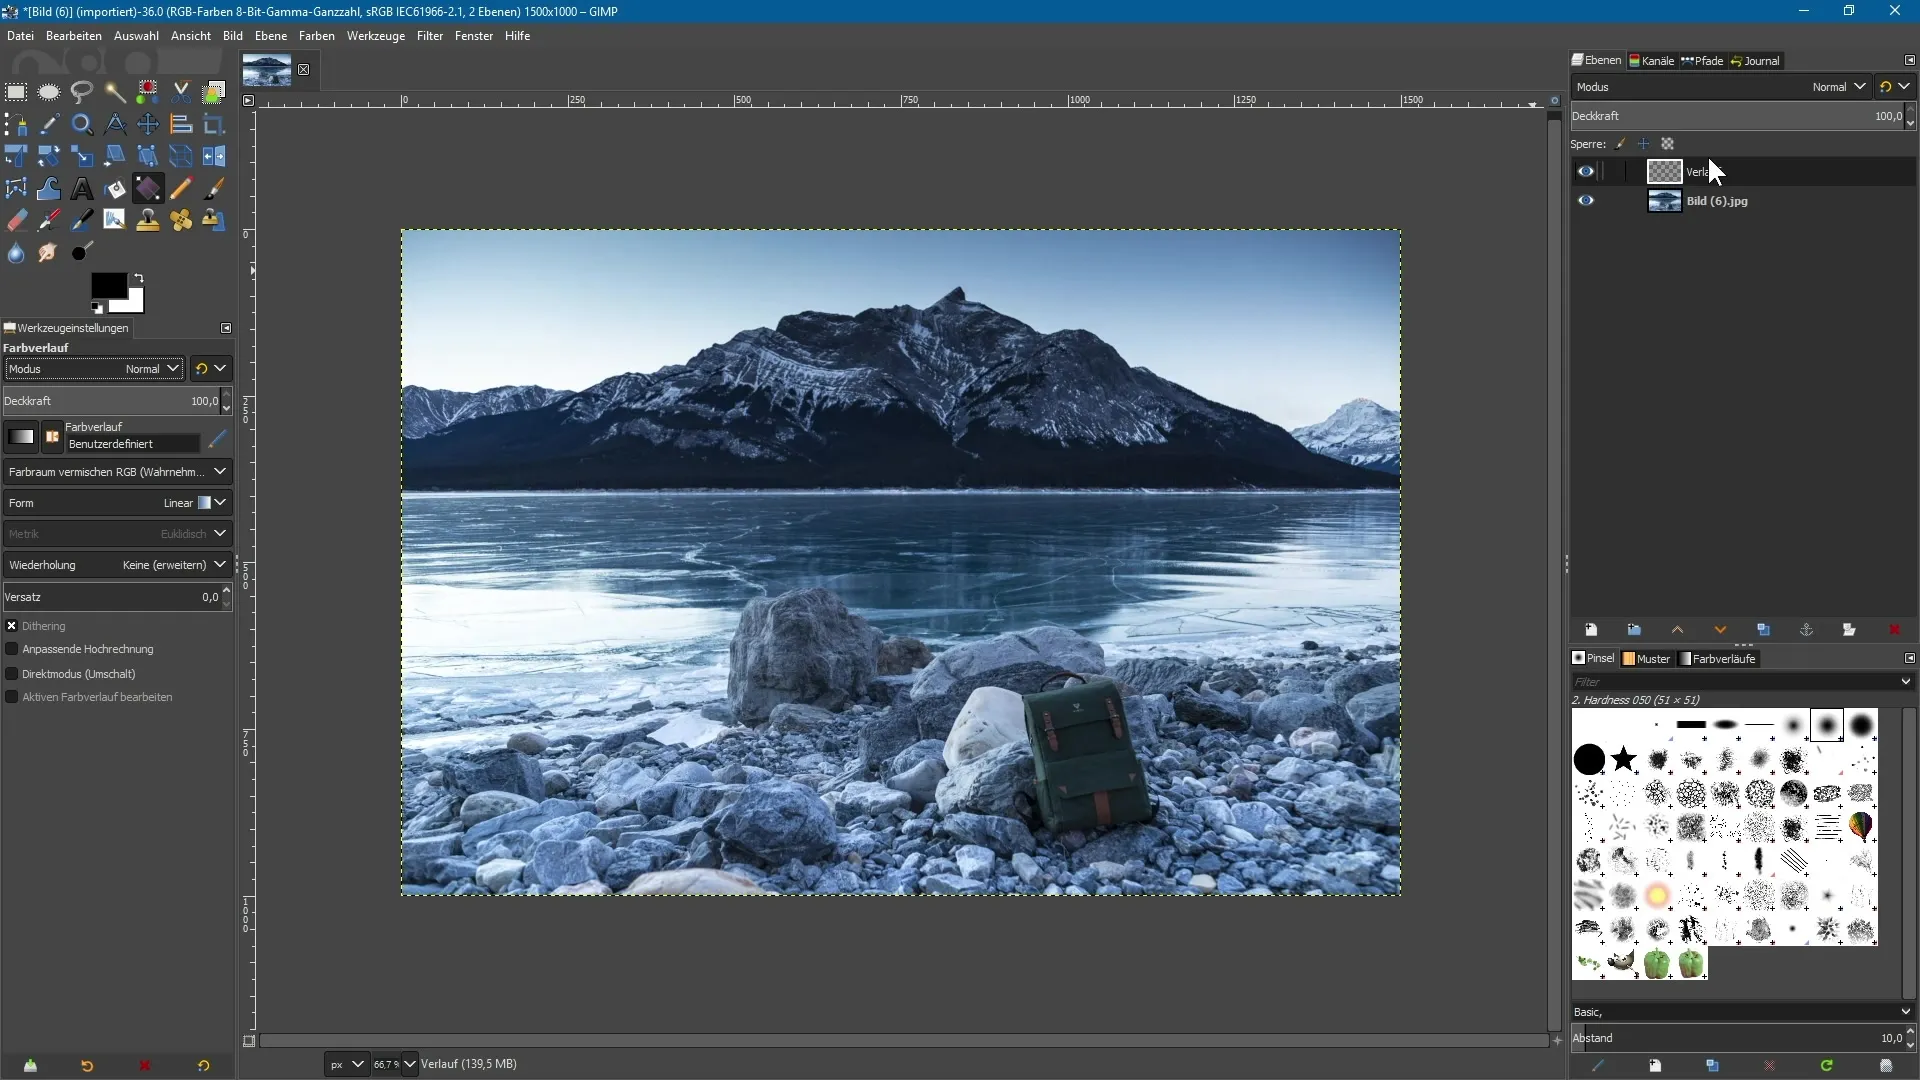
3. Choose and Apply Gradient
In the tool settings, you will see the selection for the gradient. Choose a gradient from the foreground color to the background color, for example from a yellow tone to a red tone. To apply the gradient, click and drag with the left mouse button in your workspace. While holding down the mouse button, drag from bottom to top and then release.
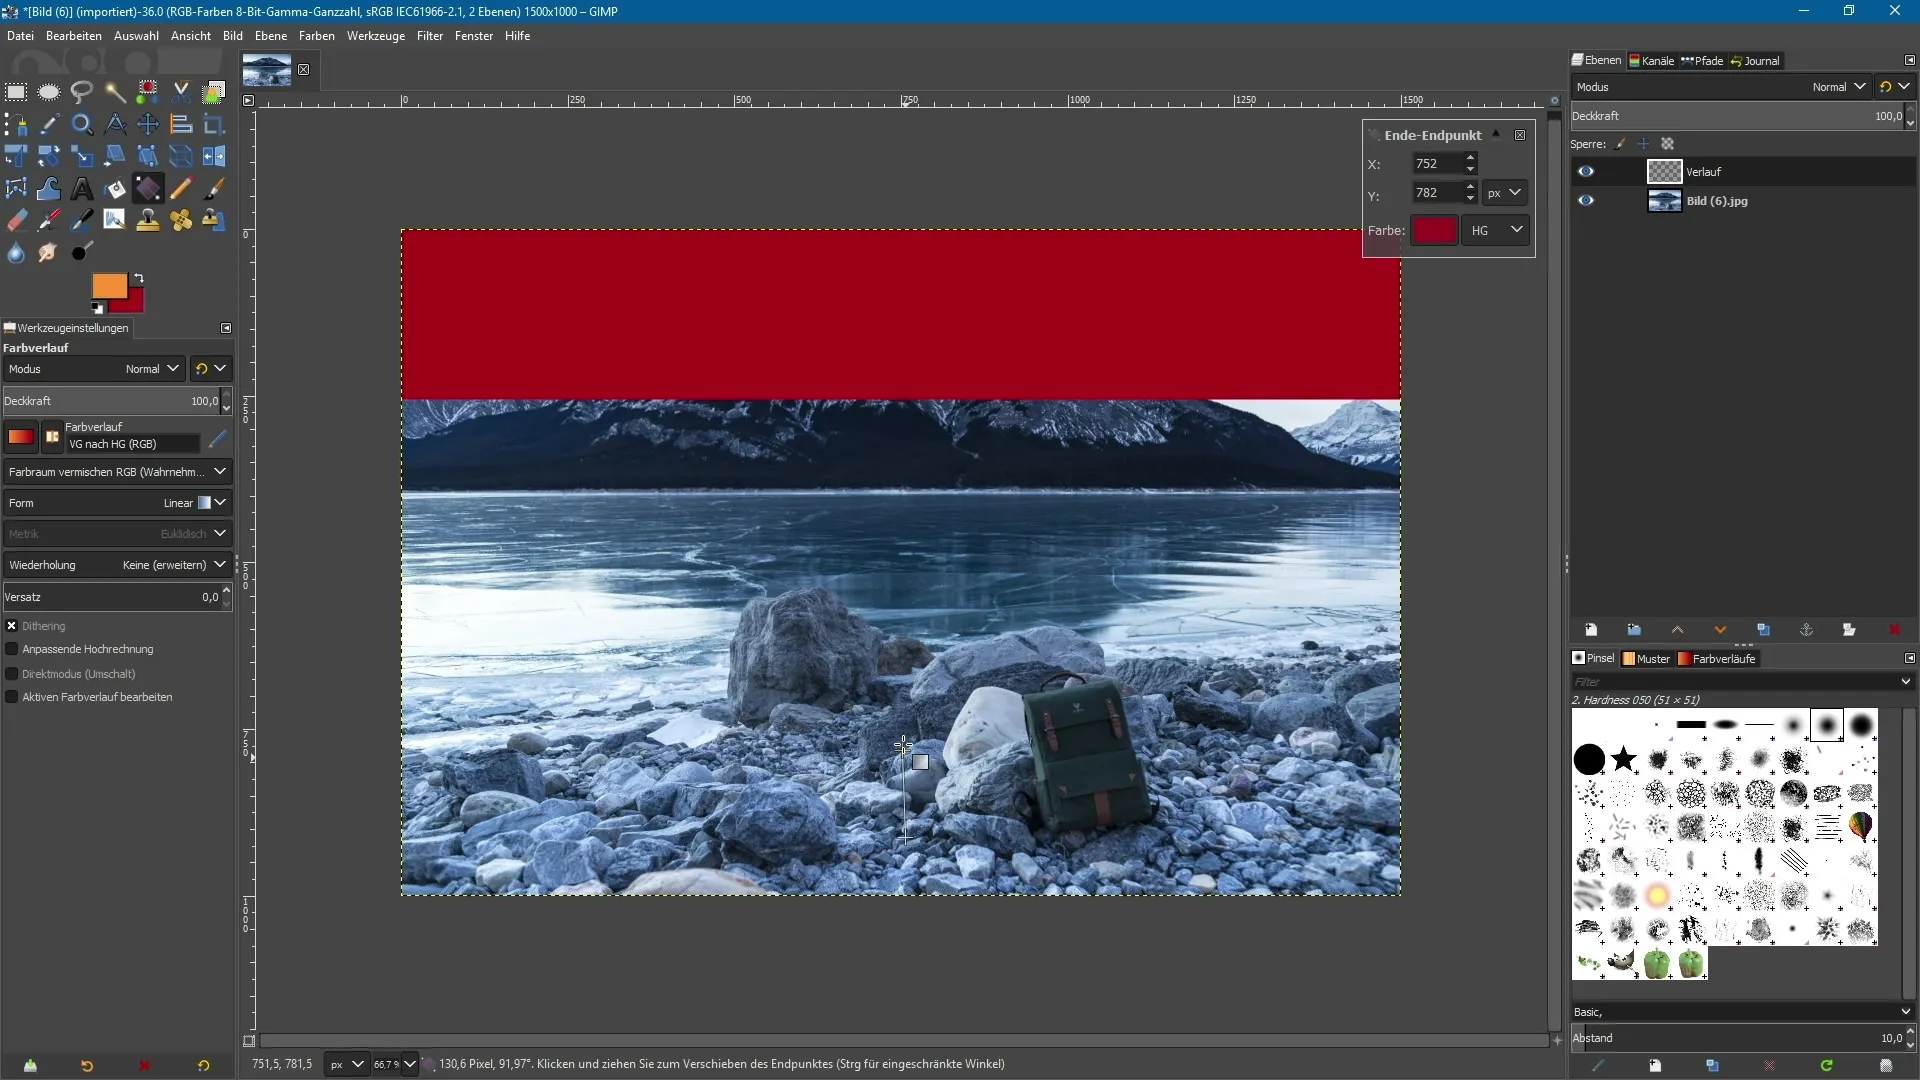
4. Adjust Gradient
After creating the gradient, you can continue to adjust the control elements easily. As long as you do not switch to another tool, the controls remain active, and you can change the position and shape of the gradient live.
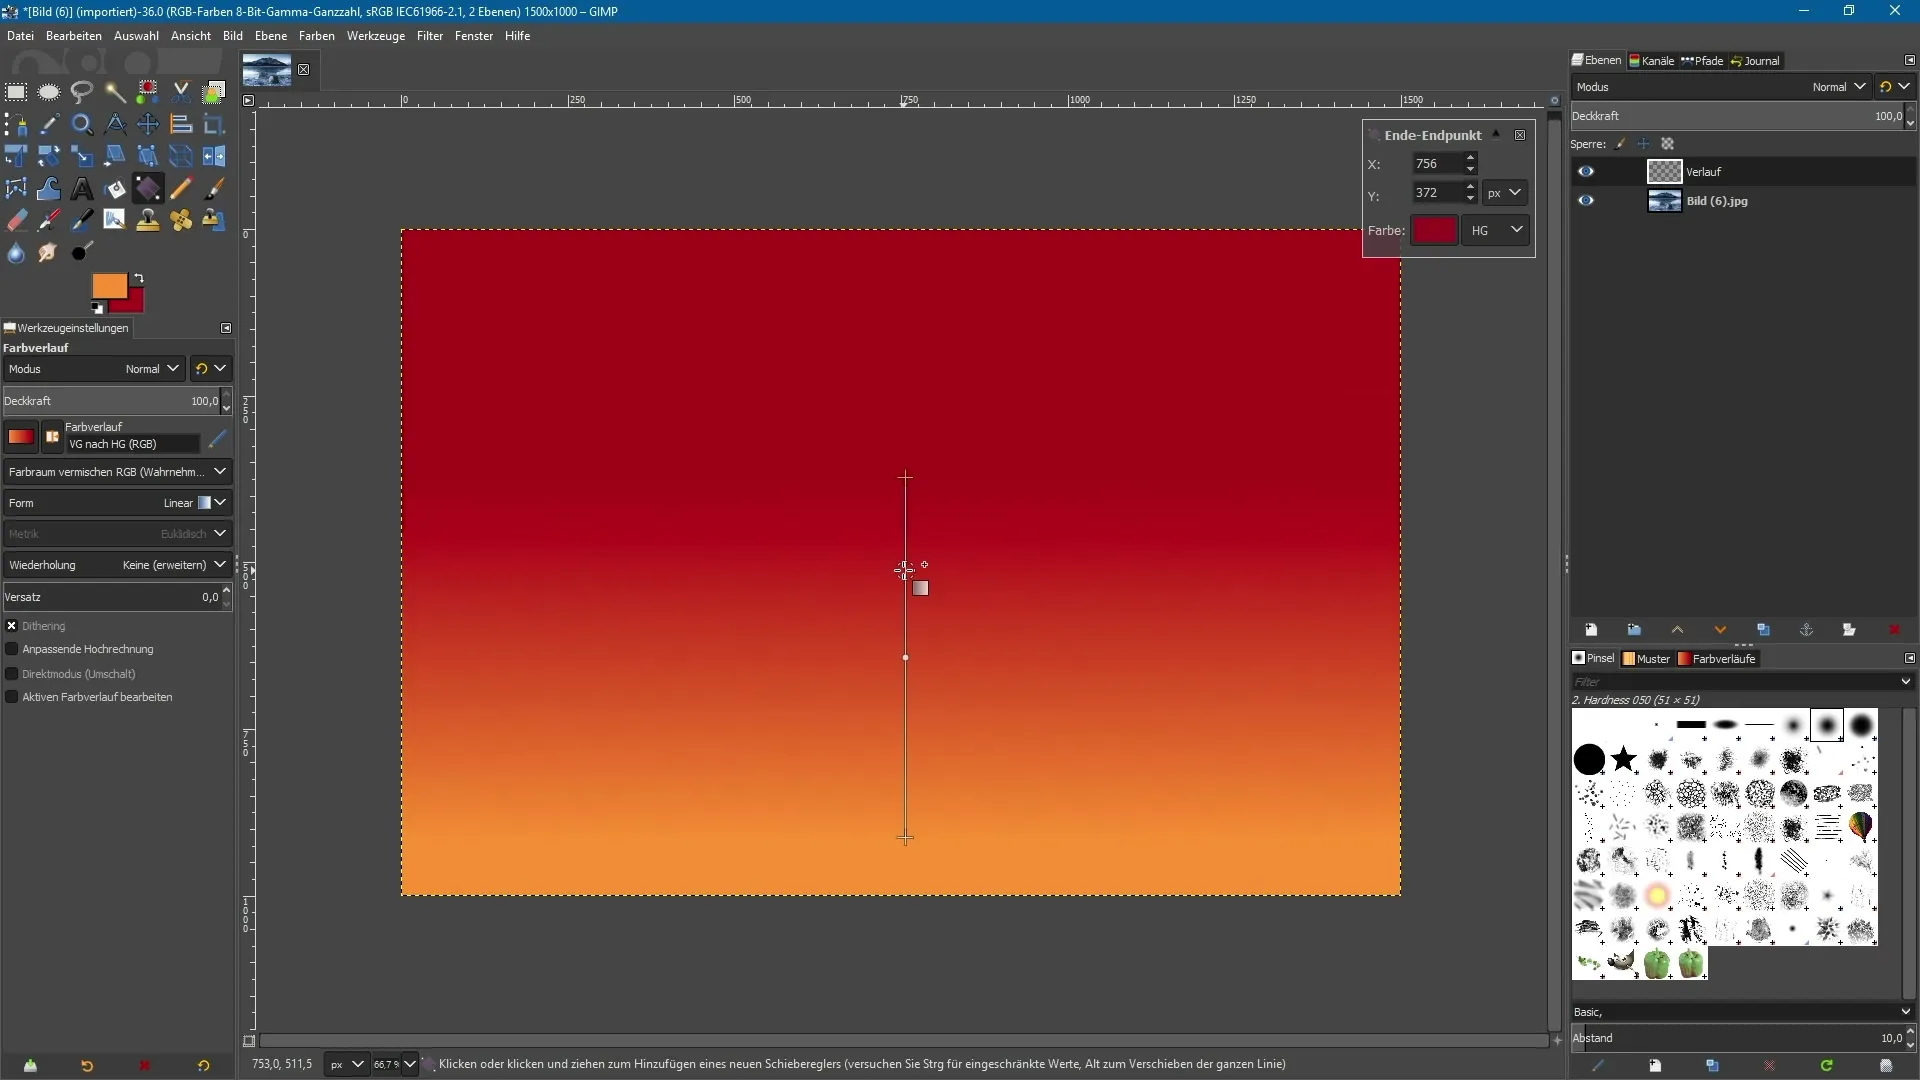
5. Tilt Gradient and Move Center Point
With the help of the controls, you can further adjust the gradient. You can not only tilt it, but also move the center point to change the colors. Click on the small dot between the two endpoints and drag it to the desired position.
6. Add Anchor Points
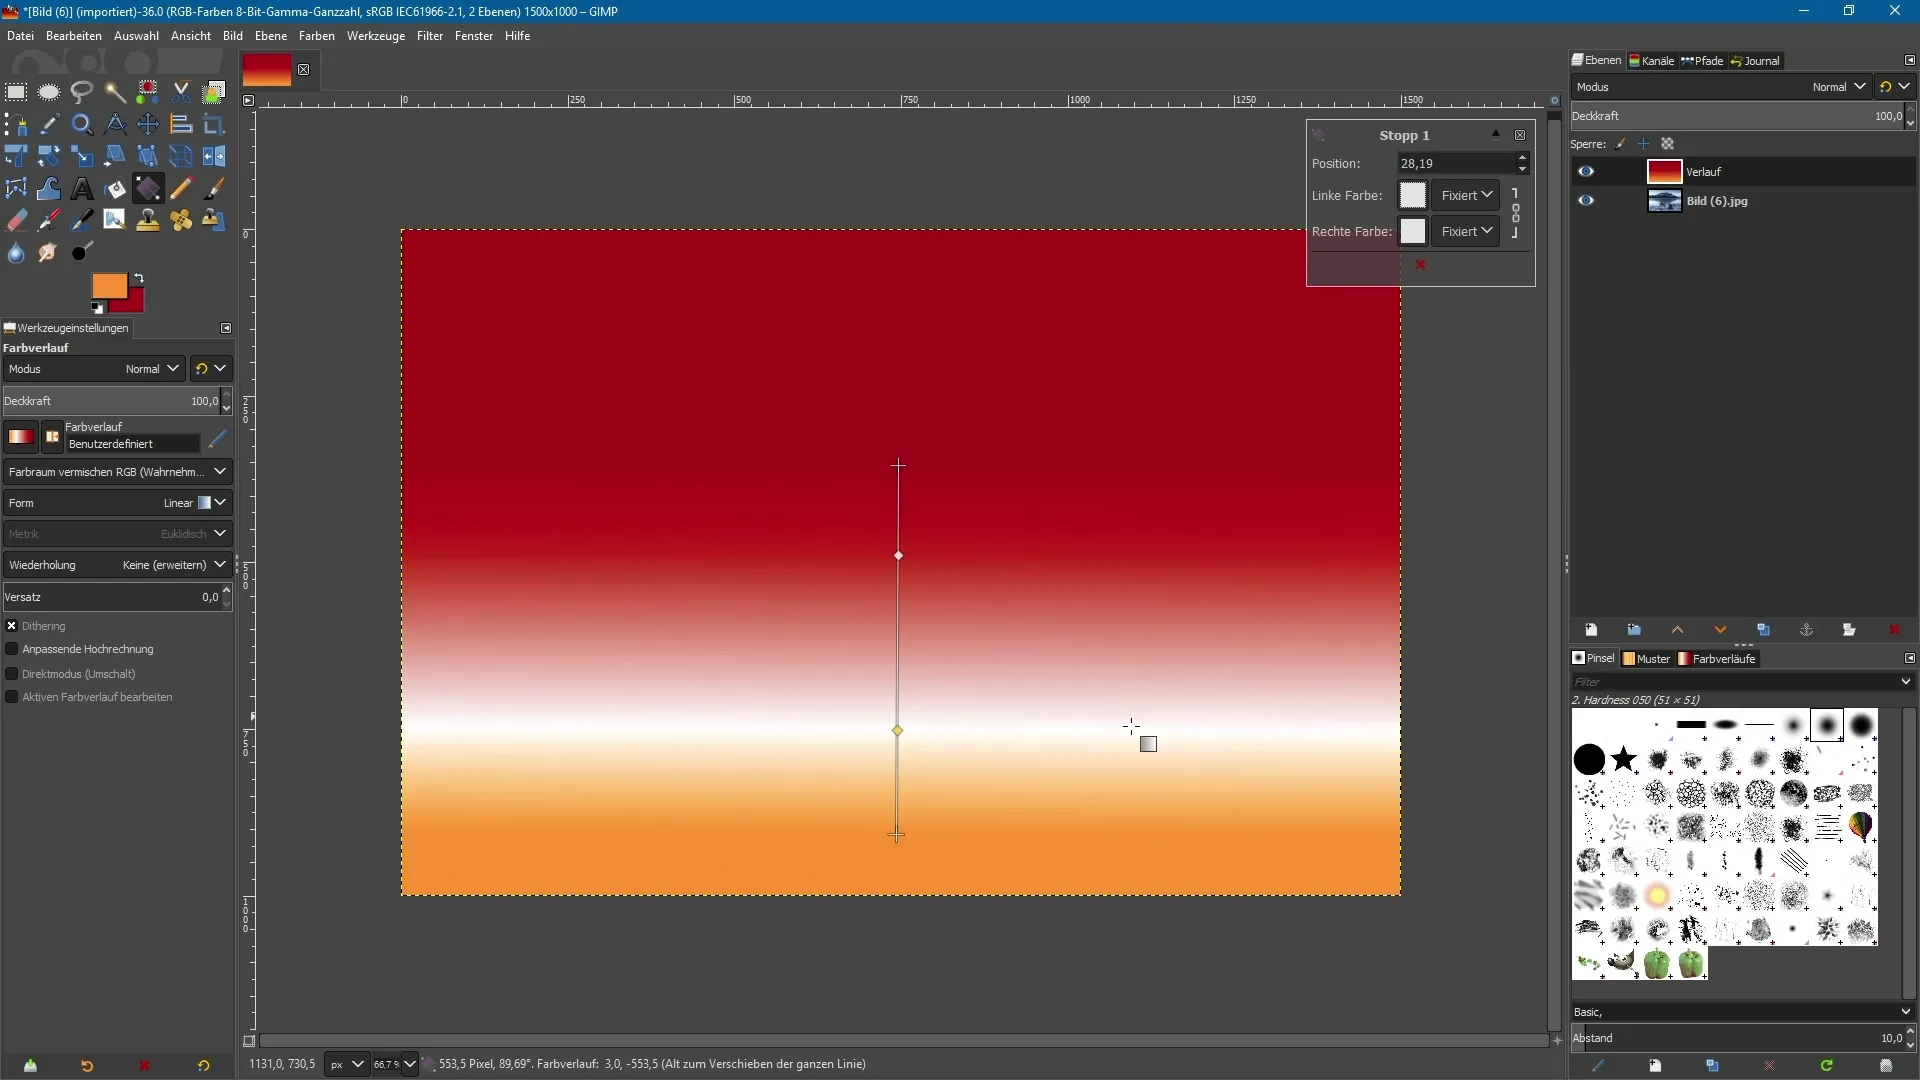
You can add more anchor points to your gradient to achieve more complex transitions. Simply click at the position where you want to place a new point. These points can then be individually colored to create varied color transitions by clicking on the color field and selecting a new color.
7. Set Gradient Type
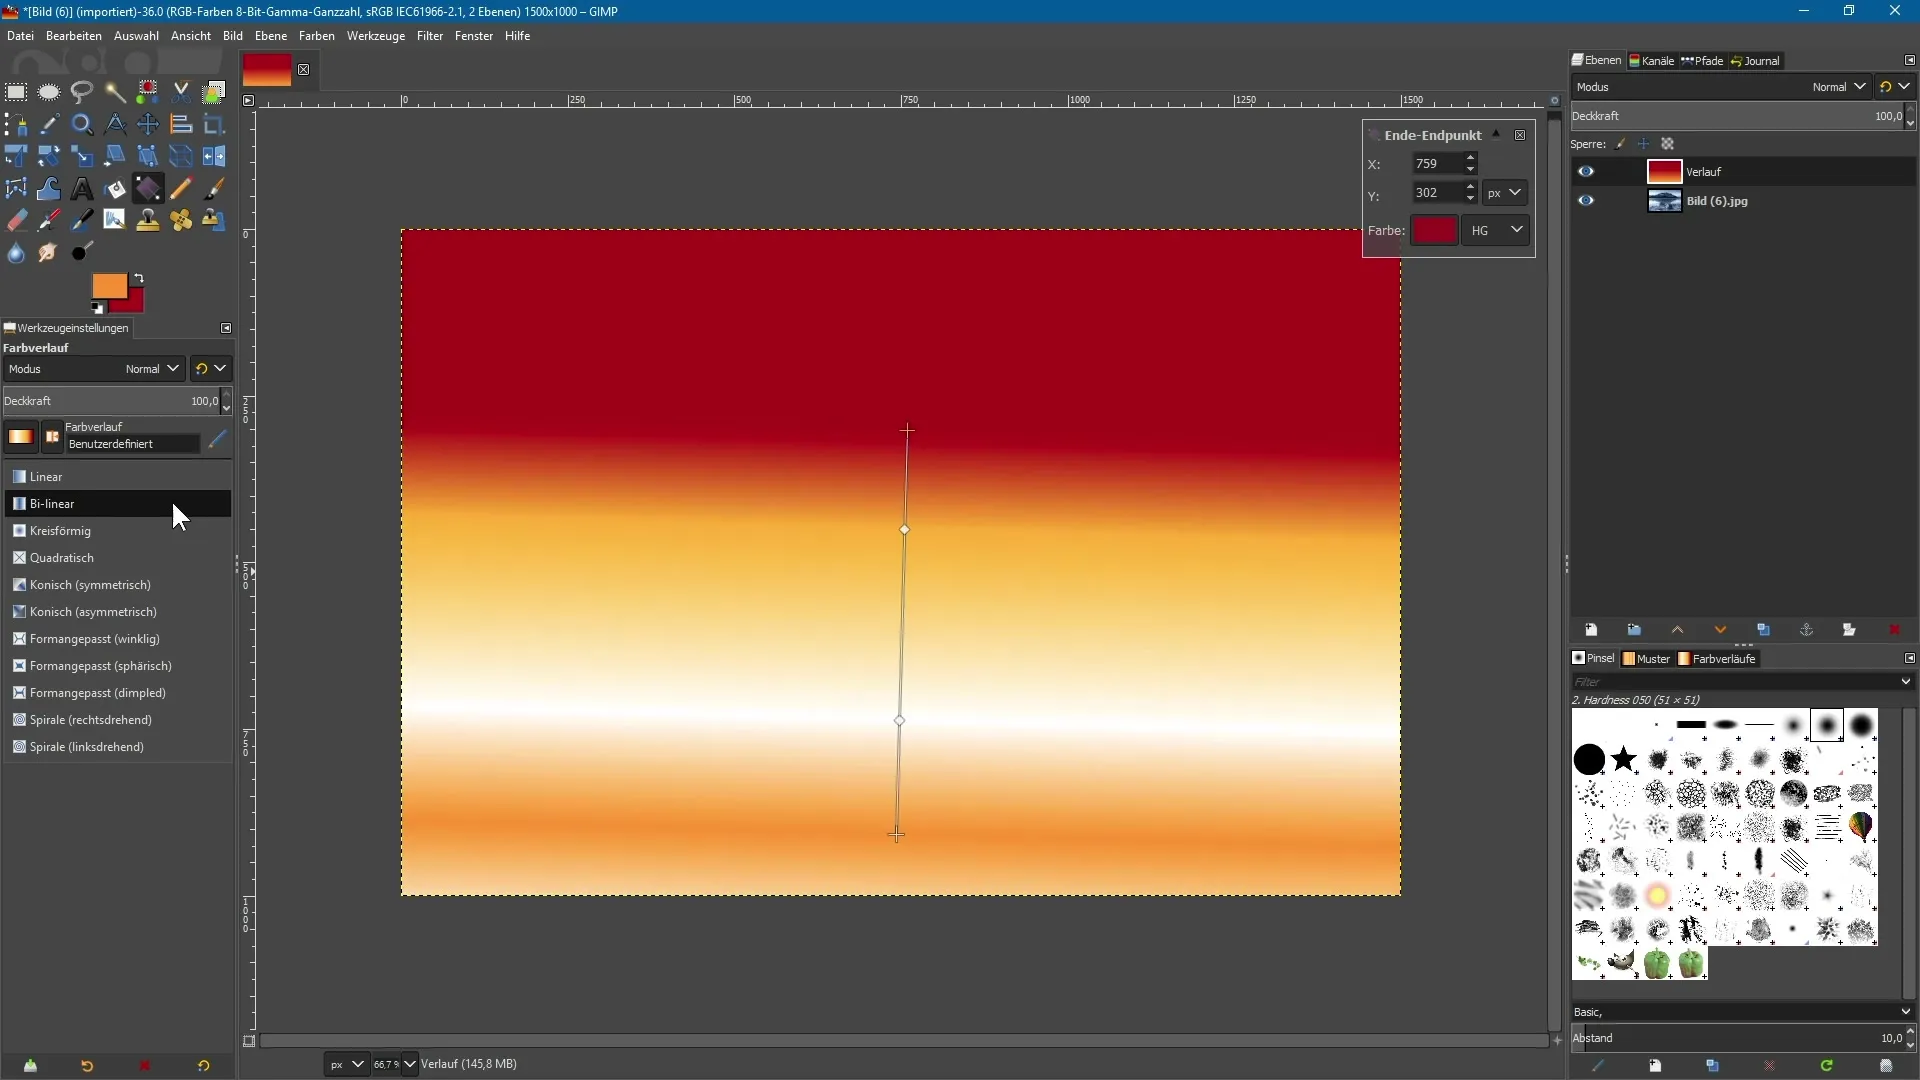
GIMP allows you to choose from different types of gradients. You can select between linear, bilinear, and radial gradients. Experiment with these options to achieve different effects for your project.
8. Assign Layer Mode
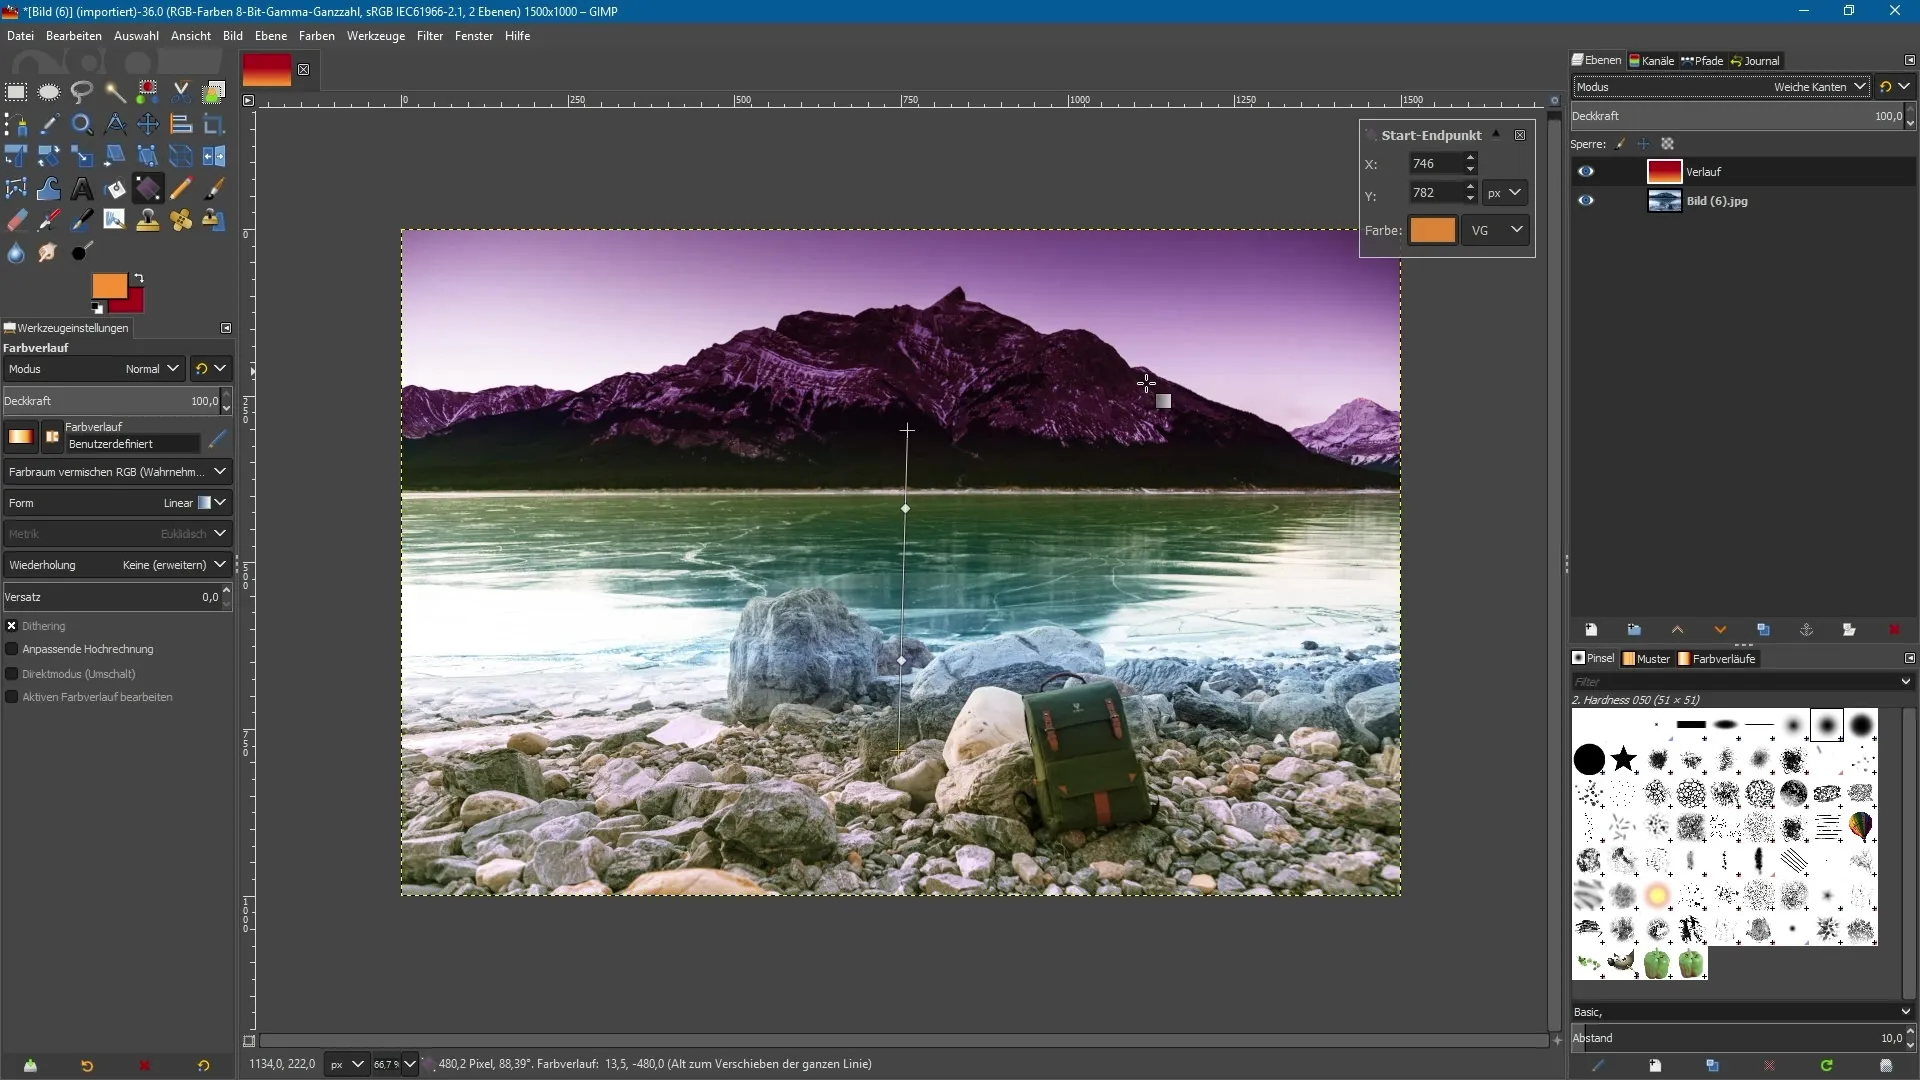
Assigning a layer mode is a critical step. Actively select your gradient layer and go to the layer mode menu. An example of an interesting effect is the “Soft Edges” mode. This mode gives your gradient a smooth integration with the underlying images.
9. Comparison Between Separate Layers and Image Layers
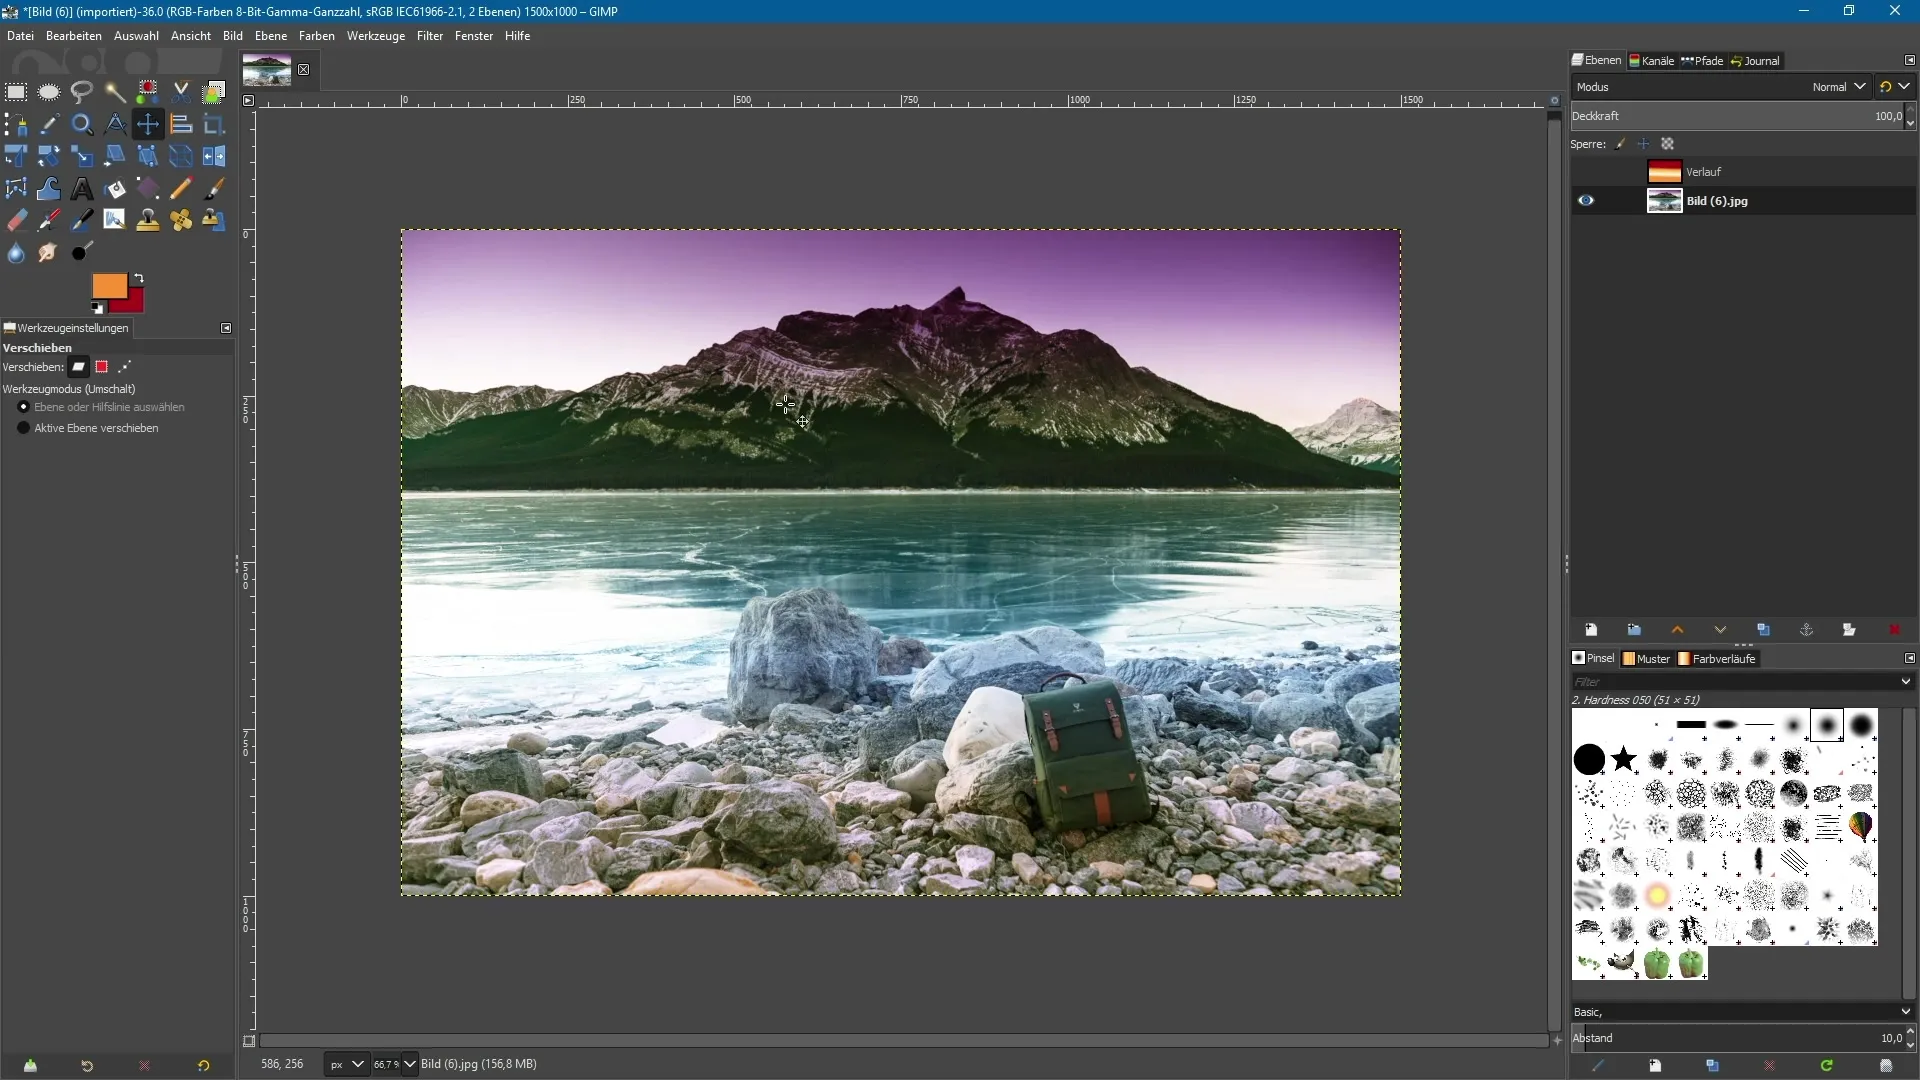
When you work on a separate layer in GIMP, you have more flexibility. However, if you work directly on the image layer with the gradient, the changes must be accepted immediately. Switching to other tools may mean that you can no longer easily undo the gradient.
Summary – GIMP 2.10: Optimized Use of the Gradient Tool
The updated gradient tool in GIMP 2.10 offers you the opportunity to creatively manipulate colors without jeopardizing your original image layers. The new features allow you to make adjustments during the application of gradients and achieve new, fascinating effects through intuitive controls.
Frequently Asked Questions
How do I create a new transparent layer?Click on the layers menu and select “New Layer,” name it, and click “OK.”
Can I change the gradient after applying it?Yes, as long as you do not switch to another tool, you can continue to adjust the gradient.
Where can I find the selection for different gradients?In the tool settings, you can select the various gradient options.
What is the advantage of working on a separate layer?If you work on a separate layer, you can make adjustments at any time without affecting the original image.
How can I change the colors of the gradient?Add anchor points and change the colors of each point in the tool settings.


