
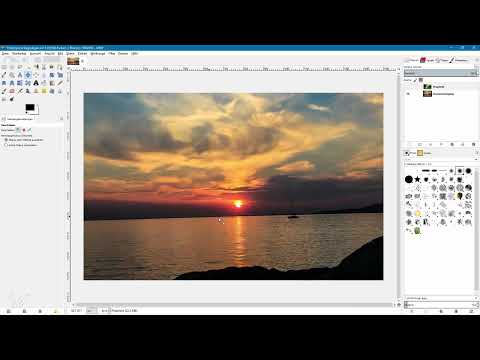
The sunset is positioned perfectly in the sky, you quickly press the shutter button, and only at home do you notice that the horizon line is crooked in the picture. That's annoying, but it can usually be corrected in GIMP without much effort. In this tutorial, you will learn how to align horizons with guides and the Rotate tool, which settings ensure clean results, and how to remove the transparent image edges that appear in the process. I will also show you how to work additionally with the Lens Distortion filter for heavily distorted shots, for example with a fisheye lens.
The video is only loaded from YouTube when you play it – data (including your IP address) is then transmitted to YouTube/Google. More in the privacy policy
Key Takeaways
The most reliable way to align the horizon is with guides that you drag directly from the rulers.
The Lanczos 3 interpolation produces much smoother edges when rotating than the "None" setting.
Rotating creates transparent corners. You remove them by cropping the document via "Image > Fit Canvas to Layers".
For distorted shots, the "Lens Distortion" filter helps, as it corrects the curvature of the horizon.
However, the most important tip comes already when taking the photo: a straight horizon prevents valuable edge areas from being lost during editing.
Step-by-Step Guide
Step 1: Show Rulers and Guides
Before you rotate anything, you should get your bearings. In the "View" menu, open the option "Show Rulers" and additionally activate "Show Guides". Afterwards, rulers appear at the top and side of the image edge, with which you can create guides.

Step 2: Align a Guide with the Horizon
Select the Move tool and click on the top ruler. Keep the left mouse button pressed and drag a guide into the image. Place it along the horizon. You immediately see how strongly the horizon line is actually tilted. The guide itself stays straight, so you can easily recognize the angle against it.

Step 3: Set Up the Rotate Tool with the Right Interpolation
You can find the Rotate tool in the toolbar, where it is hidden behind an icon with further tools. Alternatively, you can reach it with the keyboard shortcut Shift + R. In the tool options, you should not choose "None" for "Interpolation", but "Lanczos 3". Without interpolation, rotating often produces staircase effects and unattractive pixel edges. Lanczos 3 calculates the new pixels so that the result looks more harmonious overall.

Step 4: Rotate the Image with the Mouse
Click in the image so that a grid appears. You can use it as additional orientation. Keep the left mouse button pressed and drag until the horizon runs parallel to your guide. If you additionally activate the option "Show image preview", you will see the result while dragging. As soon as the horizon fits, click on "Rotate".

Step 5: Understand Transparent Edges When Clipping
After rotating, you will probably notice transparent triangles at the corners. They appear because the "Clipping: Adjust" option preserves the original image size. Undo the step with "Ctrl + Z" and choose "Crop to result" instead. GIMP then crops the image directly to the rotated area. However, the edges do not disappear completely; we will get to that shortly.

Step 6: Enter the Rotation Angle Exactly
Instead of dragging by feel, you can also enter the angle precisely in the dialog box of the Rotate tool. Then confirm with "Rotate". The image is rotated and cropped, and you see a transparent frame, which you will now remove.

Step 7: Remove Transparent Frames
For the frame to disappear, there must be no additional layer in the Layers window that affects the crop. Therefore, temporarily hide any hidden layers or delete them. Then choose "Image > Fit Canvas to Layers". The canvas then adapts to the size of the layer, and the transparent areas are gone. Finally, if needed, undo the crop changes to return to the original image, and drag the guide back into the ruler.

Step 8: Use the Alternative with "Corrective"
There is a second method based on the same principle. Make sure you have selected the correct layer in the Layers palette, and switch to the Rotate tool. Under "Direction," choose the "Corrective" option. This causes the image to rotate in the opposite direction, which you need to take into account when aligning. So if you rotate the image downward, the horizon moves in the desired direction.

Step 9: Align to the Grid Lines
Click in the image and use the grid lines as a guide. Make sure that one line runs parallel to the horizon. Once that is achieved, click "Rotate." Since you are working with "Corrective," the image is rotated in the other direction, and the horizon is level. Here too, border areas appear, which you remove with "Image > Fit Canvas to Layers."

Step 10: Align the Endpoints for Distorted Horizons
The situation is different when the horizon is not just tilted but curved by a fisheye lens. In the example with the aurora, you can see that the line slopes downward toward the edges. First, use the Rotate tool (direction "Corrective," interpolation "Lanczos 3," clipping "Clip result") to ensure that the endpoints of the horizon are at the same height. Use a horizontal guide for this, so that the distance of the endpoints to the line is the same on both sides. The exact alignment doesn't always succeed on the first try, which is completely normal.

Step 11: Apply the "Lens Distortion" Filter
For the curvature itself, GIMP offers a special filter. Choose "Filters > Distorts > Lens Distortion." In the dialog box you will see a preview. If you move the slider to the left, the image is straightened. In my example, the appropriate value was about -28. You also fine-tune the edges with the sliders. If you push them too far, the horizon curves again in the other direction. Therefore, check the preview carefully before confirming with "OK."

Step 12: Check the Result
At the end, drag a new horizontal guide to the position of the horizon. If the line and the horizon coincide, the correction was successful. Afterwards, you can clean up the border area again via "Image > Fit Canvas to Layers."

Step 13: Take a Look at the Shot
Every post-processing step costs image information at the edges. When rotating and applying lens corrections, you always lose part of the image. That is why it is worth paying attention to a straight horizon line while shooting, for example by using the level indicator in the display or by deliberately holding the camera steady.
Summary ??? GIMP Straighten Horizon: Step-by-Step Guide for Tilted Photos
With guides, the Rotate tool, and Lanczos 3 interpolation, you can reliably straighten the horizon in GIMP. Afterwards, you remove the transparent borders via "Image > Fit Canvas to Layers." For strongly distorted shots, you supplement the correction with the "Lens Distortion" filter. Still, try to ensure a straight horizon while shooting, because every correction costs image information at the edges.
FAQ
Why should I set the interpolation to Lanczos 3?With the "None" setting, rotating often produces jagged edges and pixelated edges, whereas Lanczos 3 calculates the pixels so that the result looks smoother and more pleasing.
How do I remove the transparent corners after rotating?Choose "Image > Fit Canvas to Layers." Beforehand, you should make sure that there is no additional, hidden layer in the Layers window that affects the cropping.
What does the "Corrective" option mean for the Rotate tool?It rotates the image in the opposite direction to your mouse movement. This allows you to align the horizon directly with a grid or guide line without having to mentally calculate the rotation direction.
Can I also enter the rotation angle precisely?Yes, in the Rotate tool's dialog box the angle can be entered directly. This gives you a more precise alignment than simply dragging with the mouse.
When do I need the "Lens Distortion" filter?It is useful when the horizon is curved by a fisheye or wide-angle lens. With the sliders you straighten the image, and the preview helps you find the right values.
How do I find the Rotate tool quickly?You can find it in the toolbox, hidden behind an icon. Alternatively, press Shift + R.


