
Does a photo look like a pencil sketch? You can achieve this in GIMP without any drawing talent. You only need a few filters and layer modes, and the effect can then be adjusted precisely to your image. In this tutorial, Marco Kolditz shows how to first create a contour drawing from an ordinary portrait and then continue editing it in color or in black and white.
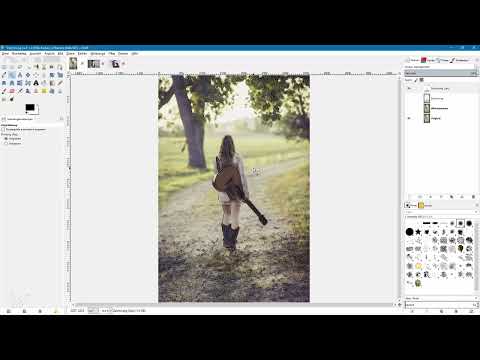
The video is only loaded from YouTube when you play it – data (including your IP address) is then transmitted to YouTube/Google. More in the privacy policy
One thing is important upfront: it is not about actually tracing an image. You translate the edges and brightness differences of your photo into lines. The result strongly resembles a drawing, but remains a digital edit. The following guide leads you through all the work steps from the video.
Key Takeaways
- You always work on a copy of the original layer, so your source image is preserved.
- The Gaussian Blur softens the edges. This step forms the basis for the drawing look.
- The Subtract layer mode creates the light contours, which are later converted into dark lines on a white background.
- Using Colors, Invert, Desaturate and Levels, you define contrast and tonal values.
- Layer masks, opacity and Posterize allow you to control the effect individually.
Step-by-Step Guide
Step 1: Duplicate the Original Layer
Open your photo in GIMP. In the Layers palette, the image is initially present as the original layer. You should not change this layer directly. Select it and click the icon for duplicating at the bottom of the Layers palette. Then name the copy, for example "Blur". With clear names you keep an overview even in a large project.

Step 2: Apply Gaussian Blur
Activate the copy and choose Filters, Blur, and then Gaussian Blur from the menu. In the preview window, you can select the appropriate image section with the cross symbol. The preset radius of five pixels is too small for this photo, so you set a higher value, which is 40 pixels in the video. What matters is that the contours appear noticeably soft. Which value is right always depends on the particular image, so feel free to try out a few values. Then confirm with OK.

Step 3: Set the Subtract Layer Mode
Select the blur layer and open the layer mode menu. Set the Subtract mode there. Now the image appears mostly black. The reason: the pixel values of the blur layer are subtracted from those of the layer below. If the areas were uniform, this would result in the value zero everywhere, that is, pure black. But because you softened the edges, precisely these areas differ from the original. Light outlines appear there, which later form the lines.

Step 4: Combine Changes into One Layer
So that you don't have to manage the previous steps individually, you combine them. In the Layer menu, go to "New from Visible". GIMP then creates a new layer that contains all the previous changes. Then name it, for example "Drawing".
Step 5: Invert and Desaturate
At the moment you have light lines on a black background. For the drawing look, however, you need dark lines on a white background. So choose Invert in the Colors menu so that light and dark are reversed. Afterwards, some areas still look slightly colored. Therefore, choose the Desaturate command via Colors. In the dialog, choose the Luminosity mode and confirm with OK. Now the layer appears completely in grayscale.

Step 6: Adjust Contrast via Levels
To make the lines stronger, you increase the contrast. Make sure the drawing layer is active, and open Colors and then Levels. Drag the black slider far to the right, to about the value 230 in the video. Move the gray slider slightly to the left so that the image becomes a bit lighter overall. You can only find the right settings by trying them out. Then confirm with OK.

Step 7: Refine contours with a second copy
When you zoom into the image, you will notice that some contours look broken. This can be fixed with another copy. Duplicate the drawing layer and name the copy, for example, "Drawing (2 pixels)". Apply the Gaussian blur to it again, this time with a radius of only two pixels. Then hide the first blur layer and set the new layer to the Burn mode. Now the contours in the image are rendered cleanly, for example in the hair area with clear black lines.

Step 8: Customize the look
From here on, you determine the design yourself. You can reduce the opacity of the drawing layer if the contour is too strong for you, or insert a white area underneath. Another option is to duplicate the original layer, name it "SW" (B&W), and desaturate it. Then add a layer mask to this layer. Choose the Gradient tool with black as the foreground color and white as the background color and drag a gradient across the image. This way, one area of the photo stays in black and white, while the other appears in color. In the video, the area the subject is moving toward becomes colored, which creates a nice visual story. With 100 percent opacity, the drawing in the example looks particularly strong.

Step 9: Use the posterize effect
Posterizing is well suited for a particularly graphic look. First, deactivate the layer mask by clicking on the mask while holding down the Ctrl key. Then select the image layer and choose Colors and Posterize. With this filter, you reduce the number of colors and gray tones in the image. If you drag the slider all the way to the left, only white and black remain. If you move it to the right, more gray tones gradually return. The preview shows you immediately which result you like. Then confirm with OK or cancel the process if the setting doesn't appeal to you.

Step 10: Protect areas with masks
Not every contour has turned out well in every spot. In the video, this shows in the eyes and the ear, where the lines look unattractive. The solution is to give the drawing layer a mask and exclude these areas from the change. This way, the face and details remain true to life, while the drawing look is retained on the remaining areas. At the end, always compare the original with the result in order to assess the effect in a targeted way.

Summary – Turn a photo into a drawing with GIMP
In just a few steps, you turn a photo into a drawing. You duplicate the original layer, soften the edges with the Gaussian blur, and create the contours with the Subtract layer mode. Then you invert the layer, desaturate it, and adjust contrast and tonal values. Additional copies, opacity, layer masks, and posterizing give you room for your own designs. Experiment with the values, because every photo requires its own settings. The look remains a digital interpretation and does not replace a real hand drawing.
FAQ
Question: Do I need drawing talent to achieve this effect?Answer: No, the effect is created by filters and layer modes. Drawing talent is not required for it.
Question: Why should I work with a copy of the original layer?Answer: This way, your original image is preserved at all times, and you can undo changes or start over.
Question: Which radius is suitable for the Gaussian blur?Answer: There is no fixed value. In the video, 40 pixels are used for the basic contours and 2 pixels for the fine work, but the appropriate values depend on the respective image.
Question: Can I weaken the effect if it seems too strong to me?Answer: Yes, simply reduce the opacity of the drawing layer or use a layer mask to exclude individual areas.

