
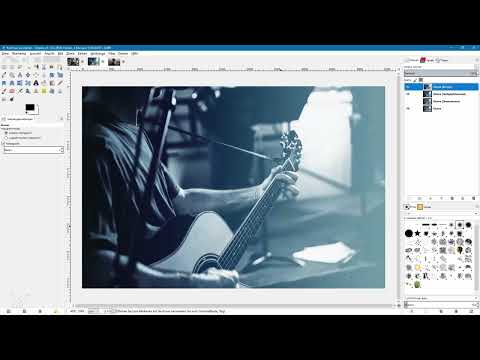
A photo can be technically clean and still look flat. In that case, what is usually missing is the difference between dark and light areas. This is exactly where contrast editing comes in. In this tutorial, video trainer Marco Kolditz shows you how to increase contrast in GIMP in a targeted way while staying in control. A black-and-white image serves as the example, as it is particularly well suited for the demonstration. You will learn several methods: the Brightness and Contrast tool, layer modes, curves, the Levels adjustment, as well as the Threshold tool and the eyedroppers.
The video is only loaded from YouTube when you play it – data (including your IP address) is then transmitted to YouTube/Google. More in the privacy policy
Key Takeaways
- Contrast describes the distance between the darkest and the lightest point of an image.
- Raising the contrast too much causes details to disappear into pure black or pure white.
- A duplicate layer with a contrast-enhancing layer mode strengthens the contrast without altering the original.
- Curves and the Levels adjustment offer the finest control over brightness ranges.
- The eyedroppers in the Levels tool help you find the actual darkest and lightest pixels of an image.
Step-by-Step Guide
What Contrast Actually Means
Before you move any sliders, you should understand what you are actually changing. In a black-and-white image, contrast describes the difference between the darkest and the lightest point. A high-contrast image contains very dark and very light areas, while the tones in between are well distributed. A flat image, on the other hand, moves predominantly within the range of mid-tone grays.

Using the Brightness and Contrast Tool
The simplest way in is via the Colors menu and the Brightness and Contrast entry. First select the correct layer, because the tool always acts on the active layer. In the dialog window, you can adjust both brightness and contrast with a slider.

Move the contrast slider to the right. Dark areas become darker, light areas become lighter. Enable the preview so you can see the change immediately. If you overdo it, details lose their definition. Light areas turn into pure white, dark ones into pure black. In the extreme case, only black and white remain, which delivers the highest possible contrast but costs a lot of information.


Reducing the Contrast
A look in the opposite direction helps with understanding. If you move the contrast slider to the left, light and dark areas move closer together. Black becomes a medium gray, and so does white. At the end of the slider, the entire image is just a uniform gray. This approach is suitable if you want to create a milky, soft image look.

Increasing Contrast with Layer Modes
The sliders have a drawback: they change the original image directly. That is why you now work with a copy. Select the layer in the Layers palette and click the icon for duplicating. By double-clicking the layer name, you can rename the copy, for example to "Guitar (Layer Mode)".

Then open the menu for the layer mode of the copied layer. Choose a contrast-enhancing mode such as Soft Light. This mode combines the layer with the layer beneath it so that light areas are brightened and dark areas are darkened. Note, however, that the color saturation also increases slightly as a result. With the Overlay mode, you achieve practically the same result in this example, so you can choose the mode freely. The Hard Light mode strengthens the effect considerably more, but also noticeably increases the color saturation.


Applying Brightness and Contrast to a Copy
You can also raise the contrast using another copy of the original layer. Duplicate the original layer again, drag the copy all the way to the top, and give it a suitable name, such as "Guitar (Brightness/Contrast)". On this layer, you apply the Brightness and Contrast tool again and increase the contrast slider.

Pay attention to the preview while doing so. Bright areas in particular, such as the gradient in the image, can quickly blow out and turn into pure white. The further you drag the slider to the right, the stronger this happens. Therefore, stick with a moderate value. If the result seems too harsh to you, reduce the opacity of this layer. This way, you blend the change with the original and bring back some details.

Controlling Contrast with Tone Curves
Tone curves offer you the finest control. To do this, you again create a copy of the original layer, drag it to the top, and with the layer active, select the entry Colors and then Curves. In the background, you see the histogram. On the left are the very dark pixels, on the right the very bright ones. A flat-looking image often shows that the pixels do not reach all the way to the edges.


To increase the contrast, you drag the lower handle of the diagonal downward and to the right so that the dark areas become deeper. You move the upper handle upward so that the bright areas are brightened. In this way, you make sure that black really becomes black and white really becomes white.

If you want a softer transition, work with an S-curve. To do this, click on the diagonal in the lower area and drag it downward. You do the same in the upper area, only there you drag the line upward. The curve then forms an S. This method improves the transitions between bright and dark areas and avoids tonal breaks. Confirm the change with OK.

Using Levels Adjustment
The levels adjustment works with the sliders for black and white. Again create a copy of the original layer, name it, and with the layer active, select Colors and then Levels. In the Input Levels area, you again see the histogram. If it shows that the darkest area is only a light gray, you can drag the black slider to the right until the first pixels appear. You drag the white slider to the left accordingly.

However, don't overdo it. If you drag both sliders all the way, you risk areas being crushed into pure black or blown out into pure white. So leave your image some room. If you want to prevent pixels from becoming completely black or white, you set the darkest and the brightest color value under Output Levels. These settings then apply to all colors in the image.


Working with Threshold and Eyedroppers
For a precise contrast increase, you first use the Threshold tool. To do this, select Colors and Threshold. Move the black slider to the left until the image appears completely white, and then slowly drag it to the right. The first, darkest pixels appear. Remember this spot. Then you move the white slider to the left until the brightest pixels become visible. Deactivate the preview to check the positions.

Then cancel the tool, open Colors and Levels again, and select the levels adjustment. Now click with the eyedropper for black on the area with the darkest pixels and with the eyedropper for white on the area with the brightest pixels. GIMP sets the tonal values accordingly, and the contrast increases quickly. If the result is too strong for you, you can lighten the black a little and darken the white a little. Confirm with OK.

Summary ??? Enhancing Contrast in GIMP: Layers, Curves, and Levels at a Glance
In this tutorial, you have seen that GIMP offers several ways to increase contrast. The Brightness and Contrast tool is the quickest way to get started, but it loses detail if applied too strongly. Layer modes with copies allow non-destructive editing, in which you leave the original unchanged at all times. Tone curves and Levels give you the most control when you want to set black and white points deliberately. With Threshold and the eyedroppers, you find the actual extreme values in the image. The results often differ only slightly. However, it is precisely this knowledge that helps you choose the right method for each image.
FAQ
Why does my image lose detail when I increase the contrast significantly?Bright areas then become pure white and dark areas pure black, causing detail and structures to be lost. Therefore, only move the sliders as far as is good for the image.
Which layer mode is best suited for increasing contrast?Soft Light and Overlay deliver a moderate increase, while Hard Light has a much stronger effect. However, with Hard Light, color saturation also increases significantly.
Can I enhance the contrast without changing the original image?Yes, it is best to work with a layer copy. The original layer remains untouched, and you can reduce the effect at any time via the opacity.
What does the histogram show?The histogram shows the distribution of brightness values in the image. The dark pixels are on the left, the bright ones on the right. Gaps at the edges indicate a flat, low-contrast image.
How do I find the darkest and brightest spots in the image?Use the Threshold tool. Move the black and white sliders until the first dark or bright pixels become visible, and note the position.
What are the output levels in Levels used for?With the output levels, you determine the darkest and brightest color value the image may have at most. This prevents pure black or pure white.
What is an S-curve?An S-curve is created when you lower the dark areas and raise the bright ones in the tone curves. The result is smoother transitions and a higher-contrast image.


