
When skin tones look uneven, blemishes are distracting, and yet the texture should be preserved, powdering with a high-pass filter is a quick and clean solution. In this tutorial, I will guide you through the entire process in GIMP: from preparing the layers and making rough corrections to partial powdering with a layer mask.
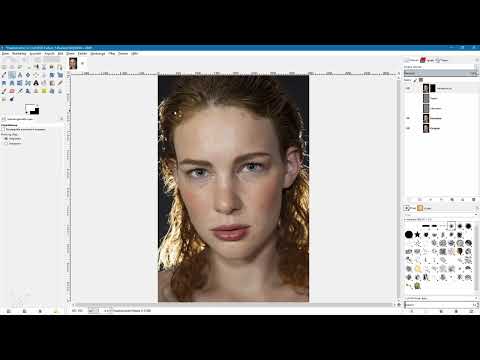
The video is only loaded from YouTube when you play it – data (including your IP address) is then transmitted to YouTube/Google. More in the privacy policy
Introduction
Skin retouching is one of those tasks where too much intervention quickly looks artificial. This method is therefore a good starting point: you first remove the most noticeable flaws, then smooth the skin surface, and bring the pores back via a detail layer. The result looks calm without becoming waxy.
The tutorial comes from the first part of a video series on skin retouching. The high-pass filter is not included in GIMP by default. How to install it afterwards, for free, is explained in the series in a separate video on image sharpening. Install it beforehand, otherwise you won't find the filter function in the menu.
Key Takeaways
Always work on layers so that you can undo or weaken every step. The combination of high-pass filter, Gaussian blur, and layer mode creates the powdering effect. The mask ensures that only the skin is affected and not hair or contours. A soft brush and careful work at edges prevent bright halos.
Step 1: Duplicate and prepare the original layer
Begin with a copy of your original image, so that the original remains untouched. To do this, click on the original layer in the layers palette and create a duplicate. Name the copy, for example, "Korrektur" so that you can clearly recognize it later. Then zoom into the image with the zoom tool by dragging a frame around the area you want to work on.

Step 2: Remove coarse skin blemishes with the Healing tool
Now switch to the Healing tool and make sure you are working on the correction layer. Adjust the brush size to the spot you are currently editing. First you remove the most noticeable flaws such as small black dots, lint, or individual hairs. To do this, hold down the Ctrl key and click on a clean area of skin nearby. This becomes the source. Then you paint over the flaw, and the tool takes over the skin texture from the source area.
Keep switching to new sources so that the same spot isn't used as the template everywhere. Otherwise, visible repetitions will appear. For larger blemishes such as a scar, you can increase the brush size and start over several times. Whether you remove freckles or small pimples is up to you. Freckles in particular are often part of a person's personality and should stay.


Step 3: Create two copies for details and powdering
When the corrections are satisfactory, you duplicate the correction layer twice. You name the upper copy "Details". On this layer you will later bring back fine structures such as eyelashes or eyebrows. You name the second copy "Abpudern". Hide the detail layer for now and work with the powdering layer.

Step 4: Invert the powdering layer and apply the high-pass filter
Activate the powdering layer and choose the Invert command in the Colors menu. The colors in the image are then reversed. This step is important because the high-pass filter captures the brightness differences in such a way that they later act like a blur.
Then apply the high-pass filter. You can find it under Filters, then Generic, then High-pass filter. The filter offers no preview, so you have to experiment. Enter a fairly high value, about 90 in the example, and confirm with OK. Remove the checkmark at "Keep original Layer" because you want to apply the filter directly to the layer. Adjust the value to your image until the results are convincing.


Step 5: Change the layer mode and bring back pores with the Gaussian blur
Set the layer mode of the powdering layer to the blend mode that the instructor chooses in the video. You will find the list of layer modes in the layers palette. Afterwards, the blotchy appearance of the skin looks significantly softer. At the same time, however, texture is lost and the pores disappear.
To bring them back, apply the Gaussian blur on the powdering layer. You will find it under Filter, Blur. In the example, 12 pixels are enough. The blur smooths the results of the high-pass filter so that more structures become visible again. Then zoom closer into the image and compare the pores with the before state. If individual blotches remain visible, you can either remove them in the correction layer or choose a higher high-pass value.


Step 6: Bring back details and textures with a second high-pass layer
So that eyelashes and eyebrows do not look too soft, you activate the detail layer and make it visible again. Apply the high-pass filter here as well. In the video, half the value of the previous filter is used, so about 45. Here too, you uncheck "Keep original Layer".
The detail layer is then mostly medium gray. Set the layer mode to Soft Light. As a result, the medium gray becomes transparent, and the details blend with the image beneath.


Step 7: Merge layers and create a layer mask with black
At the moment, however, the entire image looks powdered, including hair and contours. So that you only edit the skin, you combine all the changes. To do this, create a new layer at the top of the layers palette, via Layer, New from Visible. Then hide the detail and powdering layers. Name the new layer, for example, "Skin retouching".
Add a black layer mask to this layer. To do so, right-click the layer and choose Add Layer Mask, then Black. The layer is now completely hidden, and you see the original image again.

Step 8: Reveal skin with a white brush on the mask
Activate the mask and set white as the foreground color. Choose a soft brush with 100 percent opacity. With white on the mask, you make the skin retouching visible. So paint over the skin areas that you want to powder. You can reduce the opacity later at the layer level, so 100 percent is fine when painting.
Zoom into the image and adjust the brush size. To see where you have already painted, hold down the Alt key and click on the mask. GIMP then displays the mask for you. Work piece by piece: the forehead, the cheeks, the chin.

Step 9: Edit contours and edges carefully
You need particular care at contours. If you paint directly on the contour of the nose, chin, or eyebrows, bright halos appear. So paint just next to the contours and reduce the brush size when it gets tight. At the mouth, you should not powder too much, because the colors easily get distorted there.
Edit the nose carefully, as the nostrils are delicate. A small, soft brush is suitable for the nose line and the bridge of the nose. You leave out areas with dark shadows so that the contours are preserved. If you have painted too far, switch to black with X and undo the change.


Step 10: Edit the neck and adjust the opacity
You can powder the neck as well. To do so, zoom out the view so that you can better survey the transition to the contour, and use a larger brush. Here too, pay attention to the edge against the background. Check your work regularly via the mask so that you do not overlook any areas.
If the result looks too heavily powdered overall, reduce the opacity of the skin retouching layer. In the example, it is lowered to 75 to 80 percent. Afterwards, regularly compare the original with the edited image so that the result stays natural.


Summary ??? Skin Retouching in GIMP: Powdering Skin with a High-Pass Filter
You have seen how to powder a model's skin in GIMP while largely preserving the pores. First you removed major blemishes with the Healing tool, then you built the powdering layer using a high-pass filter and Gaussian blur, and brought the details back separately. With a layer mask you applied the editing specifically to the skin. Proceed carefully, take breaks in between, and look at the result again later. A second person can also help assess how natural it looks.
In the next video, the instructor shows a more professional method using frequency separation.
FAQ
Do I absolutely need the high-pass filter?Yes, the high-pass filter is necessary for this method. It is not included in GIMP by default and must be installed afterwards.
Why should I invert the powdering layer?Inverting reverses the brightness differences so that the high-pass filter captures the skin structures as desired and the skin appears smoother.
Can I keep freckles?Yes, freckles often are part of a person's personality. You decide for yourself which features you remove or keep.
What do I do if the skin looks too heavily powdered?Reduce the opacity of the skin retouching layer, for example to 75 to 80 percent, and regularly compare the result with the original.
Why do I paint on the mask with white?On the black mask, the changes are initially hidden. White makes them visible, so that you edit exactly the skin areas you want to powder.
How do I avoid light halos along contours?Do not paint directly on the contour, but just next to it. Use a small, soft brush and check the mask regularly.


