
A distracting passerby in a vacation photo, a scratch on an old photograph, or skin blemishes in a portrait: such spots can be corrected precisely in GIMP. Two tools are available for this, which look similar at first glance but work differently. With the Clone tool, you copy image areas to another spot. The Heal tool additionally adopts the brightness of the surroundings, which makes it especially valuable for retouching. In this guide, you will get to know both tools, understand the most important options, and learn how to work non-destructively.
The video is only loaded from YouTube when you play it – data (including your IP address) is then transmitted to YouTube/Google. More in the privacy policy
Key Takeaways
- The Clone tool (keyboard shortcut C) copies a source area of an image to another spot.
- The Heal tool (keyboard shortcut H) adjusts the brightness of the copied area to the target spot and is therefore better suited for retouching.
- The "Source" and "Alignment" options determine where the pixels come from and how the source behaves while painting.
- With the "Sample merged" option and a transparent layer, you work non-destructively; however, this option does not work with the Heal tool.
- A soft brush tip and reduced opacity prevent visible transitions, especially with wrinkles.
Step-by-Step Guide
Step 1: Finding the Two Tools
Before you get started, you should know where the two tools are hidden in GIMP. You can reach the Clone tool via the corresponding icon in the toolbox or more quickly with the keyboard shortcut C. The Heal tool is also found in the toolbox and can be called up with the keyboard shortcut H. Both tools work on the same principle: You define a source area and then paint this area onto another spot in the image.

Step 2: Understanding the Tool Options
Both tools share the options of the Paintbrush tool in the tool options, namely brush shape, size, opacity, and mode. If you are not yet familiar with these options, it is worth taking a look at the tutorial on the Paintbrush tool, as they are explained in detail there. With the Clone tool, the "Source" and "Alignment" sections are especially crucial. Here you define where the image information comes from and how it is transferred while painting.

Step 3: Setting the Source to the Image Layer
In the "Source" section, you choose where your image material comes from. By default, the image layer is activated here, and you copy the pixels from exactly this layer. A sensible workflow looks like this: First, you duplicate the background layer so that the original remains untouched. In the Layers panel, you then see the original image, above it the copy, and above that a transparent layer that is initially hidden. It is best to work on the copy, so your original image is always preserved.

Step 4: Cloning an Area
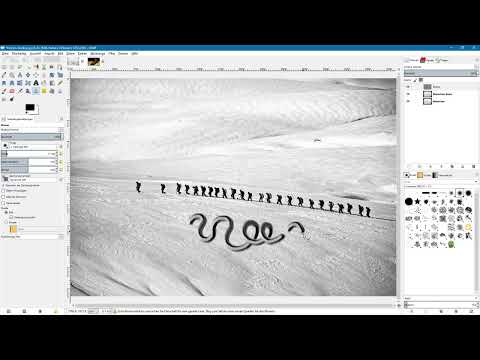
To set a source, hold down the Ctrl key and click on the image area you want to copy, for example a person's feet. Then you release the Ctrl key and paint at the spot where this person should appear again. Make sure you paint in a plausible location, for example where the person could actually stand. This way the result looks believable.

Step 5: Keeping the Background in Mind
When cloning, the entire image area is always copied, including the background. This can cause the cloned spot to look somewhat lighter or darker than its surroundings. This can be fixed later by, for example, adjusting the brightness. Therefore, when selecting the source, plan for an area with a similar background.

Step 6: Working on a Transparent Layer with "Sample merged"
The "Sample merged" option offers you a particularly clean way of working. To do this, switch to the transparent layer and make it visible. This layer does not yet contain any pixels, yet the Clone tool recognizes the layers underneath. So you can select source areas and paint areas into the image without altering the original image. If you hide the image layers, you will see only the cloned area on the transparent layer; everything else is transparent.

Step 7: Using the alignment "None"
With the alignment "None," the source stays in place, no matter where you paint. For example, if you set a source on a person, you can place that person multiple times in different spots without resetting the source. You use this setting when you need a subject several times in the image.

Step 8: Understanding the alignment "Aligned"
With the "Aligned" setting, the source moves exactly with your mouse pointer. That means when you move the brush, the source area moves along with it. When painting a new area, you initially see no difference from "None." As soon as you move the mouse, however, the effect becomes apparent. Often only the background, for example snow, is produced, and not the subject itself. This option is therefore mainly suitable for uniform areas.

Step 9: Using the alignment "Registered"
The "Registered" setting does not require a source set with the Ctrl key held down. Instead, you select the source area via the layers and paint directly at the desired spot. On the transparent layer, you can thus clone a person into an area where they do not appear in the original image. Here too, you initially see no change in the image. Only when you hide the image layers does the result become visible.

Step 10: Exploring the alignment "Fixed"
The "Fixed" setting seems unusual at first glance. With it, you temporarily turn an image area into a brush tip. First, with the Ctrl key held down, you select the source, such as a person, and then paint with this subject shape in other areas of the image. For everyday work, this option is rarely useful, but it can be interesting for creative experiments. In practice, you mostly fall back on "None" or "Aligned."

Step 11: Recognizing the Heal tool as an improvement
To see the difference from the Clone tool, first remove a scratch with the Clone tool. To do this, select a healthy area nearby as the source, set the alignment to "None," and paint over the scratch. The scratch does disappear, but the retouched area looks darker than its surroundings, because the brightness of the source was copied along with it. The Heal tool solves this problem.

Step 12: Applying the Heal tool on the layer copy
Now switch to the Heal tool and work again. Note that the "Sample merged" option does not work with the Heal tool. No image information is produced on the transparent layer. Therefore, you work on the layer copy at this point. With the Ctrl key held down, set a source point in a clean area and then paint over the scratch. The stroke disappears, and the tool takes the brightness information of the target spot into account.

Step 13: Taking the brightness of the target area into account
The great advantage of the Heal tool shows when painting in darker or lighter areas. If you paint with the same source in a different spot, the area does not become darker but adapts to its surroundings. This is why the Heal tool is particularly well suited for removing skin blemishes or stains on surfaces, such as on shoes.

Step 14: Removing stains step by step
Reduce the brush tip to a suitable size and choose a fairly soft brush shape. Each time, with the Ctrl key held down, set a new source in an area that is as clean as possible and then paint over the disturbing spot. The soft brush tip ensures that the transitions remain inconspicuous. Repeat this process for each stain until the result matches your expectations. Sometimes it also makes sense to deliberately leave some of the marks, because a used shoe can certainly show signs of wear.

Step 15: Soften Wrinkles with Reduced Opacity
You should be more careful when retouching skin. If you want to soften wrinkles, reduce the opacity of the brush. This way, you don't remove the wrinkle completely, but only to a certain extent, and the face looks natural. This is where the real benefit of the Healing tool lies: You can correct irregularities without the result looking artificial.

Summary ??? GIMP Cloning and Healing: Image Retouching for Beginners
The Clone tool and the Healing tool are powerful helpers for image editing in GIMP. With the Clone tool, you copy image areas, and with the "Source" and "Alignment" options, you control exactly how this happens. A transparent layer with the "Sample merged" option keeps your work non-destructive. The Healing tool goes a step further by taking the brightness of the surroundings into account. This results in clean retouching without dark spots. When healing, work on a layer copy, with a soft brush tip and reduced opacity, and then fine corrections such as softening wrinkles will also succeed.
FAQ
Can I call up the Clone tool with the keyboard shortcut C?Yes, the Clone tool can be reached with the keyboard shortcut C.
What keyboard shortcut does the Healing tool have?You can reach the Healing tool with the keyboard shortcut H.
What does the "Sample merged" option mean?With this option, you can work on a transparent layer while the layers underneath are still taken into account. This way, the original image remains unchanged.
Does "Sample merged" also work with the Healing tool?No, with the Healing tool, this option does not work on a transparent layer. In this case, work on a layer copy.
What happens with the "aligned" alignment?The source moves exactly with your mouse pointer. As a result, the outcome may deviate from the subject, and it is more likely that the background is produced.
What is the "registered" alignment used for?With "registered," you don't have to select a source with the Ctrl key pressed. You can paint the subject directly from the source area to another spot.
Why does the result sometimes look darker when cloning?When cloning, the background of the source area is also copied. If the source is in a lighter or darker area, the brightness at the target spot differs. The Healing tool avoids this problem.
What is the best way to remove blemishes with the Healing tool?Choose a soft, suitably small brush tip, set a clean source with the Ctrl key pressed, and then paint over the blemish. Repeat the process for each spot.
How do I soften wrinkles without removing them completely?Reduce the opacity of the brush. This way, the wrinkle only partially disappears, and the result looks natural.


