
Imagine you reach for the brush in GIMP, and your stroke trembles like that of a freezing painter. Or it gets darker with every stroke, even though you didn't want that at all. This is exactly where this guide comes in. It is based on the video by video trainer Marco Kolditz and shows you GIMP's Paintbrush tool step by step: from opacity to size and brush tip to the paint dynamics, which unfold their full potential especially with a graphics tablet. You will also learn how to set up the tool sensibly for both the mouse and the stylus.
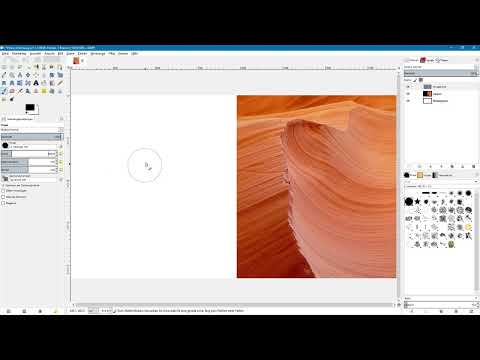
The video is only loaded from YouTube when you play it – data (including your IP address) is then transmitted to YouTube/Google. More in the privacy policy
Key Takeaways
- The Paintbrush tool (keyboard shortcut P) basically paints with the foreground color.
- Opacity determines the transparency of your stroke. With the "Incremental" option, a spot becomes more opaque when painted over multiple times; without Incremental, you only achieve the same through several separate strokes.
- Size, aspect ratio, angle, and spacing shape the brush tip and thus the overall look of your stroke.
- Smooth stroke with quality and weight smooths mouse strokes, while the Add jitter option deliberately creates unevenness.
- Paint dynamics link properties such as opacity or size to speed, direction, or pen pressure.
Step-by-Step Guide
Accessing the Paintbrush Tool
You can find the Paintbrush tool in the toolbox. It's faster with the keyboard shortcut P. With this tool, you always paint in the currently set foreground color, regardless of which layer you are working on.

Setting the Foreground Color
A click on the foreground color swatch opens the color picker. There you choose a hue and the desired brightness. For this example, you can stick with black. The only important thing is that you can change the color at any time before you start painting.

Creating a Transparent Test Layer
To observe the effect of the settings cleanly, a separate layer is worthwhile. Create a transparent layer above your background, for example named "Brush Strokes". This way you can see directly how your strokes behave on a white background and on an image.
Understanding the Tool Settings and the Mode
In the Tool Options area, you will find numerous settings. At the very top is the "Mode" menu, which offers the same layer modes (blending modes) as the Layers palette. This allows you to apply blending modes directly to a single stroke. However, this approach is less flexible. It is better to work on a separate layer and set the mode there when you need it.

Setting the Opacity
Opacity determines how strongly the stroke covers with color. At 100 percent, you paint with full color. If you reduce the value to about 50 percent, your black stroke becomes gray. On an image layer you can clearly see the difference: the stroke is not simply gray, but semi-transparent, and the image shimmers through.

Setting the Opacity Precisely
You have several ways to adjust the value. With the arrow icons, you increase the opacity by clicking up and decrease it by clicking down. It gets more precise when you double-click the numeric value, enter a percentage such as 20 percent, and confirm with Enter. In the slider, you can click a rough value at the top and set finer values in the lower area by dragging. In practice, you will usually work with exact numeric values.

Using the Incremental Option
The Incremental option is intended for layering. For example, if you set the opacity to 5 percent and paint over the same spot several times without Incremental, the opacity stays constant at about 5 percent. If you activate Incremental instead, the colors overlap at that spot, and the area becomes more opaque with each pass until it finally shows the full foreground color.

Achieving the same result without Steigernd
Without Steigernd, you achieve the same effect in a different way. Start over with the brush several times and paint over the same spot each time. With each individual stroke, the area becomes more opaque. However, this means you have to make several strokes instead of a single one.

Adjusting the size of the brush tip
The "Size" slider determines the diameter of the brush tip. You operate it just like the opacity slider. If you set the value to around 200, for example, you paint a much thicker stroke. In the preview on the document, you can immediately see how large the tip will be.
Changing the aspect ratio
With the "Aspect Ratio" slider, you turn the round brush tip into an oval one. The tip is, in a sense, squeezed. At a value of around 3.41, you already get a distinctly more oval shape. Work carefully here, because small changes have a strong effect.

Reducing the spacing between brush tips
A brush stroke actually consists of a repetition of the selected brush tip. With an oval tip, you can see this clearly, because gaps appear between the individual impressions. To adjust this, open the brush palette. If it is missing, click the small arrow icon in the tab and select "Add Tab" and then "Brushes". At the very bottom, you can set the spacing. The default value is 10. A value of around 3 produces a more even and pleasing stroke.

Rotating the angle of the brush tip
With the angle slider, you rotate the brush tip. At 45 degrees, you can see in the preview that the tip is tilted accordingly, and you can use it to draw strokes rotated at an angle.

Resetting the settings
If you want to reset the aspect ratio or angle to the default values, click the small icon next to the respective slider. This way you quickly return to the basic settings without touching the other values.

Activating smooth stroke
With a mouse, strokes often look messy because the hand trembles a little and unevenness appears at the edges. The "Smooth Stroke" option stabilizes the stroke while you paint. After activating it, the Quality and Weight sliders appear. If you increase both values, GIMP noticeably smooths the stroke. The result is much more pleasing than the unsmoothed stroke. You can disable the option at any time, though, to compare the difference yourself.

Using the Apply Jitter option
The counterpart to smooth stroke is the "Apply Jitter" option. It simulates a trembling hand while painting. At first glance this looks like a mistake, but it can be used deliberately for creative effects. With the "Amount" slider, you determine the strength. By default, it is set to a very low value of 0.2. If you increase it and at the same time make the brush tip smaller, you get, for example, a confetti-like rain of dots.

Getting to know paint dynamics
Paint dynamics are one of the most powerful features of the brush tool. They link properties of the brush to input values. On the left in the menu, you will find predefined presets. They are particularly useful when you work with a pen on a graphics tablet, but mouse users benefit from them too. Using the icon at the bottom right, you open the "Paint Dynamics" tab if it is not displayed. There, too, you can show it via the brush icon and "Add Tab".

Creating your own paint dynamics
At the bottom of the tab, you can create a new paint dynamic. You will then see a matrix in which you specify which property is controlled by which input value. The properties include, for example, opacity, size, angle, color, and hardness. Input values are, for example, speed, direction, mouse wheel, random, or fade. Pressure and tilt, on the other hand, are only available with a graphics tablet and pen. You can also give your preset a custom name.

Configuring a paint dynamics with pen pressure and speed
A practical example: You want the opacity to be controlled by pen pressure and the size of the brush tip to depend on speed. To do this, you check the box for opacity in the matrix and select pen pressure as the input. Then you check the box for size and select speed. With this combination you can develop many interesting presets. Feel free to experiment, because the possibilities are nearly unlimited.

Testing your own preset
Select your new preset using the corresponding icon. First, place the pen gently on the tablet. The stroke then stays transparent. If you press harder, the opacity increases. If you then draw faster, the size of the brush changes dynamically. It is exactly this interplay that makes paint dynamics so valuable, because you are no longer painting with rigid settings, but responding to your movement.
Summary ??? Setting up the GIMP Paintbrush tool: Opacity, size and paint dynamics
You have seen that the Paintbrush tool in GIMP can do far more than just apply color. With opacity, Incremental, size, aspect ratio, angle and spacing, you shape the brush tip exactly to your wishes. Smooth stroke helps you with the mouse, while Apply Jitter provides targeted creative effects. With your own paint dynamics, you finally link pen pressure, speed and other inputs to the properties of the brush. This makes the tool suitable not only for illustrations, but also for editing layer masks and for many other image editing tasks in GIMP.
FAQ
How do I quickly activate the Paintbrush tool?You select it in the toolbox or press the keyboard shortcut P.
Which color does the Paintbrush tool use?It always paints with the currently set foreground color.
What is the difference between opacity and Incremental?Opacity determines the transparency of a stroke. Incremental causes strokes at the same spot to overlap and thus become more opaque.
How can I achieve full opacity without Incremental?You place several individual strokes over the same spot until the desired level of coverage is reached.
Why do my mouse strokes look shaky?The hand trembles when drawing with the mouse. The Smooth stroke option with the Quality and Weight sliders stabilizes the stroke.
What is the Apply Jitter option for?It simulates a trembling of the hand and is suitable for creative effects, for example a confetti-like rain.
What are paint dynamics?Paint dynamics link properties of the brush such as opacity or size with inputs such as speed, direction or pen pressure.
Do I need a graphics tablet for paint dynamics?No, but inputs such as pressure and tilt only work with a graphics tablet and pen. With the mouse, you can use speed, direction or the mouse wheel, for example.


