
Standard brushes are handy, but they quickly reach their limits as soon as you need a custom motif. This tutorial shows you how to create three types of custom brushes in GIMP: a star brush that places randomly distributed dabs, an image brush made from a cut-out hot air balloon, and a smoke brush whose color you can choose freely. All you need is GIMP and a few images to experiment with.
The video is only loaded from YouTube when you play it – data (including your IP address) is then transmitted to YouTube/Google. More in the privacy policy
Key Takeaways
- You open the Brush Editor via the leaf icon in the brush palette. New brushes only appear in the palette after restarting GIMP.
- The spacing determines whether a stroke results in a continuous line or individual dabs. The larger the value, the farther apart the dabs are.
- Image brushes require a cut-out object with a transparent background and must be located in GIMP's brush folder.
- For smoke brushes that can be colorized, you have to convert the image to grayscale and invert the colors so that the background becomes transparent.
- Save your source files in XCF format so that you can regenerate variants at any time.
Step-by-Step Guide
Preparation: Showing the Brush Palette
First, open a regular document and check whether the brush palette is visible. If not, click the small arrow icon of the palette, select the "Add" tab, and then "Brushes". After that you will see the available brush tips. There you will find three types: standard brushes, texture brushes, and image brushes. You will create exactly these three variants yourself in this tutorial.

Step 1: Preparing the Background and Stars Layer
Drag and drop an image, such as a night sky with a moon, from Windows Explorer into GIMP. With the Move tool you can position the image however you like. Double-click the layer to rename it, for example without the file extension. Then use the new layer icon to create a transparent layer and name it "Stars". This layer stays empty for now and is where your stars will end up later.

Step 2: Opening the Brush Editor and Defining the Shape
At the bottom of the brush palette, click the white sheet of paper to open the Brush Editor. At the top you see a preview of your brush and can give it a name, for example "Star". Below the preview you choose a basic shape: circle, square, or diamond. For our star, you first take the circle as a starting point, since you will change the shape in the next step.

Step 3: Adjusting the Radius and Number of Spikes
The default brush is usually too small, so you increase the radius to about 30 pixels. Then switch the shape to diamond. Now increase the number of spikes from two to five. The brush already looks much more like a star, but still appears too opaque in the middle.
Step 4: Reducing the Hardness
So that the star does not look completely filled in the middle, you reduce the hardness. A value around 0.15 to 0.16 works well. This keeps the soft transparency gradient at the edge, while the center becomes somewhat more translucent.
Step 5: Setting the Spacing for a Random Distribution
This is the most important point of the star brush. The spacing determines how far apart the individual dabs are. Test this first with the Paintbrush tool: if you drag a line with a small spacing, a continuous line is created. If the value is high, you get individual stars. So set the spacing to about 2500 and increase the brush size to 30 pixels. When dragging across the image, you now get individual stars that appear randomly placed. Take care not to paint stars over the shadow of a moon, since they are behind that object there.
Step 6: Trying Out Dynamics, Size, and Color
The "Basic Dynamics" setting slightly varies the size and opacity of the individual dabs, which looks more natural. Via the icon next to the dynamics, you can select a different dynamic if needed. Since you are painting on a separate layer, you can hide the layer at any time with the eye icon. Simply change the brush size later, for example to 70 pixels, and choose a different foreground color, such as a yellow tone. The new stars then take on the chosen color.

Step 7: Prepare the image brush and isolate the object
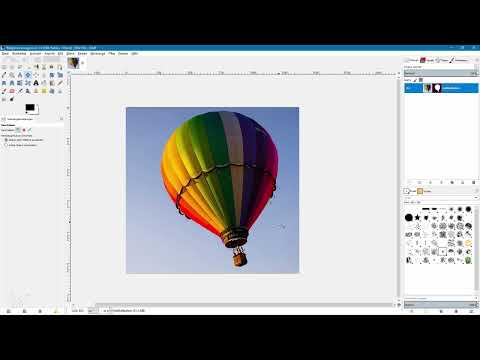
For an image brush, you need an isolated object. In this example, a hot air balloon is used, which has already been roughly isolated and has a layer mask. By holding down the Ctrl key and clicking on the layer mask, you can temporarily disable it and see the original image. By holding down the Alt key and clicking on the mask, you see its content: black is hidden, white is shown. So make sure that the background is really masked in black and the object in white.

Step 8: Crop and save in XCF format
Select the Crop tool, drag a frame around the balloon, and adjust it until only the isolated object is left in the document. A click in the image confirms the crop. Be sure to save the document in XCF format so that you can edit it later. If the image is very large, for example 4000 x 5000 pixels, you should reduce it via "Scale Image". For our example with just under 1000 x 1300 pixels, the size is fine.

Step 9: Define the brush folder in GIMP
So that GIMP finds your new brush, you need to know the storage location. Under "Edit", open "Preferences" and select "Folders" in the left area, then "Brushes". Here you see all the folders in which GIMP searches for brushes. Using the plus sign or the folder icon, you can add another folder if needed. Remember the path of the folder in which your brushes are located, because that is exactly where you will save the new brush.

Step 10: Export the image brush
Select "File" and then "Export As". Switch to the brush folder and name the file, for example "Heißluftballon". The correct file extension is important: for brushes you use ".gbr", i.e. the extension "gimpbrush". After clicking "Export", GIMP asks for a name once more. This name will later appear as the label in the brush palette, so enter a meaningful name here.

Step 11: Restart GIMP and use the image brush
For the new brush to appear in the brush palette, you must close GIMP completely and restart it. Afterwards you will find the hot air balloon in the brush palette. On a document with a blue background, create a new transparent layer, name it "Bildpinsel", and select the Paintbrush tool. Set the Dynamics to "Dynamics off" so that the opacity does not fluctuate. A click in the image places the balloon, and with a size of about 400 pixels it looks well placed.

Step 12: Prepare the smoke brush and convert it to grayscale
Image brushes with transparent areas do not respond to the foreground color. A smoke brush, however, should be colorizable. To do this, open a photo against a black background and convert it via "Image", "Mode" and "Grayscale". This is crucial, because only then are the brightness values converted into transparency. An image that is already black and white remains unchanged.

Step 13: Invert colors and increase the contrast
With the smoke photo, the problem is that the background is black and would therefore be colored. But you want to color the smoke. So select "Colors" and "Invert", so that the background becomes white and the smoke black. White will later become completely transparent, black fully colored. To make the motif crisper, you then open "Curves" under "Colors" and pull the shadows down a little. You pull the bright areas up a little again, until you are satisfied. Finally, you crop the image to fit.

Step 14: Save and test the smoke brush
Export the image as before via "File", "Export As" into the brush folder, for example as "rauch.gbr", and assign a name such as "Rauch". Then restart GIMP. Create a new transparent layer, enlarge the smoke to about 400 pixels, and set the Dynamics to "Dynamics off" so that the full opacity is retained. Choose a foreground color, such as yellow or a bright red, and click in the image. The smoke now takes on the chosen color.

Summary – Creating GIMP Brush Tips: Star, Image, and Smoke Brushes Step by Step
You have seen that GIMP allows three very different types of brushes. The star brush relies on radius, number of spikes, hardness, and a large spacing so that the dabs look random. The image brush gives you the ability to place cut-out objects in any document. Finally, the smoke brush responds to the foreground color, provided you convert the image to grayscale and invert the colors. Remember to load your brushes after exporting by restarting GIMP. With this approach, you create custom brushes that you can adjust and reuse at any time.
FAQ
Why does my new brush not appear in the brush palette?GIMP only loads brushes at startup, so you have to close the program completely and restart it.
Why does my star brush paint a continuous line instead of individual stars?The spacing is set too low. Increase it, for example to 2500, so that the individual dabs are further apart.
Which file extension do I need for a custom brush?You export the brush with the extension .gbr, that is, in the gimpbrush format.
Why is my image brush not colored in the selected foreground color?Image brushes keep the original colors of the image. Only smoke brushes created from a grayscale image respond to the foreground color.
Why is the background colored in my smoke brush?The image probably has a dark background. Select "Colors" and "Invert" so that the background becomes white and thus transparent.
Where do I find the folder for my brushes?You can find it under "Edit", "Preferences", "Folders", "Brushes". There you can see all the folders in which GIMP searches for brushes.


