
A portrait often only comes to life when the eyes appear clear and bright. In dark shots, however, they quickly get lost in the shadows. This is exactly where targeted editing in GIMP is worthwhile. You can brighten the iris a little and subtly lift the whites of the eyes without making the face look artificial.
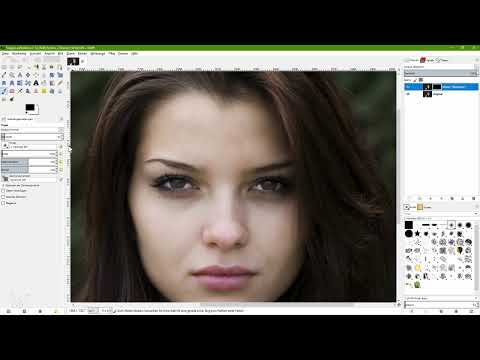
The video is only loaded from YouTube when you play it – data (including your IP address) is then transmitted to YouTube/Google. More in the privacy policy
In this tutorial, I will show you three methods: brightening using the Screen layer mode with a layer mask, the curves, and the levels adjustment. Pay particular attention to the whites of the eyes, because that is where most unnatural results occur.
Key Takeaways
Always work on a copy of the original layer so that you can go back at any time. Use a layer mask for the brightening so that you can paint changes into the image with white and take them back again with black. The whites of the eyes are particularly delicate, so you should edit them with low opacity and in several small steps. Take a break after editing and then look at the result critically once more. After all, the brightening should match the rest of the image.
Step-by-Step Guide
Step 1: Duplicate the Original Layer
Open your image in GIMP and check in the layers palette whether the image is present as an original layer. Click on the layer and create a copy using the icon for a new layer. This copy is the layer you will work with. The original remains untouched and serves as a comparison.

Step 2: Set the Layer Mode to Screen
In the layers palette menu, click on the layer mode, which is set to Normal by default. Choose the Screen mode. This mode brightens the image underneath. This gives you a general brightening of the entire photo. At the moment it is still a bit too much, but you will correct that in the next step. By the way, the brightening also affects hair and background, which is normal with this method.

Step 3: Add a Black Layer Mask
Right-click on the layer to open the context menu and select Add Layer Mask. Choose a black layer mask and confirm with Add. The brightening disappears immediately, because black hides the layer completely. For orientation, rename the layer to the Screen mode. That way you keep track of which method you applied.

Step 4: Prepare the Brush for the Mask
Now switch to the Paintbrush tool and choose white as the foreground color. White on the mask makes the brightening visible. So that size and opacity do not change unintentionally while painting, disable the option for dynamic changes in the brush dynamics. Set the brush size to suit the eye, in the example about 37. Make sure the size fits the image section so that you can work precisely.

Step 5: Brighten the Iris with White
Paint over the iris with full opacity. The brightening in the iris area usually already looks pleasant after a short time. In the area of the whites of the eyes, however, it often goes too far. The whites of the eyes then quickly look exaggerated and unnatural because they glow strongly. If that happens to you, it is not a mistake but part of the learning process. You will correct it in the following step.

Step 6: Take Back Exaggerations with Black
Now choose black as the foreground color and significantly reduce the brush opacity, for example to a low value. Zoom in close to the eye with the Zoom tool to work precisely. Then paint in the area of the whites of the eyes and carefully take the brightening back. You should be especially careful in the shadow area. Lift the brush again and again and apply the changes in small steps. In this way, you control the brightness bit by bit.

Step 7: Check the Result from a Distance
While you are editing, the result often looks good, but up close the impression can easily be deceiving. So take a bit of distance from the screen, ideally for a few minutes. Afterwards, you will see the image with fresh eyes. In the example, you will then notice that the whites of the eyes are still too bright. In this case, increase the opacity slightly and paint over it again with black. In the shadow area, you should brighten the whites of the eyes especially cautiously, as otherwise they quickly look artificial.

Step 8: Adjust the Opacity of the Entire Layer
For fine-tuning, you can additionally reduce the opacity of the entire layer. In the example, you end up at about 80 percent. Keep comparing the view with the original, for example using the keyboard shortcut for the before-and-after view. On the side with the shadow, you can also paint over specific areas or pull back individual areas at the edge a little more. If you like the result, you are done with the first method.

Step 9: Prepare the Second Variant with Curves
For a second method, you duplicate the original image twice and drag both copies to the top of the layer palette. You edit one copy with the curves. To do this, also create a black layer mask via a right-click. So that you do not have to set everything up again, you can copy the mask from the first variant. To do this, select the existing mask and press Ctrl and C. Then switch to the new mask and paste it with Ctrl and V. Create a floating selection and delete it until the mask has been applied correctly. By holding down the Alt key, you can check whether the mask is positioned correctly. Proceed in the same way with the levels layer.

Step 10: Adjust the Curve
Hide the previous layer and switch to the image layer, not to the mask. Then open Colors in the menu and there open Curves. Activate the preview so that you can see the changes directly. Click on the diagonal line in the dark area and drag it upward. The dark areas become brighter, but at the same time the whites of the eyes are also raised more strongly. To tone down the bright areas a little again, click in the upper area of the curve and pull the point down slightly. Then confirm with OK.

Step 11: Dose the Effect of the Curves Layer
With the curves, too, you can adjust the opacity of the active layer. First take the brightening back completely and then work your way up carefully. Keep comparing the before and after views as you do so. In the example, the strength fits best at about this range. Afterwards, hide the curves layer again so that you can switch to the next method.

Step 12: Use the Levels Adjustment
Switch to the levels layer, show it again, and make sure that you are editing the image and not the mask. Then open Colors in the menu and then Levels. The histogram shows you how many dark pixels are present in the image. Drag the white triangle in the dialog box to the left to brighten the dark areas. The iris looks much more vivid as a result, but the whites of the eyes quickly become too bright.

Step 13: Set Target Values for Black and White
The levels adjustment gives you the option of setting target values. With them, you determine how dark the darkest black and how bright the brightest white in the image should be. Since the whites of the eyes quickly look unnatural due to the brightening, you move the slider for white to the left. This tones down the brightest areas. Deactivate the preview in between to check the difference from the original. Move the sliders carefully until the result looks harmonious, and confirm with OK.

Step 14: Reduce the Opacity of the Levels Layer
In the last step, you reduce the opacity of the levels layer a little. In the example, about 10 percent is sufficient. Compare the result with the original once more. If the eyes look slightly brightened without shining, you have achieved the goal. Remember that eyes should not glow, but should merely look clearer and friendlier.

Step 15: Adjust the Brightening to the Overall Image
Finally, you should always view the eyes in the context of the rest of the photo. If the image is dark overall, you can alternatively brighten the entire image a little. Then the eyes can be integrated better with a more subtle brightening. A break is the best way to show you whether the edit looks natural. Set the work aside, step out of the room briefly, and then look at the image with fresh eyes.
Summary ??? Brightening Eyes with GIMP: Step by Step to a Natural Result
In this tutorial, you have learned three ways to brighten eyes in GIMP. With the Screen layer mode and a layer mask, you keep full control over every brushstroke. Curves and Levels give you precise tools for brightness. The whites of the eyes deserve special attention in all variants, because exaggerations are immediately noticeable there. Work subtly, use opacity and breaks, and regularly compare your results with the original.
FAQ
Why should I duplicate the original layer?The copy allows you to return to the unedited image at any time. The original is preserved for comparison.
What does a black layer mask do?A black mask hides the layer completely. With a white brush, you make the brightening visible in a targeted way; with black, you take it back again.
Why should I disable brush dynamics?So that size and opacity do not change unintentionally while painting. This keeps your result even and controllable.
Why are the whites of the eyes so problematic?The whites of the eyes quickly look too bright and unnatural. Even a small exaggeration stands out strongly in the overall image.
When should I take a break?After editing, you should leave the screen for a few minutes. Afterwards, you will recognize exaggerations much more easily.
When are Curves especially suitable?Curves are suitable when you want to raise dark areas in a targeted way and at the same time tone down bright areas.
What does the histogram in Levels show me?The histogram shows you the distribution of brightness values. You can recognize many dark pixels by a high peak on the left side.
Should I brighten the eyes strongly?No, eyes should not shine, but only look a little clearer. The brightening should always fit the rest of the image.


