
Red eyes are one of the most common flaws in flash photos, and you often only notice them on the screen when the moment is long gone. Fortunately, the problem can be fixed afterwards in GIMP. In this tutorial, you will learn three methods: the "Remove Red Eyes" filter, a layer mask for targeted control, and a manual approach using Quick Selection, Desaturate, and the Curves tool.
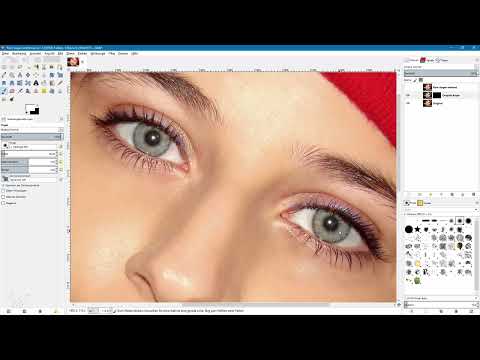
The video is only loaded from YouTube when you play it – data (including your IP address) is then transmitted to YouTube/Google. More in the privacy policy
Before you get started, it is worth taking a quick look at the cause. In poor lighting conditions, your pupils dilate so that more light reaches the retina. When a sudden flash then hits the eye, the well-supplied blood vessels of the retina reflect the light, and the red appears in the photo. Modern cameras and smartphones prevent this with a pre-flash that constricts the pupils beforehand. If that didn't work, post-processing is your option.
Key Takeaways
- Red eyes are caused by the reflection of the flash light off the retina when the pupils are dilated.
- The "Remove Red Eyes" filter works most reliably when you limit the affected areas beforehand with a selection.
- Without a selection, the entire image loses its red tones, not just the pupils.
- A layer mask allows you to readjust the correction at any time or undo it in specific places.
- The manual method offers the most control but requires a bit more patience.
Step-by-Step Guide
Step 1: Duplicate the Original Layer
Open your photo in GIMP. Before you change anything, you should duplicate the original layer in the Layers dialog. Select the layer and click the icon for duplicating at the bottom of the dialog. Then give the copy a meaningful name, for example "red eyes removed". This way, your original always remains untouched, and you can go back at any time.

Step 2: Enlarge the Pupils with the Zoom Tool
Select the Zoom tool and, holding down the left mouse button, drag a frame around the affected eyes. This displays the pupils large, and you can work more precisely. Feel free to use this step several times if you want to edit even finer details later.

Step 3: Create the First Selection with the Ellipse Select Tool
Now activate the Ellipse Select tool. With the left mouse button, start at the edge of the first red pupil and drag a circle that neatly encloses the pupil. Release the mouse button once the shape fits. The selection later defines where the filter is allowed to take effect at all.

Step 4: Add a Second Selection
To edit the second eye as well, hold down the Shift key while the selection is active. A small plus symbol appears next to the mouse pointer. Now drag another circle over the second pupil. Both areas are then selected together. If the shape isn't right yet, you can adjust it afterwards.

Step 5: Open the "Remove Red Eyes" Filter
Make sure you are on the duplicated layer. Then open the Filters menu, choose Enhance there, and then Red Eye Removal. A small dialog box opens in which you can see the effect directly in the preview window. The pupils are already displayed darkened as soon as the preview is active.

Step 6: Adjust the Threshold
A before-and-after comparison is worthwhile. Briefly deactivate the preview to see the original image, and then activate it again. Often some red still shimmers through at the edge of the pupils. This is what the Threshold slider is for. Set it to 100 for this example image and confirm with OK. Depending on the photo, you will need to adjust the value a bit until the result looks natural.

Step 7: Deselect and Check the Result
Then go to the Select menu and choose None to remove the selection. Now you see the edited image without the distracting selection lines. Compare the result with the original once more. You should evaluate the filter individually for every photo, because skin tone, lighting, and pupil size play a role.

Step 8: Why the selection is indispensable
Suppose you skip the selection and apply the filter to the whole image. Then the entire photo loses its red components, such as the cap or other colored areas. The selection is therefore the most important step so that the filter only works where it is needed.

Step 9: Preparing the alternative with a layer mask
If you want to make the correction more flexible, work with a layer mask. To do this, create a duplicate of the original layer again, temporarily hide the top layer so that you can see the original, and apply the "Red Eye Removal" filter to the entire layer. In the preview window you can see that the eyes are corrected, but the red in the rest of the image disappears as well.

Step 10: Adjusting the threshold for the entire layer
First set the threshold all the way down, and you will see the original image in the preview again. Slowly move the slider to the right and observe when the pupils become dark. Zoom in on the image to check the eyes closely. In this example, a threshold of 100 is convincing, which you confirm with OK.

Step 11: Creating a black layer mask
Right-click on the edited layer and choose Add Layer Mask. In the dialog, select the option for a black layer mask and confirm with Add. This initially hides the correction completely, and you see your original image again. This is the starting point for bringing the correction into the image in a targeted way.

Step 12: Painting in the correction in a targeted way with the brush
Switch to the Paintbrush tool and set white as the foreground color. In the Dynamics dialog, you should choose Dynamics off so that size and opacity do not constantly change. Set the opacity to 100 percent and adjust the brush size to the respective pupil. Then paint over the pupils with white on the black mask. The correction becomes visible exactly there. With black you can hide areas again later if you have corrected too much.

Step 13: Preparing the manual method with a desaturated copy
For the third variant, hide the mask layer and create another copy of the original layer. Drag it all the way to the top and give it a suitable name, such as "desaturate". Activate Quick Mask using the dashed square at the bottom of the toolbox. The marking appears in red by default, which does not suit your image well. By right-clicking on the field and choosing the option Configure Color and Opacity, you can select a blue, for example.

Step 14: Marking the affected areas with the brush
Activate the Paintbrush tool, provided white is the foreground color. Adjust the size to the pupil and paint over the area. You will see the bluish marking disappear and the original colors become visible. Feel free to paint a little beyond the edge, because inaccuracies can be corrected later with a mask. It is best to use a soft brush. If you then click on the square again, the Quick Mask disappears, and the painted areas appear as a selection.

Step 15: Creating a layer mask from the selection
Right-click on the desaturated layer and choose Add Layer Mask. In the dialog, use the option Selection and confirm with Add. The mask now shows exactly the painted areas in white. Hide the selection via the Select menu so that you can better judge the results. Make sure that you are now working on the image layer again and not on the mask.

Step 16: Desaturate the pupils
On the image layer, select the Colors menu item and then Desaturate. In the dialog box, you can choose between Lightness, Luminosity, and Average. The preview immediately shows how the gray changes. In this example, the Luminosity option works best. Confirm with OK. Since the layer mask is active, only the previously selected pupils turn gray, while the rest of the image stays in color.

Step 17: Darken the pupils with a tone curve
Stay on the image layer and open the tone curve via Colors and Curves. In the histogram, you can see the dark and light areas. Drag the dark area of the curve to the right so that the pupils become darker. The preview shows the result directly. If the light areas were changed too much, pull the upper part of the curve back a little until the effect looks natural. Then confirm with OK.

Summary ??? Removing red eyes in GIMP: Three approaches compared
Red eyes can be fixed in GIMP in three ways. The "Red Eye Removal" filter is the fastest way, provided you narrow down the pupils beforehand with a selection. The layer mask gives you more control, because you can readjust the correction at any time or undo it in specific places with the brush. The manual method with Quick Selection, Desaturate, and tone curve takes a bit more time, but delivers the most precise results. It's best to avoid red eyes already when taking the photo, for example by using your camera's pre-flash. But in an emergency, you now know how to remove them from your images.
FAQ
Do I always have to create a selection before applying the filter?Yes, this is strongly recommended. Without a selection, the filter affects the entire image and also removes unwanted red tones from other areas.
Can I still edit a layer mask later?Yes, you can add areas at any time with a white brush or hide them again with a black brush.
Which method is the fastest?The "Red Eye Removal" filter with a previously made selection is usually the quickest to complete.
What should I do if red is still visible at the edge of the pupils?Gradually increase the threshold in the filter dialog and check the preview until the red component disappears.


