
Not every photo turns out well in the weather that happens to prevail. A gray, cloudy sky can quickly make an otherwise good subject look dull. With GIMP, the sky can be replaced afterwards, and in such a way that the editing is barely noticeable in the finished image. You don't need any special tools for this, just the Magic Wand tool, a few filters, a layer mask, and some patience for the fine-tuning.
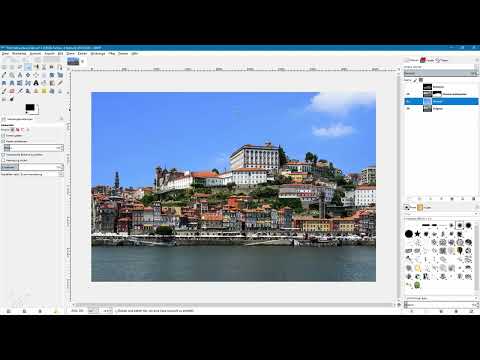
The video is only loaded from YouTube when you play it – data (including your IP address) is then transmitted to YouTube/Google. More in the privacy policy
The following guide takes you step by step through the entire process: from selecting the sky, through the mask, to the color adjustment that blends the new sky into the scene.
Key Takeaways
- Always work on layer copies so that the original image remains unchanged and you can go back at any time.
- The Magic Wand tool alone quickly reaches its limits with uneven skies and building edges. A filter for finding edges helps to separate the sky cleanly.
- A layer mask that you create from the selection is non-destructive and can be corrected at any time later.
- A new sky only looks believable when colors and brightness harmonize with the subject. Desaturation, a soft transition, and a color harmony layer in "Overlay" mode take care of that.
Step-by-Step Guide
Preparing the Selection with the Magic Wand Tool
Select the Magic Wand tool and click on a blue area of the sky. GIMP then marks pixels of similar color in the immediate surroundings, depending on the set threshold. To add more areas, hold down the Shift key and click again. In this way, the selection grows bit by bit. With such a uniform sky, however, this takes a long time, and individual areas often remain unselected.

Increasing the Threshold
A faster option is to increase the threshold in the tool settings. This captures more similar colors in a single click. The problem with this: parts of the house facade or the roof quickly end up in the selection too. Therefore, undo the last selection before continuing, and proceed with a different method.

Creating a Contour Layer
First, create a copy of your original layer so that you are not working directly on the original image. Name it, for example, "Replace Sky". Then create a second copy and call it "Contours". Activate the contour layer and in the Filters menu choose Edge-Detect and there Edge. In the preview window you can see that contours in the image are displayed brightly, while the sky becomes almost black. This very contrast will help you later to separate the sky from the rest of the image. The default settings of one to two are usually sufficient here, and you confirm with OK.

Darkening the Sky on the Contour Layer
The contours are not yet completely clean, because some light gray cloud areas remain at the edge. To fix this, open the Levels dialog under Colors. Drag the black slider to the right to darken the dark areas, that is, the sky, even further. You can move the gray slider slightly to the right and the white slider slightly to the left so that the contours become brighter. Keep an eye on the preview until you like the result, and confirm with OK.

Selecting the Sky with a Higher Threshold
Now the sky is almost completely black and clearly separated from the white contours. Switch back to the Magic Wand tool and increase the threshold to about 75. Also activate the Feather edges option with a radius of about 10. This makes the edges of the selection softer, and you get a smoother transition. Then click into the sky. Probably a few tiny dots will remain. Hold down the Shift key and click on these spots until the entire sky is selected. This time, the facade and roof should no longer be selected.

Creating a Layer Mask from the Selection
Keep the selection active and switch to the "Replace Sky" layer. Right-click on this layer and choose Add Layer Mask. In the dialog, choose the Selection option and confirm with Add. The layer now has a layer mask that corresponds exactly to your selection. Then hide the contour layer, since you no longer need it. At the moment you still see the old sky, because the mask is inverted.

Invert the mask
Remove the selection via Select and None. Click on the layer mask and choose Colors and then Invert. Now the old sky is hidden and the buildings are visible again. Using the eye icon of the original layer, you can show and hide the original image for comparison.

Place and adjust the new sky
Now drag your new sky image into GIMP via drag and drop. Name the layer "Himmel" and move it in the layers palette between the original image and the masked layer. If the new sky is too large, activate the Scale tool. Hold down the Ctrl key while dragging so that the proportions are preserved, and confirm with the Enter key.


Refine the layer mask
Check the mask by clicking on the mask thumbnail while holding the Alt key. This way you see the mask in grayscale. You might notice that areas that actually belong to the building are not yet white. Choose the Paintbrush tool with a hard brush, set the paint dynamics to Dynamics off, and set white as the foreground color. Then paint over the affected areas until they are completely white. After that, switch back to the sky layer.

Desaturate the sky
The new sky may look too intense. Activate the sky layer and choose Colors and then Hue-Saturation. Use the saturation slider to reduce the color intensity. With the preview active, you immediately see what the result looks like. Often a slightly lower value looks even more natural than the first impression. Then confirm with OK.

Create a soft transition using color from the sky
At the edges of buildings, a residual fringe of the original sky sometimes remains visible. Therefore, create a new transparent layer above the sky layer with the width and height of the document and name it "Übergang". Then choose the Paintbrush tool with a very soft brush and a larger size that fits the image scale. Use the color picker to pick up a lighter blue tone from the transition between sky and cloud. If the color picker doesn't respond in the color dialog, simply switch to the Color Picker tool and select the color directly in the image. Greatly reduce the brush opacity and paint carefully along the building edges. Several thin strokes look more natural than a single strong stroke.


Create color harmony using a layer mode
Finally, you make sure that the new sky also influences the colors of the buildings. To do this, duplicate the sky layer, name the copy "Farbharmonie", and drag it to the very top. Apply the Blur filter to this layer and then the Gaussian Blur with a high value of about 150. Since this is only about color information and no details are to be transferred, the strong blur is exactly right. Then change the layer mode from Normal to Overlay. If the result looks too colorful, reduce the layer's opacity, for example to about 80.


Create a before-and-after comparison
For a comparison, duplicate the original layer and drag the copy to the very top. By showing and hiding this layer, you immediately see how much the image has changed.

Summary – Replacing the sky in GIMP: step by step
With a few tools and a cleanly created layer mask, an overcast sky can be replaced with a clear sky without the image looking artificial. What matters is working with layer copies, making the contours visible via the Edge Detect filter, and the mask, which you then invert and refine. The final finishing touch is given to the image by a soft color transition and a color harmony layer in Overlay mode. If you follow these steps calmly, you can also apply the technique to other photos.
FAQ
Why should I work with layer copies?Layer copies preserve your original image. You can return to the initial state at any time without having to edit the shot again.
Why isn't the Magic Wand tool enough on its own?With uniform skies, the Magic Wand tool can quickly select areas, but it often overlooks small gaps or captures parts of buildings. With contours from the Find Edges filter, the sky can be delineated much more cleanly.
What does the tolerance do with the Magic Wand tool?The tolerance determines how different colors may be and still belong to the selection. A higher value captures more tones at once, but increases the risk that unwanted areas are also selected.
Why does the mask have to be inverted?The selection initially includes the sky. However, the layer mask hides everything that is white and shows everything that is black. By inverting, the old sky is hidden while the buildings remain visible.
How can I tell if the layer mask is clean?Hold down the Alt key and click on the mask thumbnail. The mask is then displayed in grayscale, and you can immediately spot gaps or flaws.
What does the Overlay layer mode do?The Overlay mode blends the colors of the sky layer with the layers beneath it. This way, the tones of the new sky are transferred to the buildings, making the overall image look more harmonious.
Can I reduce the effect of the color harmony?Yes, the strength of the effect can be adjusted via the layer's opacity. At a value of around 80 percent, the result often looks more natural.


