
Dark wrinkles often look stronger in portrait photos than they actually are. With GIMP, you can soften individual fine lines after the fact without making the face look artificially smooth. That is exactly what this practical tutorial is about. You will edit a portrait in which the skin deliberately retains its highlights and natural texture. A complete skin retouch is not the goal.
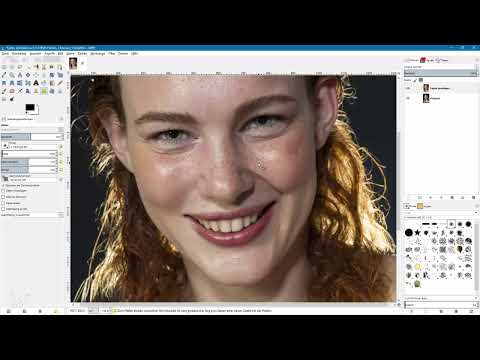
The video is only loaded from YouTube when you play it – data (including your IP address) is then transmitted to YouTube/Google. More in the privacy policy
The process is divided into two methods. The first works with the Heal tool on a copy of the original layer, the second uses frequency separation. Both approaches are non-destructive, meaning your original image remains untouched and you can readjust at any time.
Key Takeaways
Always work on a copy of the original layer so you can go back at any time. The Heal tool does not work reliably on a transparent layer, so you have to work directly on the copy. Opacity is your most important control: First remove the wrinkle completely and then gradually blend it back in. Repeated structures become noticeable quickly, so change the source regularly. Frequency separation makes it possible to edit structures and colors separately, which leads to a particularly soft result.
Step-by-Step Guide
Preparation: Creating the Copy of the Original Layer
Before you get started, duplicate your original layer. To do this, click the icon for a new layer by copying in the Layers dialog. Then give the copy a clear name, for example "Soften wrinkles". This way you keep track of things when working with multiple layers and always know which layer you are currently working on.

Why the Heal Tool Has to Work on the Copy
Normally, when cloning, you create a separate transparent layer. With the Heal tool, this does not work. If you activate the "Sample merged" option, the tool does take the entire image into account, but it still does not draw anything on a transparent layer. Even with the normal Clone tool, the copy could not be replaced, because you specifically want to use the Heal tool. Therefore, work directly on the copy and leave the "Sample merged" option deactivated for the Heal tool. This way you only access the sources of the current layer.


Setting an Intermediate Goal: Remove the Wrinkles Completely First
Your first step is to completely remove the affected wrinkles on the copy. This may sound excessive at first, but it has a clear advantage. Later, you can use the copy's opacity to make the wrinkles visible again bit by bit until exactly the right amount is reached. However, a face without any wrinkles quickly looks unnatural, so this intermediate state is only a starting point.

Enlarging the View and Preparing the Brush
Zoom in closer to the image for the fine work. With the 1 key, you get a 100 percent view so that you can see the structures of the skin precisely. Choose a very soft brush for the Heal tool, because hard edges give away the editing immediately. You can adjust the brush size at any time. Adjust it so that it matches the width of the wrinkle.
Also deactivate the "Dynamics" option by choosing "Dynamics Off". This way you keep full control over size and opacity while cloning and do not have to constantly readjust these values. For alignment, you should choose the "Aligned" option. Then the distance between source and target stays constant while painting.


Selecting Source Areas and Covering the Wrinkle
Hold down the Ctrl key and click on an area of skin near the wrinkle. This point serves as the source. Release the Ctrl key and then paint over the wrinkle. The Heal tool takes over the texture from the source and automatically adjusts brightness and color to the surroundings.
Then set new source points again and again by holding down Ctrl once more and selecting a different area. Paint over the edited spot each time. This gradually creates complete coverage of the wrinkle. At this point the result still looks unnatural, which is perfectly fine at this stage.

Avoiding repetitions
A common mistake is that the same structure is repeated several times in the image. This is immediately noticeable, especially with skin pores and fine lines. Therefore, reduce the opacity to about half and paint over the spot several times with changing sources. Make sure that you keep picking up new source areas in between.
If you do notice a duplication, you can cover the affected area with a different source. Especially with larger wrinkles, it makes sense to take your time and work through the individual areas one after another.

Editing further wrinkles
With the same procedure, you can tackle further wrinkles, such as the wrinkle on the right side of the face. Work carefully and check after each step whether patterns are repeating. For each wrinkle, consider whether it should be softened at all. Not every line is bothersome, and some wrinkles are part of a portrait's character.

In the eye area, a particularly delicate touch is worthwhile. Here, in addition to the wrinkles, you can also subtly remove some shiny spots. If small brush tips are barely visible in the slider, enter the size directly as a number. This makes the fine work much easier.


Adjusting opacity and dosing the result
After you have completely removed the wrinkles, reduce the opacity of the copy very strongly. This way you see almost the original image again. Then slowly increase the opacity until you reach the point where the lightening looks right to you. In the result, the wrinkles are still recognizable, but significantly softer. This exact degree of softening is the goal.

Method 2: Preparing the layers for frequency separation
For the second method, hide the previous layer and create three copies of the original layer. Name the top layer "Vergleich" ("Comparison") so that you have a quick before-and-after comparison later. The second layer gets the name "Struktur" ("Structure"), the third the name "Farben" ("Colors"). Drag the "Falten abmildern" ("Soften wrinkles") layer all the way to the bottom so that it does not cover the other layers.


Preparing the color layer with the Gaussian blur
Once you are on the color layer, select "Blur" under "Filter" and then the "Gaussian Blur". A value of 17 causes the structures in the image to blur. Apply the setting with "OK" and remember the value, because you will need it again shortly.

Isolating the structure layer with the high-pass filter
Show the structure layer again and select the high-pass filter under "Filter" in the "Generic" area. Use the value 17 again. Deactivate the "Keep Original Layer" option so that only the structure information is retained. Then set the layer mode of the structure layer to the mode for structures, which the video calls "Fiber". As a result, the interplay of the color and structure layers gives you your original image again, just separated into two information layers.

Weakening dark wrinkles on the structure layer
Now hide all other layers so that you only see the structure layer. Here you can see the details of the skin, but also the dark wrinkles. These are exactly the structures you want to weaken. To do this, switch to the clone tool and reduce the opacity. A brush size of about 30 works well for this image.
The important thing is to deactivate the "Sample merged" option under "Source". You only want to work within this layer and use only its sources. Under alignment, activate "aligned" again. Hold down Ctrl, select a bright area nearby, and paint over the dark wrinkle. The goal here is not to remove the wrinkle completely, but to lighten it. Repeat the process several times and change the source regularly.


If you compare the effect with the other layers, you will quickly see how much the wrinkles have already faded. Continue working carefully around the eyes and on the left side of the face as well. The wrinkles should become softer, not disappear.
Using the color layer for soft transitions
Additionally, you can work on the color layer to adjust the affected areas in terms of color. Activate the color layer and switch to the paintbrush tool. There, activate the "Sample size" option with a value of about 5. You leave the "Sample merged" option deactivated at this point, since you are working exclusively with the colors of this layer.
Hold down the Ctrl key to pick up a color from a bright area and greatly reduce the opacity. Increase the brush size, for example to 40, and paint over the affected areas. This creates gentle color transitions. Use a very soft brush and keep choosing a different color so that no area looks artificial. For particularly dark areas, such as in the laugh lines, you can also pick up a slightly darker shade and use it to lighten the wrinkles.


Comparing the results of both methods
Finally, you can compare the results directly. To do this, show the healing tool layer and compare it with the original image. Then show the variant with frequency separation. Both results help you recognize the differences. The first method is particularly well suited for targeted interventions in individual spots. The second method is often the better choice if you want to preserve the overall structure of the skin.
Summary ??? GIMP Softening Wrinkles: Natural Results with Two Methods
In this tutorial, you have learned two ways to soften wrinkles in portrait photos in GIMP. The first method uses the healing tool on a copy of the original layer. You first remove the wrinkles completely and then fade them back in via the opacity until the result looks natural. The second method separates structures and colors from each other. With the Gaussian blur and the high-pass filter, the structures can be edited in a targeted way, while the colors are adjusted separately.
Both methods share the non-destructive approach, with which you can return to the original image at any time. Which method fits better depends on the particular photo. It is worth knowing both and reconsidering with each image.
FAQ
Do I have to remove the wrinkles completely before softening them?With the first method, this intermediate step makes sense because you can then adjust the amount via the opacity. However, the result should never look completely wrinkle-free.
Why doesn't the healing tool work on a transparent layer?The healing tool does not draw reliably on a transparent layer. That is why you work directly on a copy of the original layer.
How do I avoid repeated patterns in the skin?Change the source regularly by holding down Ctrl and selecting new areas. Also reduce the opacity and paint several times with different sources.
Which brush should I use?A very soft brush prevents hard edges. Also deactivate the paint dynamics so that you keep size and opacity under control while cloning.
What does the Gaussian blur do in frequency separation?It blurs the structures in the image. This way, the color information is retained on the color layer without the details interfering.
Why is the high-pass filter applied to the structure layer?The high-pass filter isolates fine details such as skin textures and wrinkles. You can then edit this layer in a targeted way.
Should I soften every wrinkle?No. Consider which wrinkles really disturb the impression. Some lines are part of a portrait's character and may be kept.


