
An image often looks flat, even though only a few areas really need contrast. With GIMP, you can strengthen the contrast exactly where it is needed and make the image more three-dimensional step by step. This guide shows you how to do this non-destructively, that is, without permanently changing your original image.
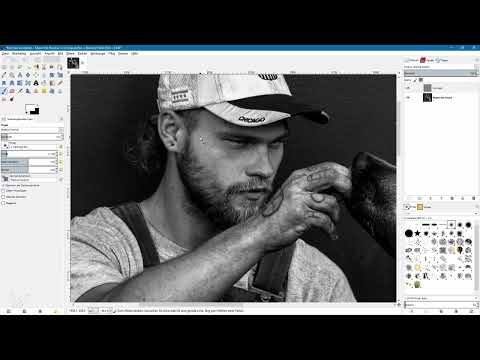
The video is only loaded from YouTube when you play it – data (including your IP address) is then transmitted to YouTube/Google. More in the privacy policy
This tutorial builds on the method from the previous video, which dealt with general contrast enhancement. Now we move on to the next step: targeted, partial editing.
Key Takeaways
- A general contrast increase affects the entire image and can clog up dark areas and blow out bright areas.
- A layer mask allows you to fade in the effect only in certain places. However, this is cumbersome if you later want to undo individual changes.
- With a layer in "Soft Light" mode filled with medium gray, you can selectively lighten or darken light and shadow.
- The Dodge and Burn tool is well suited for modeling, but it works directly on the image layer and is therefore less flexible.
- With low opacity and white or black on the gray layer, corrections can be built up gently and undone at any time.
Step 1: Prepare the Contrast Layer
Start with a copy of your original layer. Duplicate the layer and initially leave it with its default name. Then set the copy to the layer mode "Soft Light". The image immediately gains noticeably more contrast, but some dark areas lose their detail and become almost black, while bright areas blow out. We want to control exactly these effects in the next step.

Step 2: Create a Black Layer Mask
Right-click the copy and select "Add Layer Mask". Choose a black mask. This initially hides the contrast effect completely, and the original image remains visible. Then click on the mask once to make sure you are really working on the mask and not on the image layer.

Step 3: Fade in the Effect Selectively with the Brush
Select the Brush tool and set the foreground color to white. If black is active as the foreground color on your end, simply swap foreground and background colors using the double-arrow icon. Enlarge the brush to a comfortable size and paint with white on the black mask. Wherever you paint, the contrast effect becomes visible.
Paint over the shoulder, for example. The bright areas become brighter, the dark ones somewhat darker. However, be aware that with this method light and shadow are always strengthened together. If you paint over the arm or the face, the beard and shadows darken heavily, while the cap and other bright spots quickly blow out. The image loses detail there. A layer mask is therefore well suited for simple fade-ins, but it is not sufficient for deliberately controlling light and shadow separately.

Step 4: Try Out the Dodge and Burn Tool
Now delete the contrast layer again and create a new copy of the original layer. Then switch to the "Dodge/Burn" tool. It allows you to selectively lighten or darken areas, and you can choose between shadows, midtones, and highlights.
For bright areas, choose "Dodge" and the option "Highlights" with a low exposure. Start several times and paint over areas like the arm or the pants. This way you can lighten the highlights step by step. Midtones or the edge of the image can also be edited quite easily this way.

The disadvantage of this method is obvious: You are working directly on an image layer. If you want to remove an individual correction later, you have to work with masks and afterwards have hardly any options for changing the edited areas again.
Step 5: Create a Neutral Grayscale Layer
The non-destructive way is via a separate layer with medium gray. To do this, set the foreground color to a medium gray by entering the value 50 for brightness. Then create a new layer using the icon in the layers palette, fill it with the foreground color, and give it a descriptive name such as "Contrast".

Set this layer to the "Soft Light" mode. Medium gray becomes transparent, and the original image is visible again unchanged. Light colors on this layer brighten the image, dark colors darken it. This gives you a tool that you can rework at any time.

Step 6: Paint with a soft brush and low opacity
Now select the Paintbrush tool and set white as the foreground color and black as the background color. Choose a soft brush tip and reduce the opacity significantly, to about 11 percent. The low opacity ensures that the effect builds up only slightly with each stroke. You can paint over the same spot several times and thus work very carefully.
For example, paint over the bright areas of the arm. At first, the difference is barely visible. But hide the layer once and show it again, and you will see how the highlights have been deliberately raised. Without changing the layer mode, you would not have carried out a general contrast increase in this area, but a targeted brightening.

For fine details, make the brush smaller. If you want to edit areas more precisely, zoom into the image with the Zoom tool. By holding down the space bar and dragging the mouse, you move the view section so that you can move through the entire image at your leisure.

Step 7: Darken shadows selectively
To emphasize shadows, swap the colors and paint with black. Now the contrast layer is darkened where you want it, for example on a shadow next to the body, at the edge of the arm, on the neck, or on individual parts of the trousers. Use a smaller brush for fine edges.
It is especially important to vary the opacity and the brush size. This way you can build up light and shadow bit by bit until the image achieves the desired three-dimensionality. However, make sure that the changes do not become too strong. Especially with portraits, you should edit the eyes and facial areas sparingly.

Step 8: Compare and fine-tune the effect
Finally, a comparison is worthwhile. Hide the contrast layer and show it again, and compare the results. Especially in shadows and at edges, it becomes apparent how strongly the image has actually been modeled. The individual steps often seem only slight while painting, but are clearly noticeable in comparison.

Step 9: Undo corrections with medium gray
A great advantage of this method becomes apparent when you want to undo changes. To do so, temporarily set the layer mode of the contrast layer to "Normal". You will then see a kind of drawing on the original image in which light and dark areas become visible. Afterwards, set the mode back to "Soft Light".
Now choose medium gray as the foreground color and paint with the brush over the area whose contrast effect you want to remove. Increase the opacity, for example to 100 percent. The contrast increase disappears at this spot. If you want to apply the effect again later, simply paint over the spot again with white or black. This keeps the image flexible at all times.

Step 10: The result at a glance
With this method, you do not increase the contrast generally, but model highlights and shadows selectively. The result looks more three-dimensional without losing details. The work is more time-consuming than a single click, but it offers full control and the possibility to make improvements at any time.

Summary ??? Increase contrast selectively: Model light and shadow with GIMP
Partial contrast enhancement in GIMP works best via a layer in "Soft Light" mode filled with medium gray. With white you brighten, with black you darken, and with low opacity you work carefully. You undo corrections with medium gray, without touching your original image.
FAQ
Why should I use a layer with medium gray and not simply a layer mask?With a layer mask, you only show or hide an effect. With a gray layer in "Soft Light" mode, on the other hand, you can control highlights and shadows separately and rework changes at any time later.
What opacity should I choose for the brush?A low opacity, around 11 percent, works well. This way you can paint over the same spot several times and build up the effect step by step.
What does it mean when I paint with white?White brightens the underlying area. So the highlights in the image become brighter.
What does black do on the contrast layer?Black darkens the area. This allows you to deepen shadows selectively.
How do I undo a correction?Choose medium gray as the foreground color and paint with a high opacity over the affected spot. The contrast increase disappears there again.
Can I still use the Dodge and Burn tool?Yes, the tool is well suited for quick adjustments. However, it works directly on the image layer, which is why individual changes are difficult to undo later.
How do I avoid the image looking unnatural?Work in small steps, vary brush size and opacity, and regularly compare the result by hiding and showing the layer. With portraits, you should edit the eyes and facial areas especially sparingly.


