
Anyone who removes skin blemishes with the healing brush often loses the fine skin texture along with them. Frequency separation solves this problem by splitting the image into two layers: one for the colors and one for the details. This way you can correct shiny spots and color differences without touching pores or skin texture. In this tutorial, I will guide you through the entire process in GIMP, from preparing the layers to correcting individual areas. The photo in the video is only for illustration, since large skin blemishes are barely visible on it. That is exactly why it is well suited for following the technique at your own pace.
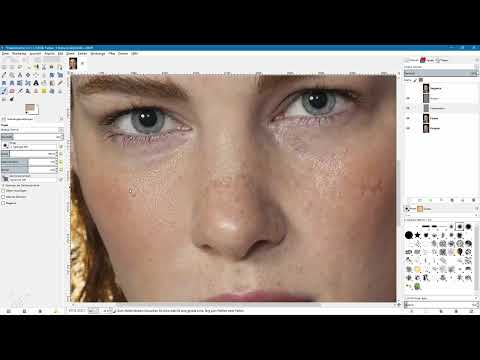
The video is only loaded from YouTube when you play it – data (including your IP address) is then transmitted to YouTube/Google. More in the privacy policy
Key Takeaways
Frequency separation splits an image into a color layer and a texture layer that you can edit separately. The Gaussian blur creates the color layer, and the high-pass filter creates the texture layer. The layer mode "Grain Merge" combines both layers again into a complete image. The value for the blur radius must be identical for the texture layer, and you should remember it. You correct the shiny spots with skin colors on a transparent layer, and the scars and textures with the clone and paintbrush tools on the texture layer.
Step-by-Step Guide
Step 1: Prepare the Layers
Start with the original as the only layer. Duplicate this layer three times using the corresponding icon at the bottom of the layers palette. Rename the top copy "Comparison", the second "Texture" and the third "Colors". Hide the comparison layer for now. Later, you can switch back and forth between the original and the edited version with a single click.

Step 2: Blur the Color Layer
Hide the texture layer and select the "Colors" layer. In the "Filters" menu, open the "Blur" section and choose the "Gaussian Blur". Activate the preview and navigate in the image to an area with distinct structures, such as the eyebrow. Increase the radius gradually. At 5 pixels, individual hairs are still recognizable, at 35 pixels the details disappear, and only brightness gradients remain. Be careful not to set the value too high. At 100 or 500 pixels, you only get a mush of color, and the method no longer works. The right value depends on the image. For this example, 35 pixels is right. Remember this value, because you will need it again shortly.

Step 3: Apply the High-Pass Filter to the Texture Layer
Show the texture layer again and activate it. In the "Filters" menu, choose the "Generic" section and there the "High Pass Filter". The filter has no preview, so you have to enter the radius exactly. Enter the value from the previous step, that is, 35 pixels. Deactivate the "Original Layer" option so that the filter acts directly on the layer and no additional layer is created. The texture layer then mostly shows a medium gray, while details become visible as lighter or darker areas. The high-pass filter is not included in GIMP by default. Check beforehand whether it is available under "Generic" on your system.

Step 4: Combine the Layers with the "Grain Merge" Mode
Activate the texture layer and open the layer mode menu in the layers window. Choose the "Grain Merge" mode. This makes the medium gray transparent, and the light and dark areas are combined with the color layer beneath. The image now looks like the original again. To check, show the comparison layer and compare both states. If they look identical, you have set up the frequency separation correctly.

Step 5: Create a Transparent Layer for the Shiny Spots
To correct the shiny spots, you need an empty layer between the texture layer and the color layer. To do this, click on the "Colors" layer and then on the icon for a new layer. Name the layer, for example, "Color Correction" and choose "Transparency" as the layer fill. Since the layer lies between the other two, you only change the colors when painting, not the textures. Then zoom to about 50 percent so that you have a good view of the forehead, cheeks and chin.

Step 6: Pick Up Skin Colors and Paint with Low Opacity
Select the paintbrush tool and reduce the opacity significantly, to about 20 percent. Adjust the size to the shiny spot and deactivate the brush dynamics so that the stroke remains even. Now pick up a skin color from the image while holding the Ctrl key. The "Sample merged" option in the tool settings of the color picker is important here. When it is activated, the picker samples from the entire visible image and not just from the empty layer. Then paint over the shiny spot several times. Keep changing the color, especially at transitions, so that soft color gradients are created. Turn the layer off from time to time to compare your result with the before state.

Step 7: Fine-tuning the correction
Check the areas where the colors look too dark or too light, and correct them with new skin colors and a larger, softer brush. For shadows and transitions, such as at the corner of the mouth, you should be even more careful with the opacity. If the correction looks too strong overall, reduce the opacity of the "Color correction" layer, for example from 100 to 80 or 75 percent. This blends some of the original back in. A drawback sometimes appears in GIMP: after clicking on a layer, the color picker does not work right away. In this case, briefly hold down the Control key, and then it works again.

Step 8: Reducing the textures on the texture layer
The color correction did not change the fine textures, and that is exactly the advantage of frequency separation. If you want to reduce the textures themselves, select the "Texture" layer. It mostly contains medium gray, which is transparent in the "Grain merge" mode. In the color settings, set the brightness value to 50 to get a medium gray as the foreground color. Choose a soft brush with low opacity and paint over the areas with strong contrast. The texture becomes weaker as a result. Work carefully with few strokes and start gently at the edge so that no visible transition is created.

Step 9: Removing scars with the clone tool
For smaller blemishes such as scars, you switch to the clone tool and work on the texture layer. Make sure that the "Sample merged" option is deactivated for this tool. Otherwise, it takes information from the entire image and not just from the active layer. Activate soft painting, choose a small brush, and, holding down the Control key, pick a clean area of skin as the source. Then click on the scar and paint over it. The texture is transferred in the process, but the color is not. That is why the area often remains too dark.

Step 10: Reworking the colors
After removing the texture, switch back to the "Color correction" layer. Holding down the Control key, pick a suitable skin color and paint over the dark areas with low opacity. Repeat the process with changing colors until the transition looks harmonious. At the end, compare the result with the original by showing and hiding the comparison layer. If you edit the image calmly and zoom in regularly, you will achieve significantly better results than in the video, in which the work was deliberately shown quickly for time reasons.

Summary ??? Skin retouching with frequency separation in GIMP step by step
With frequency separation, you split your image into a color layer and a texture layer. This allows you to correct highlights and color differences without losing pores and fine skin textures. The color layer is created with the Gaussian blur, the texture layer with the high-pass filter with the identical radius. In the "Grain merge" mode, you put the two back together. You work on highlights with skin colors on a transparent layer, and on scars and textures on the texture layer. The method requires patience and regular comparisons with the original, but rewards you with a natural result.
FAQ
Why must the radius of the blur and the high-pass filter be identical?Only with the same value do the two layers combine again exactly into the original image in the "Grain merge" mode; otherwise, brightness errors or leftover textures occur.
What happens if I choose a blur radius that is too high?Then all details blur into a single mush of color, and the texture layer contains hardly any usable information for later editing.
Why should I activate the "Sample merged" option for the color picker?It ensures that the color picker picks up colors from the entire visible image, which would otherwise not be possible on an empty, transparent layer.
Why do I deactivate "Sample merged" for the clone tool?Without this setting, the tool only copies information from the active layer, i.e. the texture layer, which is exactly the desired behavior when removing textures.
Can I adjust the opacity of the color correction layer afterwards?Yes, you can reduce the opacity at any time to blend some of the original image back in and make the correction look more natural.
Is frequency separation also suitable for professional jobs?Yes, it is particularly suitable for professional skin retouching because you can edit both colors and textures independently of each other and correct them at any time.


