
With just a few clicks, turn a plain lettering into something eye-catching: that's exactly what this tutorial shows you. You'll learn how to create gradients, outlines, double outlines, blur, a wood look, and text along a path in GIMP. Along the way, you'll come across a quirk of the program that you should know about before you get started: as soon as you apply an effect, the editable text layer becomes a pixel layer. From then on, the text can no longer be rewritten. That's why it's best to work with a copy of your original.
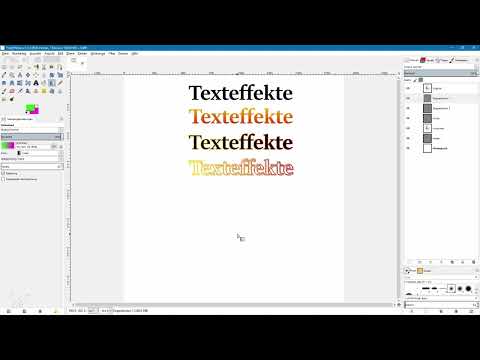
The video is only loaded from YouTube when you play it – data (including your IP address) is then transmitted to YouTube/Google. More in the privacy policy
Key Takeaways
The most important points at a glance:
- A text layer remains editable only until you apply an effect to it.
- Before every effect, create a copy of your original layer and keep the original untouched.
- Gradients and outlines can be created with tools such as the Gradient tool, the Bucket Fill tool, and Stroke Path.
- For blur, you need to adjust the layer size beforehand, otherwise the effect will be cut off.
- You can achieve a wood look and similar image-filled text with a layer mask created from the text's alpha channel.
- Text along a path requires a path that is long enough for the text.
Preparation: Setting Up the Original Layer Properly
Start with a white background layer. Choose the Text tool and set an easily readable font at a size of 200 pixels and in black. Then click once in the image and type your text. So that you can position it precisely, enable the option "Move the active layer" in the Move tool.
Next, give the text layer a clear name, for example "Original". You'll keep this layer in the background as a template, because you'll need it again for every further effect.

First Effect: Text with a Gradient
Duplicate the original layer, drag the copy downward, and name it, for example, "Gradient". Make sure the text layer in the Layers palette still shows the icon for editable text. You can tell this by the fact that you can click into the text with the Text tool at any time and change it.
However, as soon as you apply an effect, GIMP converts the layer into a pixel layer. You are then working destructively, because only individual pixels remain and the text can no longer be rewritten.
For the gradient layer, enable the "Lock alpha channel" icon. This keeps the background transparent and the gradient ends up only in the text. Then choose the Gradient tool and set the foreground and background colors in the toolbox, for example a red and an orange-yellow.
Drawing the Gradient and Varying the Direction
With the Gradient tool, drag out a gradient on the active gradient layer. As soon as you release the mouse button, the text layer becomes a pixel layer, which you can see in the Layers palette. The text now appears with a linear color gradient.
If you don't like the direction, simply drag the gradient from bottom to top, diagonally, or in another direction. You can change the colors at any time and set a new gradient. Since your original layer is still there, you can start over at any time if needed.
Adjusting the Layer Size Before You Blur
When converted, the pixel layer is automatically cropped to the size of the text. If you later want to use an effect with a lot of spread, such as a soft blur, this space isn't enough. A blur would then be cut off at the layer boundary.
Therefore, select the pixel layer and, in the "Layer" menu, open the "Layer Size" entry. There you enter the width and height manually, for example 1500 by 500 pixels, and center the text. The preview below shows you what the layer looks like after the change.

Outlined Text by Stroking a Path
GIMP offers no direct outline function for text. You therefore take a detour via a path. First create a copy of the original layer, name it, for example, "Outline text", and drag it downward. Then right-click the text layer and choose "Path from Text".
The path initially appears only in the Paths palette. Make it visible by clicking the empty area next to it in the Paths palette. The red line merely shows you the path. It is not yet a finished outline.
Now create a new transparent layer above the outline text, for example named "Outline", and choose "Transparency" as the layer fill type. Switch to the Paths tool and click on the path. With the "Stroke Path" option in the tool settings, a dialog opens.

Select "Stroke with solid color" there and set the line width, for example 4 pixels. Confirm with "Stroke". GIMP draws the outline along the path in the current foreground color. Then hide the path so that only the outline is visible.

If you only want to change the color of the outline, protect the transparent areas of the outline layer again. Choose a new color and fill the selection with the fill tool. Alternatively, you can also drag out a gradient here.
Creating a double outline
A double outline is created by making two copies of the outline layer and naming them "Double outline 1" and "Double outline 2". Beforehand, crop the size of each copy using "Autocrop layer" so that the layers don't remain unnecessarily large.
Then move the two outlines slightly offset from each other. The arrow keys on the keyboard help you with fine adjustments, because they let you work more precisely than with the mouse.

Give the upper double outline a gradient, for example from green to pink, and give the lower outline a gradient in the opposite direction. With a bit of experimenting, you will quickly find a combination you like.

Text with blur in partial areas
For this effect, you again create a copy of the original layer and name it, for example, "Text with blur". Here too, first enlarge the layer size, for example to 1500 by 600 pixels, so that you have enough room to work with later.
Then select the Blur tool and use a very soft brush. With the "Blur" mode active in the lower area, you can make specific areas blurrier. Paint mainly with the edge of the brush so that the transitions between sharp and blurred zones stay soft.

You can go over the top by making the brush smaller and smudging individual letters more strongly so that they recede into the background.
The Gaussian Blur under "Filters", "Blur" is also suitable for experimenting. Set a high value and confirm with OK. Remember that the effect is only visible within the layer boundary.

White outline over the blurred text
Text with blurred areas looks especially striking when a white outline lies over it. To do this, duplicate the blur layer, name it "Text with blur and outline", and place it at the desired position.
You create the outline by placing a double outline layer on the text. Activate the "Lock alpha channel" function, choose white as the foreground color, and fill the selection with the fill tool. With this method, the white outline remains clearly visible, especially in the blurred areas.

Wood-look text with a layer mask
Instead of a color, you can also use a photo as the text fill. To do this, drag an image with a wood look into your project. With the Scale tool, you shrink or enlarge it so that it is approximately the same size as the text. Then name the layer, for example, "Wood texture".

So that the image only appears within the text, you need a layer mask. Duplicate the original layer, drag it down, and right-click it. Select "Alpha to Selection". Then hide the text layer.

Now click on the wood texture, select "Add layer mask", and choose the "Selection" option. You now see text with a wood look. Deselect the selection again with Ctrl + Shift + A.

Placing Text Along a Path
To make text follow a curved path, first zoom out of the image a bit so that you have enough room for the curve. Then create a path with the Paths tool: Click at the start position, drag the handles to shape the curve, and add more anchor points. By holding down the Shift key, you can align the handles evenly.

Rename the path in the Paths palette, for example to "Path". It is important that it is selected in the Paths palette. It does not have to be visible.
Next, create a copy of the original text layer, name it "Path Text" and drag it downwards. Right-click it and choose "Text along Path". GIMP then creates a text that follows the path.
Note that GIMP offers no function to automatically center the text on the path. Therefore, plan the length of the path based on the length of your text.
To color the text, convert the path into a selection. To do this, right-click the path in the Paths palette and choose "Selection from Path". Then create a new transparent layer, for example "Path Text Fill", choose a foreground color and fill the selection with "Edit", "Fill with Foreground Color". Finally, deselect the selection again.

Summary ??? GIMP Text Effects: Gradient, Outline, Blur and Path Text Step by Step
In this tutorial, you have learned how to create various text effects with GIMP. You now know that a text layer becomes a pixel layer after applying an effect, which is why making a copy of the original is sensible. You can draw gradients, trace outlines along the path, create double outlines, apply blurs selectively, add a wood look with a layer mask, and place text along a path. GIMP is not particularly convenient, but with clear planning and a combination of different functions, you can reliably achieve good results.
FAQ
Why can't I edit my text anymore after applying the gradient?As soon as you apply an effect to an editable text layer, GIMP converts it into a pixel layer, which can no longer be edited as text.
How do I prevent the gradient from also coloring the background?Before using the Gradient tool, activate the "Lock alpha channel" icon in the Layers palette so that only the text is colored.
Why is my blur being cut off?The pixel layer is only as big as the text. Enlarge it beforehand via "Layer", "Layer Boundary Size" so that the effect has room.
How do I create an outline even though GIMP has no outline function?Create a path from the text, make it visible and use the "Stroke Path" option in the Paths palette with a solid color on a transparent layer.
How can I change the thickness of the outline?You set the line width when stroking the path. For a thicker outline, repeat the steps and delete the old outline layer.
How do I achieve a wood look in the text?Place a wood image over the text, create a selection from the alpha channel of the text layer and apply this selection as a layer mask to the image.
Why isn't my text centered on the path?GIMP offers no automatic centering. Therefore, adjust the path length to the length of the text before you create the text along the path.


