
Imagine the light in your photo begins to glow softly and the contours dissolve a little. You know exactly this mood from dream sequences in the movies. With GIMP, it can be transferred to your own photos without much effort. All you need is a few layers, a blur, and the right layer mode.
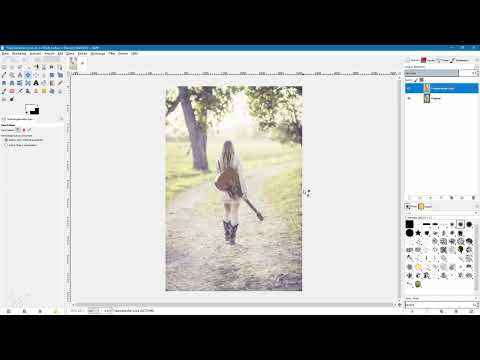
The video is only loaded from YouTube when you play it – data (including your IP address) is then transmitted to YouTube/Google. More in the privacy policy
In this tutorial, I guide you step by step through the process. You will learn how to duplicate the original layer, set the Gaussian blur appropriately, and work with layer modes. Finally, I will show you an additional zoom effect that showcases paths and roads especially impressively.
Key Takeaways
The original layer remains untouched, because you always work on a copy.
A strong Gaussian blur is the foundation of the look. With small values, the image only looks slightly washed out.
The Screen layer mode creates bright, diffusely radiant highlights.
A reduced opacity of around 70 to 80 percent prevents the effect from looking overdone.
The zoom effect via motion blur complements the look with dynamic rays, especially with paths, roads, or lines.
Step-by-Step Guide
Step 1: Duplicate and Name the Original Layer
Open your photo in GIMP. In the layers palette, you initially see only the original layer. Create a copy by duplicating the layer. This way, the original is always preserved, and you can undo changes at any time. Then give the copy a meaningful name, for example "Dreamy Look". This helps you keep track, especially when you have multiple layers.

Step 2: Apply the Gaussian Blur
Select the new copy and choose Filters in the menu, then Blur, and then Gaussian Blur. A preview appears in the dialog window. With the directional pad, you can shift the image section, for example to view the area around the head. This way you can immediately judge how the blur affects important details.

Step 3: Set the Blur Radius Appropriately
The default value is 5 pixels, and that is far too little for this look. In the example, you first set the radius to 40 and then test 50. What matters is that the image becomes clearly blurred without the shape dissolving completely. The ideal value depends on the subject and the image size. So feel free to experiment with different values. Then confirm with OK so that GIMP performs the calculation.

Step 4: Adjust the Layer Mode to Screen and the Opacity
Activate the "Dreamy Look" layer and select the Screen mode in the layers palette. The image now becomes brighter, and the highlights get a diffuse radiant glow. Pay particular attention to skin tones, because that is where you quickly see whether the effect is too strong. Compare the result with the original several times.
Then lower the opacity of the layer. Values between 70 and 80 percent have proven effective, in the example about 75 percent. This keeps the effect subtle, and the subject does not lose its naturalness.

Step 5: Test the Soft Light Layer Mode
Besides Screen, there are other modes worth trying. For example, try out the Soft Light mode. It increases contrast and saturation, but still looks soft. Adjust the opacity again if needed. This mode is well suited for photos where you want to retain more color. For a classic dreamy look, however, Screen is usually the better choice. In the example, you then undo this test.

Step 6: Readjust the Radius
It is often worth adjusting the blur once more. To do so, open Filters, Blur, and Gaussian Blur again. In the example, a value of 120 shows a much softer image, which works better for this subject. Then set the Screen mode again and reduce the opacity to about 70 percent. Here too, compare the before-and-after view until you like the result.

Step 7: Add a zoom effect with motion blur
For the additional effect, you need another copy of the original layer. First hide the existing layer, duplicate the original again, and drag the new layer all the way to the top. Name it something like "Zoom". With the Zoom layer active, now choose Filters, Blur, and Motion Blur in the menu.
Motion blur offers three options: Linear, Radial, and Zoom. Choose the Zoom option for this look. In the preview area, you can see how the lines wrap around the subject. Set the length of the effect, in the example to 40. Then confirm with OK.

Step 8: Adjust the Zoom layer in Screen mode
The Screen mode is also worthwhile for the Zoom layer. This creates bright rays that run along a path or a road and emphasize the depth of the image. Then reduce the opacity until the rays look subtle. Try the Soft Light mode here as well. The effect is also interesting, but in the example it is less appealing than Screen. In the end, decide for yourself which variant suits your photo.

Summary – Dreamy look in GIMP: Enchant photos with blur
You have learned how to give a photo a dreamy look in just a few steps. You duplicate the original layer, apply the Gaussian blur with a suitable radius, and set the layer mode to Screen with reduced opacity. With an additional Zoom layer from the motion blur, your image gets dynamic rays that work especially well on roads and paths. Try out the settings on your own photos, because every subject requires slightly different values.
FAQ
Do I always have to duplicate the original layer?Yes, this is recommended, because that way the original photo remains unchanged and you can go back at any time.
Which radius is suitable for the Gaussian blur?The right value depends on the subject. In the example, values between 40 and 120 worked well; what matters is a clear, but not complete, blur.
Why should I reduce the opacity?An opacity of about 70 to 80 percent ensures a subtle effect and prevents skin tones and details from being overexposed.
Which layer mode is best suited for the dream look?The Screen mode produces bright, diffusely glowing lights and fits this look well. Soft Light, on the other hand, increases contrast and saturation.
What does the zoom effect do?Motion blur with the Zoom option creates radiating lines around the subject. Especially with paths or roads, this produces a dynamic sense of depth.
Can I also use the effect without a Zoom layer?Yes, the basic version with Gaussian blur and layer mode is completely sufficient for a successful dreamy look.


