
Text on a light background quickly blends in with its surroundings. A subtle shadow makes it stand out without you having to rebuild the layout. GIMP offers a built-in filter for this, and with a few tricks you can create effects that go far beyond a simple drop shadow. This tutorial takes you from the first text layer to a perspective gradient shadow with a soft falloff.
The video is only loaded from YouTube when you play it – data (including your IP address) is then transmitted to YouTube/Google. More in the privacy policy
Key Takeaways
- A text layer remains editable as long as you do not rasterize it. The shadow, on the other hand, is created as its own pixel layer.
- With the "Move the active layer" option, you move only the layer you have selected.
- The "Drop Shadow" filter controls offset, blur, color, and opacity in a single dialog.
- With "Lock alpha channel" you color only the existing pixels, not the entire layer.
- The Perspective tool, Shear tool, and layer mask make shadows more spatial and lively.
- A layer that is too small cuts off soft edges. Enlarge it before blurring.
Step-by-Step Guide
1. Prepare the document and choose the Text tool
Open your image at the desired size. In the video, the instructor works with a document of 1920 × 1920 pixels and a white background. Select the Text tool. In the tool options, you set the font, font size, and color. A bolder font such as Adobe Gothic works well, because thin lines quickly make the shadow invisible. The size depends on your document: the larger the image, the larger the value needs to be. In the example, 100 pixels is used.

2. Create the text layer
Click into the image with the Text tool and type your text, for example "Text mit Schatten". GIMP automatically creates a text layer in the Layers palette. This layer is not rasterized, so it is not a pixel layer. You can change the text at any time by clicking into the text with the Text tool and making changes. Moving it or adjusting the size later is also possible at any time.
3. Adjust individual words
If only a specific word should appear larger, select it in the text dialog and enter a separate value there, 150 pixels in the example. If you then change the font size in the tool options, this only affects the parts you have not edited separately. Afterwards, set the text uniformly back to 100 pixels so that all characters are the same size.
4. Select the right layer
Switch to the Move tool and enable the "Move the active layer" option in the tool options. Select the layer you want to move in the Layers palette and do not click directly in the image. This is especially important with multiple text layers and shadows, because it keeps you from accidentally moving the wrong element.
5. Create the drop shadow with the filter
Select the text layer and in the menu choose Filters > Light and Shadow > Drop Shadow. The X and Y values determine the offset. With 0 and 0, the shadow sits directly behind the text. With 4 and 4, it appears slightly offset to the bottom right. Note that in the version shown in the video, this dialog has no live preview. You therefore confirm with OK, check the result, and correct if necessary via Edit > Undo.

6. Set blur, color, and opacity
The "Blur radius" value determines the blurriness. At 0 the shadow is hard; at higher values it becomes softer. In the video, 35 is entered. The color remains set to black. You can leave the opacity in the dialog at 100%, since it is more convenient to control the transparency later via the layer. With OK, the shadow is created.
7. Manage the shadow as its own layer
The generated shadow sits below the text layer and is named "Drop Shadow". Rename it to "Schlagschatten" so that you keep an overview in the Layers palette. Since it is a rasterized pixel layer, it does not follow changes to the text. If you change the text, you have to recreate or duplicate the shadow. If the intensity is too strong for you, reduce the opacity of the shadow layer, for example to 80%. This is non-destructive; you can adjust the value again at any time.
8. Recolor colored shadows afterwards
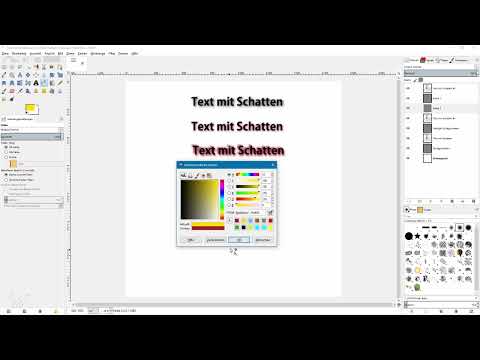
You do not have to set the color in the filter dialog already. Duplicate the text layer and create another shadow from it, this time with a blur radius of 25. Rename the layer, for example, to "Farbig". Then enable the "Lock alpha channel" icon in the Layers palette. Select the Bucket Fill tool, set it to "Fill whole selection", and choose a shade of red as the foreground color. A click in the image now colors only the pixels of the shadow; transparent areas remain unchanged.

9. Experimenting with multiple colors
The principle can be repeated as often as you like. Duplicate the text layer and the colored shadows, move the copies to different positions with the Move tool, and fill each shadow layer with its own color. In the example, a yellow shadow appears at the bottom right and a blue one at the top left. Strictly speaking, these are no longer shadows, since they don't look dark. Nevertheless, the result is a striking effect from a design perspective that works well for title graphics.

10. Creating a perspective shadow
Duplicate the text layer, move the copy downward, and apply the Drop Shadow filter to it with an offset of 0 and a blur radius of 15. Name the layer, for example, "Vanishing Point Shadow". Then select the Perspective tool and click in the image. Drag the corner handles at the top left, top right, and bottom left so that the shadow converges toward the back. Don't overdo it. Confirm with "Transform" and align the shadow with the Move tool until it begins exactly at the base of the letters. A lower opacity finally makes it look more subtle.

11. Creating a slanted gradient shadow with a layer mask
Create another copy of the text layer, move it downward, and apply the Drop Shadow filter with a blur radius of 0. Name the layer, for example, "Gradient". Select the Shear tool and drag the shadow to the right in the image until the desired slant is reached. Confirm with the Enter key. For better assessment, temporarily lower the opacity to about 50%. Then position the shadow exactly with the arrow keys and set the opacity back.
For the gradient, right-click the layer and choose "Add Layer Mask". Use the "White (full opacity)" option so that the image initially remains unchanged. Set the foreground color to black and the background color to white. Select the Gradient tool on the mask and drag a gradient from bottom to top. At the bottom the shadow stays dark, and toward the back it becomes transparent. You can drag the gradient multiple times until you are satisfied with it.

12. Making the rear area of the shadow softer
A problem appears when you want to blur: the layer is only as large as the shadow itself. Soft edges would therefore be cut off. Duplicate the shadow layer, hide the original layer, and select the copy. Enlarge the layer via Layer > Layer Boundary Size, for example in width and height, and center it. This creates room for the blur.
Next, select the Blur tool. Set the convolve type to Blur, increase the rate, and choose a very soft brush. Under the paint dynamics, deactivate the "Dynamics Off" option so that size and opacity do not change while painting. Run the brush over the rear area of the shadow. For straight lines, hold down the Ctrl and Shift keys and click at two points. Repeat the process until the shadow becomes noticeably softer toward the back, while it stays sharp and dark at the front.

Summary – Creating and adjusting drop shadows for text in GIMP
You have seen how to use GIMP to gradually create various drop shadows from a simple text layer. The filter provides the foundation, while the layers panel, alpha lock, perspective, shear, and layer mask refine the result. The biggest drawback remains that the shadows are rasterized and do not adopt text changes. If you change the text later, you have to recreate the shadows. Nevertheless, the effort is worthwhile, because with the techniques described you get results that stand out clearly from the standard shadow.
FAQ
Can I adjust a drop shadow afterwards to a changed text?No, the shadow is a rasterized pixel layer and does not follow text changes. You have to recreate it or duplicate the text layer again.
Why does the Drop Shadow filter show no preview?The dialog in the version from the video offers no live preview. Confirm with OK, check the result, and make corrections via Undo if needed.
What is the "Move the active layer" option for?It ensures that only the selected layer is moved. This way you don't accidentally move the shadow together with the text or another shadow.
How do I color a shadow without losing its transparency?Activate "Lock alpha channel" in the layers panel and fill the layer with the Fill tool. Then only the already visible pixels are colored.
Why is my soft shadow cut off at the edge?The layer is too small for the blur. Enlarge the layer via Layer Boundary Size before you blur.


