
A sepia look resembles a photo from an old box in the attic, and you can create exactly this effect in GIMP in just a few steps. You will work entirely non-destructively, so you can go back at any time. In this tutorial, I will show you how to turn a color photo into a clean black-and-white image, tint it with Color Balance, and protect the bright areas with a luminance mask.
The video is only loaded from YouTube when you play it – data (including your IP address) is then transmitted to YouTube/Google. More in the privacy policy
Introduction
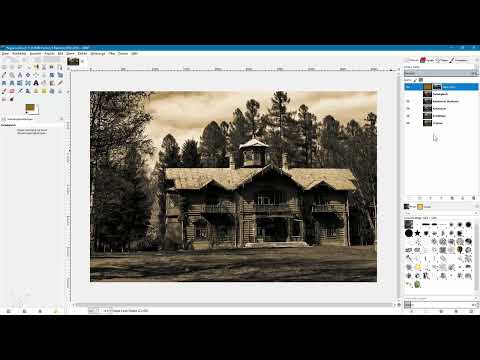
This tutorial builds on the black-and-white conversion from the previous video. If you are not yet familiar with the basics, it is worth taking a quick look there. However, you do not need any prior knowledge of the Channel Mixer or layer masks, because all the tools are explained step by step. The example image is a landscape shot with a house, trees, and a sky with clouds.
Key Takeaways
- You work on an image non-destructively by performing each editing step on its own copy of the original layer.
- The "Desaturate" tool offers different methods. Compare them in the preview before you commit.
- The Channel Mixer in "Monochrome" mode gives you more control because you determine the proportions of the color channels yourself. The sum should ideally be 100%.
- With Color Balance, you tint shadows, midtones, and highlights separately so that the sepia tone looks natural.
- A luminance mask prevents the color from covering the bright areas. The opacity and the "Color" layer mode give you additional fine control.
- A subtle noise over the entire image gives the result the typical character of old photographs.
Step-by-Step Guide
Copy and Desaturate the Original Layer
Open your image and first create a copy of the original layer. This way, the original photo remains untouched, and you can fall back on it at any time. Then give the copy a suitable name, for example "Desaturate".

Select the active layer and open the "Desaturate" tool in the "Colors" menu. GIMP offers you three methods: Lightness, Luminosity, and Average. Click through them one after another and assess the result in the live preview. In the example, Average is not convincing because the image looks flat. Between Lightness and Luminosity, I chose Luminosity because it shows more detail and the image still stays high in contrast. Confirm with "OK".


Alternative Conversion with the Channel Mixer
Now you try a second method to see whether the result can be improved further. Create another copy of the original layer and name it "Channel Mixer". Then apply the Channel Mixer via "Colors" and "Components". Activate the "Monochrome" option there so that the image is converted to grayscale. Enlarge the dialog box so the preview is bigger.

The Channel Mixer initially shows the red channel. Reduce this value, to 40 in the example. It is best to enter the values numerically so that you can control them precisely. Then add some green and additionally a share of blue so that the sky becomes brighter. In the example, green and blue each end up at 30. Make sure that the sum of the three values is ideally 100% so that the brightness of the image stays balanced. Confirm with "OK".


Now compare both variants. In the example, the Channel Mixer is clearly preferable because the trees appear darker and the lawn in the foreground does not look too bright. This completes the black-and-white conversion.

Strengthen Contrast with a Tone Curve
To increase the contrast further, duplicate the Channel Mixer layer and name it, for example, "Channel Mixer (Contrast)". Then choose the "Curves" option via "Colors". Set a point in the middle of the curve so that the midtones remain as untouched as possible. Pull the upper half of the curve slightly upward to brighten the light areas, and the lower half downward to darken the dark areas. Keep an eye on the preview and proceed carefully, because a curve that is too strong quickly makes details disappear.


Color balance for the sepia tone
Now comes the actual sepia effect. Create another copy of your current black-and-white layer and name it "Color Balance". Select this layer and open Color Balance via "Colors". This tool lets you add color separately for shadows, midtones, and highlights.

Start with the shadows, that is, the dark areas. Drag the slider for red slightly to the right so that the shadows get a warm tone. In the example, the red component initially looks too strong, so you add some yellow. This makes the image more brownish overall without looking artificial.

Then switch to the "Midtones" option. The mid-gray areas also need red and yellow so that the sepia tone looks even. Leave the highlights unchanged if possible, because red clouds in the sky would look very unnatural. If you make a mistake with a setting, click "Reset Range". This button only affects the currently selected range; the other settings are preserved.


Confirm with "OK". If the effect is too strong for you, reduce the opacity of the layer. In the example, about 80% is enough to get a subtle, restrained sepia look.

Inserting a sepia color fill layer with a luminance mask
For the preferred method of coloring, you use a color fill layer. First, in the foreground color dialog, choose a brown, slightly reddish tone and confirm with "OK". Then use the icon to create a new layer that uses the same foreground color, and name it "Sepia Look".

In the layer mode menu, set the mode to "Color". This lays the brown tone over the image but keeps the brightness underneath. The result already looks good, but the color also tints the bright areas, and that is exactly what you don't want.

This is where the luminance mask comes into play. Right-click the sepia layer and choose "Add Layer Mask". Confirm with "White". Now click the black-and-white layer, copy it with Ctrl + C, and then switch to the layer mask of the sepia layer. It is important that you really click the mask and not the image. Paste the image with Ctrl + V and confirm the paste in the layers panel. You can then discard the floating selection.


At the moment the mask is still upside down, because the bright areas show the color that should not appear there. Invert the mask by selecting it and applying the "Invert" option in the "Colors" menu. A test is worthwhile: hold down the Alt key and click on the mask, and you will see the mask as a grayscale image. White areas now show where the brown tone appears, and the roof and the bright areas remain free.

If the color still seems too strong, reduce the opacity of the sepia layer. In the example, the look is more harmonious at 75%.

Cool variant as an alternative
If you want to try a different style, you can duplicate the sepia layer and hide the copy. Name the copy, for example, "Cool". Then select the image layer, switch to the fill tool, and fill the selection with a cool blue tone. Reduce the opacity to about 40% so that the image looks cooler but not unnatural.

It gets interesting with the layer mode "Hard Edges". This mainly brightens the dark areas, so the shadows no longer appear deep black. Here too, you can adjust the opacity until you are happy with the result.

Subtle Noise as a Finishing Touch
Finally, you place a fine noise over the image that gives the photo an analog character. Show the sepia layer again and create a new layer at the very top of the layer palette. Fill it with a medium gray with a brightness of 50. Name the layer "Noise".

Now apply the "HSV Noise" filter via "Filters", "Noise". Drag the saturation value to the right until the noise is clearly visible, and adjust the hue as needed. Confirm with "OK".

Set the layer mode of the Noise layer to "Soft Light" so that the noise blends with the layers beneath it. In the example, you leave the opacity at 100%, as the noise fits the sepia look best that way.

If the noise seems too sharp to you, apply the "Blur" filter with the "Gaussian Blur" while the Noise layer is active. A value of one pixel is usually enough to make the grain look softer.


Summary ??? Sepia Look in GIMP: Coloring a Black-and-White Image with a Luminance Mask
In this tutorial, you learned how to convert a color photo into a black-and-white image using Desaturate and the Channel Mixer. With Curves you strengthen the contrast, and with Color Balance you create a warm tone that specifically affects shadows and midtones. The color fill layer in "Color" mode with an inverted luminance mask protects the bright areas from being colored. A subtle noise rounds off the result. You also now know that you can apply the same technique with any color you like.
FAQ
Do I absolutely have to use the Channel Mixer for the sepia look?No, you can also use the "Desaturate" tool. However, the Channel Mixer gives you more control over the brightness distribution and often delivers the better result.
Why should I always work with copies of the layers?Copies ensure that the original image remains unchanged. You can undo or adjust any step at any time without having to start over.
What exactly does the luminance mask do?The luminance mask is based on the brightness of the black-and-white image. Dark areas are colored, while bright areas remain free of the color.
Can I reduce the sepia tone later?Yes, simply reduce the opacity of the sepia layer. This lets you adjust the intensity of the color continuously.
Can I also use the technique with other colors?Yes, the method works with any color. Simply choose a different foreground color for the color fill layer.


