
Yellowish teeth can quickly spoil an otherwise successful portrait. With GIMP, you can brighten them afterwards without the result looking artificial. In this tutorial, you will learn how to edit only the teeth in a targeted way, and completely non-destructively. Your original image remains untouched at all times.
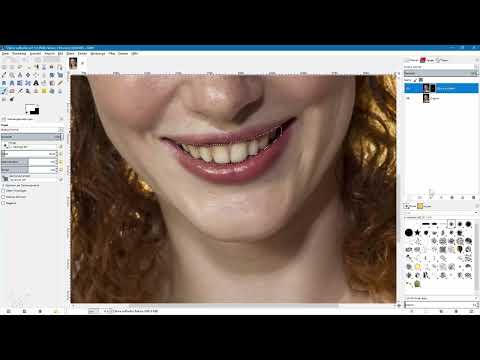
The video is only loaded from YouTube when you play it – data (including your IP address) is then transmitted to YouTube/Google. More in the privacy policy
For this, you need three tools: the Quick Mask for marking, the layer mask for limiting the change, and Hue-Saturation, with which you specifically influence the yellow tones. No prior knowledge of color correction is necessary. If you go through the steps in order, you will arrive at a coherent result.
Key Takeaways
- Duplicate the original layer before you change anything. This way, your source image is preserved as a backup.
- Mark the teeth in the Quick Mask. With black, you exclude areas such as the gums again.
- Convert the selection into a layer mask so that the brightening only affects the teeth.
- In Hue-Saturation, edit only the yellow tones: increase the lightness, use overlap for soft transitions, and lower the saturation.
- Reduce the layer's opacity to about 75 to 80 percent so that the result looks natural.
Step-by-Step Guide
Step 1: Back Up the Original Layer
Open your image and check in the Layers dialog whether the original layer is present. Click on it and duplicate it using the corresponding icon in the Layers dialog. Name the copy, for example, "Brighten Teeth". From now on, every change takes place on this copy, while the original layer remains unchanged underneath.

Step 2: Activate the Quick Mask
First, zoom in to about 50 percent so that you can see the teeth precisely. Then switch to Quick Mask mode. The icon for it is inconspicuous and can be found at the bottom left of the image edge as a dashed square. One click on it tints the image reddish. This means that no area is selected yet.

Step 3: Prepare the Brush Properly
Set the foreground color to white and choose a brush with very soft edges. Then disable the brush dynamics so that size and opacity do not constantly change while you paint. Adjust the brush size to the width of your teeth so that you can work quickly and evenly.

Step 4: Mark the Teeth and Exclude Problem Areas
Now paint over the teeth with the white brush. You do not have to trace every single tooth exactly. A small overlap onto the lips is not a problem, since the change only affects the yellow tones. The selection becomes more precise when you paint with black. With it, you remove areas such as the gums from the marking again. As soon as the selection matches the teeth, you are done.
Step 5: Convert the Selection into a Layer Mask
Click the square again to leave Quick Mask mode. Your marking is now visible as a selection. Right-click on the "Brighten Teeth" layer and choose "Add Layer Mask". There, select the "Selection" option and confirm with "Add". The selection is then applied as a layer mask. Afterwards, remove the selection via "Select > None" so that no marking gets in the way anymore.

Step 6: Switch to the Image Layer and Open Hue-Saturation
Now comes an important point: You must work on the image layer and not on the mask. To do this, click the image layer in the Layers dialog, not the white mask thumbnail. Then open the dialog via "Colors > Hue-Saturation". Activate the preview so that you see every change immediately and can assess the effect directly.

Step 7: Brighten Only the Yellow Tones
At the top of the dialog, you will find a selection of color ranges. By default, all colors are active. Instead, select only the yellow tones so that the rest of the image remains untouched. Leave the hue at zero, since you do not want to shift the color of the teeth. Drag the lightness slider to the right, to a value of about 50. The yellow tones thereby become brighter and move toward white.

Step 8: Smooth the transitions with Overlap
After brightening, the edges of the teeth often still look harsh and untidy. The slider for the overlap helps here. It starts at zero. Drag it gradually to the right until the individual color tones blend into each other more softly. In the video, the slider is dragged all the way to the right, and the result looks much more coherent. Always compare with the original state in the preview to better judge the change.

Step 9: Reduce the yellow tint with saturation
The yellow tint is caused mainly by excessively high saturation. Therefore, drag the saturation slider to the left, to a value of around minus 50. The teeth thereby lose their yellow tone without appearing glaringly white. Compare the result again in the preview before confirming it with "OK".

Step 10: Adjust the opacity for a natural result
A fully applied brightening quickly looks fake. Therefore, you reduce the layer's opacity to about 80 percent, in the example even to around 75 percent. The teeth look more subtle and natural as a result. With the keyboard shortcut Ctrl+Shift+J shown in the video, you can display the image before and after and directly check the difference.

Step 11: Refine the result non-destructively
Since you have worked with a duplicated layer and a layer mask, you can adjust the result at any time. Using the mask, you remove areas that were brightened too much, or add further teeth. The opacity can also be changed again at any time later. The original layer remains completely untouched.

Summary – Whitening teeth with GIMP: Remove yellow tint realistically and non-destructively
With a duplicated layer, a quick mask and a layer mask, you have edited the teeth in a targeted way without altering the rest of the image. In Hue-Saturation, you brightened only the yellow tones, used the overlap for soft transitions and reduced the saturation. The final opacity adjustment ensures that the result looks natural. Since everything is based on layers and masks, you can correct every step at any time later.
FAQ
Can I get the original image back after editing?Yes. Since you work on a duplicated layer, the original layer is preserved. You can make it visible again at any time or undo your changes via the layer mask.
Do I have to select each tooth precisely?No. Painting imprecisely over the lips does no harm, since the brightening only affects the yellow tones. With black, you can afterwards exclude disruptive areas such as the gums again.
Why should I disable brush dynamics?Without disabled dynamics, the size and opacity of the brush can change while painting. This leads to uneven selection edges.
Why should the layer's opacity be reduced?Full brightening quickly looks unnatural. With about 75 to 80 percent opacity, the teeth remain more realistic.
Why do I work on the image layer and not on the mask?The color correction only affects the image if the image layer is active. If you are on the mask, you only change the mask itself.


