
Imagine you quickly need an image of your screen, but you don't want to install an additional program just for that. This is exactly where GIMP's screenshot function comes in. It is free, already included in the program, and allows you to capture the entire screen or a single program window and then continue editing the result directly in GIMP.
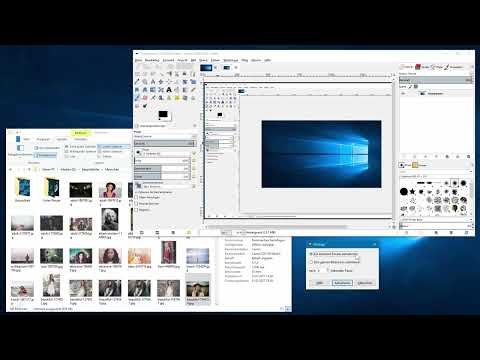
The video is only loaded from YouTube when you play it – data (including your IP address) is then transmitted to YouTube/Google. More in the privacy policy
However, the function has its quirks. Especially when you work with multiple monitors, you need to know a few peculiarities, otherwise you won't get the image you had in mind. In this guide, I take you through the function step by step, show you typical stumbling blocks, and explain how to edit a successful screenshot afterwards. The video length of around eight minutes is enough to cover all the important points.
Key Takeaways
- GIMP provides a built-in screenshot function under "File", "Create", "Screenshot".
- You can capture either the entire screen or a single window.
- With multiple monitors, you cannot select the screen specifically. The captured image often comes from the wrong monitor.
- With a delay, you can capture menus and selections that only open when you click. However, there is no visible countdown.
- The function is not error-free. Black borders, display errors, and empty windows occur.
- Successful screenshots can be edited in GIMP with layers, markings, and text.
Step-by-Step Guide
Step 1: Open the screenshot function
Getting started is quick. In GIMP, click on "File" in the menu, select "Create", and then the entry "Screenshot". A separate dialog box opens, which you use to control the capture.

Step 2: Drag the dialog box to the right monitor
With a two-monitor setup, there is a peculiarity: the dialog box often appears on the other screen. Drag it with the mouse to the place where you want to see the screen content before you continue. Otherwise, you can easily confuse which window is currently active.
Step 3: Choose between the entire screen and a single window
Two options are available to you in the dialog box. With "Capture entire screen" you photograph everything that is displayed. With "Capture single window" you select a specific program window. For Windows Explorer or another open window, the second option is usually the better choice.
Step 4: Know the limitations with multiple monitors
This is the biggest problem of the function. If you select the entire screen, you cannot specify which monitor is captured. In the video, the other 4K monitor is therefore captured, even though GIMP is open on the other screen. The current screen on which GIMP is located also cannot be selected specifically. So plan on having to check the result.
Step 5: Select a single window with the crosshair
Once you have selected "Capture single window" and clicked "Capture", the dialog box moves to the monitor again. The mouse pointer icon now becomes a cross. Click on this cross, hold down the left mouse button, drag it onto the desired window, and release the button. GIMP then creates the screenshot of the selected window.

Step 6: Work with a delay
Many situations require you to do something first before the picture is taken. A menu has to open or files have to be selected. For this, you set a delay in seconds at the bottom of the dialog box. At zero seconds, the capture happens immediately. Note that the function does not show a visible countdown. So you have to count the seconds in your head.
Step 7: Capture an open menu or a selection
A typical example is Windows Explorer. Shrink GIMP a little so that Explorer becomes visible, and select the desired files there. Set a delay of three seconds in the dialog box, click "Capture", drag the cross onto the Explorer window, and wait out the time. Afterwards, the selected files appear in the screenshot. This procedure also works for open menus, as long as you open the menu in time.

Step 8: Recognizing Typical Display Errors
Not every screenshot works on the first try. In my attempts in the video, several problems showed up. The blue text of an original appeared black in the screenshot. An open menu was highlighted, but was not displayed as open. In addition, the entire border was black, and in some places there were inexplicable areas. Therefore, check every result carefully before you use it further.

Step 9: Dealing with Problems in Third-Party Programs
A Word document could not be captured cleanly either. After the capture, you only saw strange blue lines, and the document window was not captured. In such cases, try a different delay, a different window, or a capture without secondary windows. If that doesn't work either, your only option is to switch to a specialized free screenshot program, which is also mentioned in the video.

Step 10: Editing the Screenshot in GIMP
If the capture succeeds, you can continue working on it directly in GIMP. To do so, create a new transparent layer above the image. On this layer, you mark important areas with the paintbrush tool. Choose red as the foreground color, a fairly hard brush, and reduce the size to about six or seven pixels. With the text tool, you can also place notes. Then save the file and pass it on, for example to a colleague who knows exactly which areas are important.

Summary – Creating a GIMP Screenshot: The Screenshot Function in a Practical Tutorial
GIMP's screenshot function is a handy extra. You can find it via "File", "Create", "Screenshot", and you can use it to capture entire screens or individual windows. A delay helps you capture menus and selections. However, the function does not work reliably. With multiple monitors, you cannot select the screen specifically, and display errors occur. Check every result and then edit successful captures with layers, markings, and text.
FAQ
Can I choose in GIMP which monitor is photographed?No, with the "Capture entire screen" option, you cannot select the monitor. Often the other screen is captured.
How long should I set the delay?Set the time so that you can perform the desired action, for example three seconds for opening a menu. There is no visible countdown, so count the seconds yourself.
Why is the text in my screenshot black?This is a known display error of the function. Blue text in the original can appear black in the screenshot.
Why is the border of my screenshot black?This error also occurs with the screenshot function. Simply crop off the border after the capture in GIMP with the crop tool.
What do I do if a Word document is not captured?Try a different delay and capture again. If that doesn't help, you can use a specialized free screenshot program.
How do I mark important areas in a screenshot?Create a new transparent layer, choose a red foreground color, and mark the areas with a hard brush that is about six to seven pixels in size.


