
At first glance, layer modes look like a confusing menu full of technical terms. Once you understand how they blend layers together, however, they open up a whole range of creative possibilities. You can lighten or darken areas of an image, colorize targeted areas, and even make retouching visible, without permanently altering your original image.
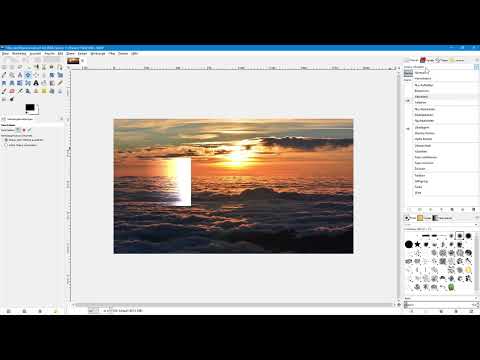
The video is only loaded from YouTube when you play it – data (including your IP address) is then transmitted to YouTube/Google. More in the privacy policy
In this tutorial, I will guide you step by step through the most important groups of layer modes in GIMP. You will learn how blending works in general, why some modes are suitable for transparency gradients, and where groups reach their limits.
Key Takeaways
- A layer mode blends the active layer with all layers beneath it. With the "Normal" mode, this does not happen.
- On an empty, transparent layer, no mode causes a visible change, because there is nothing to blend with.
- The "Dissolve" mode creates the illusion of a transparency gradient from completely opaque pixels, which is especially useful for T-shirt printing.
- With the modes "Lighten only", "Screen", and "Dodge" you lighten the layers beneath, while with "Darken only" and "Multiply" you darken them.
- A medium-gray layer becomes transparent in the contrast-enhancing modes. With it, you can lighten or darken areas non-destructively.
- The color modes "Hue", "Saturation", "Color", and "Value" transfer properties of one layer to the layers beneath it.
- The "Difference" mode makes deviations between two layers stacked on top of each other visible.
- For layer groups, the mode applies to the entire group. Individual layers within the group cannot be blended selectively with it.
Step-by-Step Guide
Step 1: Prepare the layers and open the mode area
For the exercises, you need several layers above a background image, for example a sunset. In my example, I created an empty layer at the top. It is completely transparent and initially hidden. Make it visible and click on it so that it is active. In the "Mode" area above the layers, you then open the selection menu with all available layer modes.

By default, it says "Normal" there. This means that the active layer is not blended with the layers beneath it. This is precisely the real purpose of the other modes: they determine how the active layer interacts with all the layers beneath it.
Step 2: Understand the effect on an empty layer
If you try out different modes on the empty layer, nothing happens. There are simply no pixels on this layer that could be blended. It's important to know this so you aren't surprised. Once you have opened the menu, you can move through the list with the arrow keys on your keyboard. This is a convenient way to quickly try out modes one after another and watch the preview directly in the image.
Step 3: Create a gradient with a soft brush
For modes to become visible, you need content on the layer. Hide the empty layer and activate the next layer named "Soft Brush". Zoom the image to 100% so you can see details well. You can do this via the zoom menu or more quickly with the 1 key.

On this layer there is a black circle that was painted with the brush tool and a very soft brush. In the center it is fully opaque, and toward the edge it becomes increasingly transparent. If you now select the "Dissolve" mode, this transition disappears and you see individual black pixels.

Step 4: Imitate the transparency gradient with Dissolve
The "Dissolve" mode is particularly suitable if you want to create the impression of a transparency gradient without using semi-transparent pixels. Every single pixel is completely opaque. In the center, the black pixels sit close together, and toward the edge they become sparser. From a distance, this creates the impression of a soft transition.

This trick is especially helpful when you design motifs for T-shirt printing. Many print shops cope poorly with true transparency gradients, and the result on the shirt often looks washed out. With dissolved, fully opaque pixels, on the other hand, the motif stays clean.

Step 5: Testing the Lightening Modes
Now hide the active layer and activate the layer below it with a gradient from black to white. We will use this layer as a test surface for the next groups of modes. In the menu, you will find the groups sorted by their effect: Lighten, Darken, Increase Contrast, a group with special functions, and the color modes.

Start with the lightening group. The "Lighten only" mode works so that dark pixels are hidden or become transparent, while light pixels are preserved. In between, partially transparent transitions emerge. The "Screen" mode is much softer and is well suited for gently lightening the layers beneath. The "Dodge" mode, on the other hand, is more aggressive and additionally increases saturation. The "Addition" modes fall in between.
Step 6: Applying the Darkening Modes
Stay on the same gradient layer and now choose a group for darkening. The "Darken only" mode works essentially in reverse: Dark pixels are preserved, while light pixels are hidden or partially transparent. For a softer effect, the "Multiply" mode is suitable, which produces an even gradient. As with lightening, the same applies here: Stronger modes additionally change the colors in the background.

Step 7: Understanding Contrast-Enhancing Modes
Next comes the group of contrast-enhancing modes. First choose "Overlay". Dark pixels of the layer beneath are darkened, light pixels are lightened. With mid-gray pixels, the image remains unchanged. The "Soft light" and "Hard light" modes work similarly, but with different intensity. With "Hard light" you see an opaque black on the left, an opaque white on the right, and the original image in the middle.

Step 8: Working Non-Destructively with a Mid-Gray Layer
An important insight emerges from the last step: In the contrast-enhancing modes, a medium gray becomes completely transparent. The value 50% gray lies exactly between black and white. For this, create a new layer with a mid-gray square and activate it. Set the mode to "Overlay" or "Soft light", then the gray disappears and the layer has no effect.

Here lies the practical benefit: If you edit this mid-gray layer with the Dodge tool, you lighten the areas beneath it. With the Burn tool, you darken them. I will explain in more detail how these tools work in a separate video. For now, it is enough to know that you can proceed on the mid-gray layer by clicking several times on one spot.
As soon as you set the mode to "Soft light", the result appears: The edited area is lightened, the other is darkened. The special thing about this is that on a single layer you can both lighten and darken areas. The changes are non-destructive, because you can delete or hide the layer at any time.

Step 9: Using the Color Modes for Colorizing
The next group affects the colors of the layers beneath. For this you use a color layer, that is, a colored square. Show it, activate it, and open the mode menu. You probably know the terms Hue, Saturation, Color, and Value from the color selection. The modes transfer exactly these properties of the active layer to the layers beneath.

If you choose "Hue", the background adopts the hue of the blue. With "Saturation", the image itself remains unchanged, but the saturation of the blue is transferred. With the "Color" mode you colorize the image completely, making the background vividly blue. The "Value" mode transfers the brightness. "Color" in particular is excellent for quickly colorizing images.
Step 10: Using the Difference Mode for Comparing
Finally, I will show you a special function. To do this, duplicate the sunset layer by right-clicking and choosing "Duplicate Layer". Activate the copy and set the mode to "Difference". Briefly hide the other layers. Two identical images result in pure black in Difference mode. If you switch to the "Grain extract" mode, a gray appears; in "Divide" mode, an almost uniform white.


It gets exciting when you slightly move the upper layer with the Move tool. Then the differences become visible. Afterwards, undo this step, set the layer back to "Normal" and retouch it, for example with the Smudge tool over some clouds. Then set the layer to "Difference". Now only the changed areas appear, because the mode displays only the difference.


This way you can tell whether an image has been altered compared to the original. A trained eye can often spot such retouching today without any aids, but the mode provides quick and unambiguous proof.
Step 11: Be aware of the limitations of layer groups
Finally, an important note about layer groups. If you organize layers in a group, the mode can only be applied to the entire group, not to individual layers within it. An example: You have a group with a blue color layer, a medium gray layer, and a gradient layer. If you choose the "Color" mode for the blue layer, it disappears completely in most modes. If, on the other hand, you assign the "Screen" mode to the entire group, it affects all layers within it, and the background brightens.

Therefore, plan carefully whether you are working with a group or with individual layers. Groups help with tidying up, but prevent targeted blending.
Summary ??? Understanding layer modes in GIMP: A guide for beginners
Layer modes blend the active layer with all layers beneath it. You have seen how the groups work for lightening, darkening, increasing contrast, colorizing, and comparing. With a medium gray layer, you can also work non-destructively. Try out the modes on your own images, because only through experimenting does their potential become truly clear.
FAQ
What does the Normal mode do?It does not blend the active layer with the layers beneath it; the image remains unchanged.
Why does nothing change on an empty layer when I select modes?An empty layer is transparent and contains no pixels that could be blended with the other layers.
What is the Dissolve mode suitable for?It creates the impression of a transparency gradient from fully opaque pixels and is therefore ideal for motifs in T-shirt printing.
Which mode lightens images particularly gently?The Screen mode is considered a soft gradient for lightening the layers beneath, while Dodge has a more aggressive effect.
Which mode darkens layers gently?Multiply creates an even, soft gradient for darkening.
Why does a medium gray remain invisible in contrast-enhancing modes?In these modes, 50% gray becomes completely transparent, so such a layer does not change the image.
Can I lighten and darken areas with a medium gray layer?Yes, with Dodge and Burn on a medium gray layer in Soft Light mode, this can be done non-destructively.
What happens with the Color mode?The color of the active layer is transferred to the layers beneath it, which makes it quick to colorize images.
What is the Difference mode used for?It shows the differences between two stacked layers and helps to recognize retouching compared to the original.
Why does a layer mode within a group not work on individual layers?For groups, layer modes can only be applied to the entire group, not to individual layers within it.


