
If you have already worked with layers and masks in GIMP, you know the problem: with round or curved subjects, mask work with the brush quickly reaches its limits. Paths solve exactly this problem. With them, you define contours precisely, adjust them at any time, and make them visible from a selection. In this tutorial, you will learn how to create, edit, save, and use paths for clean cutouts.
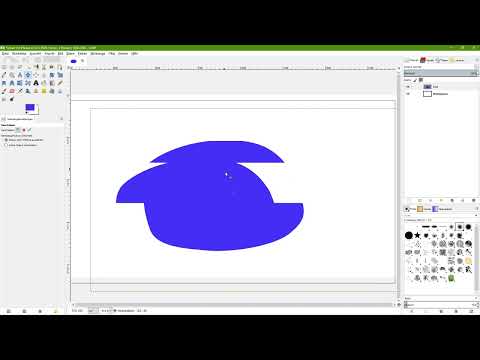
The video is only loaded from YouTube when you play it – data (including your IP address) is then transmitted to YouTube/Google. More in the privacy policy
Key Takeaways
- Paths are not a drawing. They remain saved as vector lines in the Paths panel and can be recalled and modified at any time.
- With the Paths tool, you set anchor points by clicking; curved lines are created by clicking and dragging while holding down the left mouse button.
- The Ctrl key closes paths, switches to edit mode, and helps with adding and removing anchor points. The Alt key moves the entire path.
- With "Selection from Path," the path becomes a selection that you can fill or use for cutouts.
- With "Stroke Path," you trace the path with a solid color or a paint tool, such as a brush with emulated brush dynamics.
Step-by-Step Guide
Finding the Paths Tool and the Paths Panel
The Paths tool is located in the toolbox at the top left, in the group behind the corresponding icon. It is worth keeping the tool in view, since you will need it frequently from here on.

Every path also has its own panel. If it is not visible on your screen, click the small arrow in the panel area, choose "Add Tab," and then "Paths." The tab will then appear next to Layers.

Creating a New Layer for the Path
Before you get started, it is best to create a separate layer. To do this, click the new layer icon at the bottom of the Layers panel and name it "Path." Enable the "Transparency" option so that the layer stays see-through. This way, your background layer remains untouched.
Setting the First Anchor Points
Now select the Paths tool. In the tool options, the "Design" mode is active by default, which you can leave as it is for now. A click with the left mouse button sets an anchor point. A second click at a different location already creates a straight connecting line between the two points. In this way, you set more points until your path has the desired shape.
A path created this way is initially open because the start and end points are not connected. This is perfectly fine for many tasks.
Closing the Path
If you want a closed shape, move the mouse to the starting point, hold down the Ctrl key, and click once. The cursor changes slightly, and the path is closed. As long as the Ctrl key remains pressed, GIMP automatically switches to edit mode, which is why the note "Ctrl" additionally appears in the tool options.
Switching Between Editing and Moving
With the Ctrl key, you can therefore edit anchor points in a targeted way. If you hold down the Alt key instead, you are in move mode. Then click on the path and move the mouse to place the entire shape in a different position. You can move individual anchor points at any time with the Paths tool while holding down the left mouse button.
Naming the Path and Finding It Again
The Paths panel initially shows the new path as "Unnamed." By double-clicking the entry, you can give it a meaningful name, such as "Cup." It is important to know: the path does not disappear when you switch tools. It remains saved in the Paths panel. A click on an empty area in the panel makes it visible again, and you can then edit it again with the Paths tool.
If you save your project in GIMP's native XCF format, the paths are preserved. You can therefore close the file and continue working later.
Adding and Removing Anchor Points
To add an anchor point to an existing path, hold down the Ctrl key and move the cursor onto a line of the path. A small plus symbol appears. A click places a new anchor point there.
To remove one, hold down the Ctrl key and additionally the Shift key. Move the mouse onto the anchor point to be removed until a minus symbol appears, and click once.
Deleting paths
You remove an entire path in the Paths panel by right-clicking it and choosing "Delete Path". Alternatively, drag it with the left mouse button onto the trash icon at the bottom of the panel.
Creating curved lines
Not every shape consists of straight lines. For curves, choose the Paths tool, click in the image and keep the left mouse button pressed. If you then drag the mouse in one direction, a curve is created between the anchor points. With another click and drag, you set the next point.
Every dragged point has small handles that you can use to adjust the curve afterwards. To do so, click on a handle, hold the left mouse button and drag it in the desired direction. If you want to turn a corner into a curve, hold down the Ctrl key, click on the anchor point and drag it apart.
Turning the path into a selection
Once your path is finished, you can convert it into a selection. You'll find the "Selection from Path" option at the bottom of the tool options. After clicking, the familiar marching ants appear, and the selection is active. You then no longer see the path itself, since it is hidden as soon as you switch to a different tool.
Now switch to the empty "Path" layer, choose the Bucket Fill tool, pick a color and click inside the selection. Afterwards, you deselect the selection again via "Select – None".

So that your layer doesn't stay unnecessarily large, you can crop it to its content. To do this, choose the "Autocrop Layer" option in the "Layer" menu. The layer is then only as large as the object, which makes moving it smoother.

Clean cutouts with the path
Imagine a photo of a cup. Its shape consists of straight and round sections that are only laboriously traced with a layer mask and the brush. With the Paths tool, you define the outline of the cup point by point and adjust the curves. Afterwards, you convert the path into a selection and create the mask from it or delete the background. The path remains available at all times, so you can easily make corrections later.
Stroking paths
The second function relates to stroking paths. To do this, you activate the empty layer, open the path's menu while the path is visible (right-click in the Paths panel) and choose "Stroke Path". Two main options are available: With "Stroke line", you trace the path with the foreground color as a solid line. Be sure to leave the "Antialiasing" option enabled, otherwise curves will look stair-stepped later.

With the second option, you stroke the path with a painting tool, for example a brush with a soft tip. If you additionally enable "Emulate brush dynamics", GIMP simulates varying pen pressure. The result looks significantly more natural as a result.
Using guides for straight paths
Straight lines can be placed especially precisely with guides. To do so, drag a horizontal and a vertical guide from the rulers into the image. Via "View", you enable snap to guides. If you now move anchor points near a guide, they automatically snap onto it. If you confirm the path by clicking the starting point while holding the Ctrl key, a closed rectangle with perfectly straight edges is created. You can remove all guides via "Image – Guides – Remove all Guides".
Summary – Creating paths and cutting out in GIMP: A guide for beginners
Paths are a flexible tool with which you define outlines precisely, correct them at any time and convert them into selections. You create anchor points with the Paths tool, close paths with the Ctrl key and move them with the Alt key. Curves are created by dragging, and via the Paths panel you manage all paths permanently. For cutouts, the route via "Selection from Path" is especially helpful, while "Stroke Path" lets you create lines with solid color or a painting tool. It's best to practice with simple shapes before you venture into complex subjects.
FAQ
How do I find the Paths tool in GIMP?You'll find it in the toolbox, in the group behind the path icon.
What do I do if the Paths panel is missing?Click the small arrow in the panel area, choose "Add Tab" and then "Paths".
Is a path lost when I switch tools?No. The path remains saved in the Paths panel and can be shown and edited again at any time.
How do I close an open path?Move the cursor to the starting point, hold down the Ctrl key and click once.
How do I move an entire path?Hold down the Alt key, click on the path and move the mouse.
How do I remove a single anchor point?Hold down the Ctrl key and the Shift key, move the mouse onto the anchor point and click as soon as the minus symbol appears.
How do I create a curve instead of a corner?Hold down the Ctrl key, click on the anchor point and drag it apart with the mouse button pressed.
What does "Selection from Path" do?The path is converted into a selection, which you can then fill or use for cutting out.
Why should I leave antialiasing enabled for "Stroke Path"?Without antialiasing, curves look stair-stepped. With the option enabled, clean, smooth lines are created.


