
A poster only looks credible on a house wall if it sits at the right angle. The same applies to a meadow that is supposed to sit next to a scene with depth in a composite. This is exactly what GIMP's Perspective tool is for. With it, you distort layers, selections, and paths so that they match the perspective of your subject.
The video is only loaded from YouTube when you play it – data (including your IP address) is then transmitted to YouTube/Google. More in the privacy policy
In this tutorial, I will guide you step by step through how to use it. You will learn where to find the tool, how to control the grid, and why a copy of the original layer is indispensable. It is based on the video tutorial by Marco Kolditz, in which the function is demonstrated using a top view of a patch of lawn.
Key Takeaways
- You can find the Perspective tool via its icon in the toolbox; you can reach it faster with the keyboard shortcut Shift and P.
- The tool changes the perspective of layers, selections, and paths. You control this via the handles at the corners of the grid.
- The transformation is destructive. Therefore, always work with a copy of the original layer.
- GIMP does not store how a layer was transformed. When you call the tool again, the grid starts at the layer's current corners.
- Typical areas of use are composites and inserting subjects with correct perspective, such as posters on house walls.
Step-by-Step Guide
Step 1: Open the Perspective Tool
The Perspective tool is hidden behind its own icon in the toolbox. If you prefer working with the keyboard, simply press Shift and P. The tool can change the perspective of a layer, a selection, or a path. In the video, a top view of a lawn serves as the example, but you can use any other subject.

Step 2: Select the Right Layer
Before you get started, select the layer to be distorted in the Layers palette. In the example, it is the "Wiese" layer. Make sure that this layer is really active. Otherwise, you will unintentionally alter another element of your project.

Step 3: Create a Copy of the Original Layer
The transformation in GIMP is a destructive step. This means that you cannot simply undo the result once you have taken further steps. Therefore, duplicate the original layer before you transform. You can find the command in the Layer menu under "Duplicate Layer". This way, the original layer remains untouched, and you can return to it at any time.

Step 4: Activate the Grid
Click with the Perspective tool on the layer you want to edit. A grid then appears, consisting of the familiar transformation lines. The corners of the grid are handles with which you control the shape. In addition, a small dialog box opens with the transformation options.

Step 5: Move Handles Precisely
To change the perspective, click a handle with the left mouse button, hold the button down, and drag it to the desired position. In the video, the upper left handle is moved first. Each handle can be set individually, so you can control the distortion step by step. Watch the image in real time as you do this, because that way you can quickly see whether the direction is right.

Step 6: Create a Side View
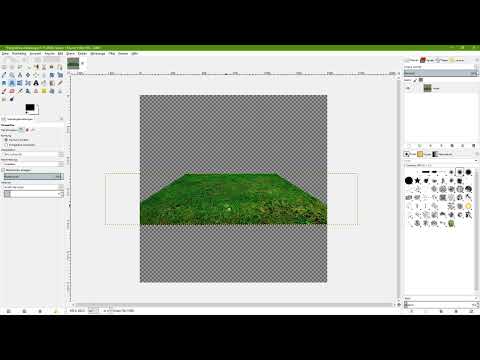
If you drag the lower handles downward, the effect changes significantly. The top view of the meadow becomes a view that looks as if you were standing at the side edge of the field and looking into the distance. The viewer no longer sees the subject from above, but from a shallow angle. This is exactly the effect you need when a surface is to be inserted into a slanted environment.

Step 7: Place Handles Beyond the Document Edge
The handles do not have to stay inside the canvas. You can also position them outside the document edge, which is the better solution in many cases. In the example, the instructor pulls the points further down until it looks as if someone could walk across the meadow from left to right. Always check the result in the overall picture, because a handle outside the document often looks inconspicuous at first glance, but changes the perspective significantly.

Step 8: Apply the transformation and place the layer
Once the shape is right, click "Transform" in the dialog box. The image is then recalculated in perspective. Afterwards, switch to the Move tool and place the layer at the appropriate spot in your image. Only now does the final result emerge, which you can continue to use in a composite, for example.

Step 9: Understand what GIMP remembers
After the transformation, the layer boundary shows the new dimensions of your adjusted layer. The top left corner of the boundary is therefore actually the top left corner of the layer and no longer the corner of the original meadow. However, GIMP does not store how the transformation came about. This information is lost as soon as the process is completed.

Step 10: Edit the layer again
If you apply the Perspective tool to the transformed layer again, the grid reappears. However, the handles are now at the actual corners of the layer. You can adjust the layer further. However, GIMP does not restore the original grid, and it no longer runs the way the original perspective would dictate. Therefore, plan further changes deliberately and, if possible, work with a fresh copy.

Step 11: Recognize typical areas of use
The Perspective tool is particularly suitable for two situations. In a composite, you can, for example, adjust a meadow so that it fits into a scene with correct depth effect. You can also place a poster on a house wall afterwards and adopt the perspective of the façade. In both cases, you usually have to readjust the perspective deliberately so that the result is convincing.

Summary – Adjusting layers in perspective: How to work with the Perspective tool in GIMP
The Perspective tool is a versatile aid with which you can change the perspective of layers, selections, and paths. You activate it via the icon in the toolbox or with Shift and P, select the appropriate layer, and move the handles on the grid until the desired effect is achieved. Remember to create a copy of the original layer beforehand, because the transformation is destructive. In addition, GIMP does not remember the previous transformation, which is why you work with the current state of the layer for further adjustments. With this knowledge, you can create composites and montages in which the perspective is right.
FAQ
How do I open the Perspective tool quickly?You can reach it via the icon in the toolbox or with the keyboard shortcut Shift and P.
Which elements can I apply the Perspective tool to?You can influence the perspective of layers, selections, and paths.
Why should I create a copy before the transformation?The transformation is a destructive work step. With a copy, the original layer is preserved, and you can return to it at any time.
Does GIMP remember the transformation when I call up the tool again?No, GIMP does not store how the layer was transformed. The grid appears at the current corners of the layer.
What is the Perspective tool typically used for?It is especially suitable for composites in which elements must be fitted in with correct perspective, as well as for posters that are to be placed on a house wall afterwards.


