
If an image is displayed too large or too small in GIMP, the View menu will help you. In this tutorial, you will learn how to arrange panels, show and hide rulers, switch zoom levels using the mouse and keyboard, and move around within the image. At the end, you will also find out what options the interface offers in version 2.8 and where the limits are.
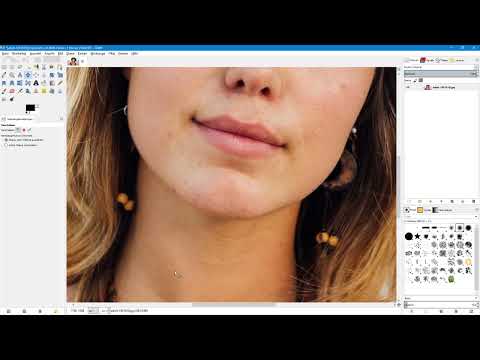
The video is only loaded from YouTube when you play it – data (including your IP address) is then transmitted to YouTube/Google. More in the privacy policy
Key Takeaways
- Panels and docks can be adjusted by dragging their edge with the mouse. This way you set up a workspace that suits your workflow.
- Rulers can be shown and hidden via the "View" menu or with the key combination Ctrl+Shift+R. This creates more space for the image.
- With Ctrl+Shift+J you fit the image to the window. The 1 key displays it at its original size of 100%.
- You can find the zoom level in the status bar at the bottom. With the number keys 1 to 5, you quickly switch between fixed levels.
- The navigation window at the bottom right allows you to quickly move through enlarged images.
- A dark interface is not provided for in GIMP 2.8 via the settings. Themes from the internet are a possible alternative.
Adjusting the panels to your needs
Before you start working with the image, it is worth taking a look at the arrangement of the interface. GIMP allows you to customize each dock individually. To do so, move the mouse pointer to the edge of a dock. As soon as the mouse pointer changes, you can drag the dock wider or narrower while holding down the mouse button. This way you always keep the layers or tool options in view without them crowding out the image area.
You can also change the size between two panel groups. For example, if you have one group at the top right and one at the bottom, the mouse pointer also shows a changed icon in the space between them. Click and drag to adjust the height of the individual panels.

Showing and hiding rulers
By default, GIMP displays rulers at the top and left edges when an image is open. They help you with orientation. For a photo that is 2500 pixels wide, for example, you see the zero mark on the left and roughly the 2500 mark on the right. They are useful for precise work.
However, if you prefer more space for the image, you can hide the rulers. To do so, click "View" in the menu and deactivate the item "Show Rulers". It is faster with the key combination Ctrl+Shift+R. The same combination shows the rulers again when needed.

Fitting the image to the window
If you have shrunk or moved the image, you can quickly bring it back into the available window with Ctrl+Shift+J. The display is chosen so that the entire image is visible. This command is especially handy when you need an overview again after navigating or zooming.

Reading and changing the zoom level in the status bar
A glance at the status bar at the bottom of the window shows you the current zoom level. A photo can be displayed there at 52.8%, for example. This means that the image is displayed smaller in the window than in the original.
To see the actual pixel dimensions, click the small arrow icon next to the zoom display and select 100%. Then you see the image at its original size. Scroll bars appear at the sides, with which you can move around in the enlarged image.

Navigating within the image
As soon as the image is larger than the window, you need a way to shift the visible section. You can click the bars at the side and drag them with the mouse. The same principle also works for the bar at the bottom edge.
The navigation window offers a more convenient solution. At the bottom right you will find a small cross icon. If you click it and hold down the left mouse button, a preview of the entire image appears. If you move the mouse while holding the button, the visible section moves along with it. In this way, even large images can be browsed quickly. If you want to see the whole image again, press Ctrl+Shift+J once more.

Switching zoom levels with keyboard shortcuts
GIMP has handy keyboard shortcuts for selecting the zoom level. The 1 key sets the view to 100%. With the 2 key you get 200%, with the 3 key 400%, with the 4 key 800%, and with the 5 key 1600%.
At 1600% you can see the individual pixels of the image. You usually only need this view when you are creating pixel graphics or retouching very precisely. For normal image editing, the default view is generally sufficient. With the 1 key you can return to 100% at any time.

Using the Zoom tool
In addition to the keyboard shortcuts, the toolbox contains the Zoom tool. With it, you gradually move closer to an area. Each click enlarges the view a bit further. If you want to zoom out instead, hold down the Ctrl key. The mouse pointer then displays a small minus symbol. One click reduces the display again.

Adjusting the interface colors
Many users are bothered by the light base color of the interface. A darker display is easier on the eyes, especially during longer sessions. In version 2.8, GIMP unfortunately offers no option for this in the settings. So you cannot swap the light gray for a darker gray with a switch.
As an alternative, GIMP supports so-called themes. These can be downloaded from various websites. To import them, open "Edit" and then "Preferences". On the left side you will find the "Folders" section. Click the plus symbol there, scroll down, and select the "Themes" entry. Afterwards you can integrate the downloaded themes into GIMP. They then change the appearance of the entire interface.
So far, however, I have not found a theme that looks convincing. If a darker interface is important to you, you should therefore try out different themes and check before importing whether they suit your taste.

Summary – Controlling the view in GIMP: Mastering zoom, navigation, and interface
You now have an overview of the most important tools for the display in GIMP. You can adapt docks to your needs, show and hide rulers, and fit the image in the window with Ctrl+Shift+J. You select the zoom levels via the status bar or the keys 1 to 5. The Navigation window and the Zoom tool make working on details easier. For the interface, themes currently remain the only way to change the appearance.
FAQ
How do I hide the rulers in GIMP?Open the "View" menu and deactivate "Show Rulers", or use the keyboard shortcut Ctrl+Shift+R.
How do I quickly set an image to 100%?Press the 1 key. The image is then displayed at its original size with the actual pixel dimensions.
How do I fit the image to the window again?Use the keyboard shortcut Ctrl+Shift+J. The entire image is then displayed in the available window area.
How do I navigate in heavily enlarged images?Use the scroll bars or click the cross symbol at the bottom right. Hold down the left mouse button and move the mouse to shift the section in the preview.
How do I zoom out with the Zoom tool?Hold down the Ctrl key and click on the image with the Zoom tool. The mouse pointer then displays a minus symbol.
Can I set the interface to dark in GIMP 2.8?No, this is not possible via the settings in this version. Alternatively, you can import themes from the internet via "Edit", "Preferences", "Folders", and "Themes".


