
Imagine a photo came out slightly crooked when you took it, and the horizon runs visibly at a slant across the image. This is exactly where GIMP's Rotate tool comes in. It rotates individual layers or the entire image, lets you set the pivot point, and helps you implement corrections precisely. In this tutorial you will learn step by step how to use the tool, which settings are really important, and what you should pay attention to regarding clipping and interpolation.
The video is only loaded from YouTube when you play it – data (including your IP address) is then transmitted to YouTube/Google. More in the privacy policy
Key Takeaways
- The Rotate tool is one of the transform tools and can be accessed with the keyboard shortcut Shift + R.
- With it you can rotate layers, selections, or paths. The option for layers is active by default.
- The pivot point can be moved freely, and the angle can also be entered numerically.
- The clipping option "Adjust" keeps all pixels, while "Clip result" crops the image directly to the working area.
- The direction "Corrective" rotates opposite to the mouse movement and is ideal for straightening crooked subjects.
- Interpolation determines how clean edges look after rotating. For photos and objects, you should usually choose "Cubic".
Step-by-Step Guide
Step 1: Open the Rotate Tool
You can find the Rotate tool in the toolbar behind its own icon. The fastest way to reach it, however, is the keyboard shortcut Shift + R. It belongs to the group of transform tools, which also includes Scale, Shear, and Perspective. All of these tools have one thing in common: in the tool options you specify what exactly is to be transformed. The choices are the respective layer, a selection, or a path. To begin with, keep the option for layers active, because this affects all the image material on the selected layer.

Step 2: Rotate the Layer with the Mouse
Activate the Rotate tool and click into the image while holding down the left mouse button. If you now drag the mouse downward, the layer rotates in exactly the direction you drag. While you drag, horizontal and vertical guide lines appear, and you see a preview of the rotated image. In addition, a dialog box opens in which you can enter the angle numerically. This is handy when you need exact values, such as a value of 5.83 degrees.

Step 3: Move the Center of Rotation
Every rotation has a center point around which everything moves. This point is shown in the image as a small circle. As long as you don't change it, it is usually located in the center of the image. If you click on it and drag it to a different position, the result changes noticeably. If you then click into the image again and drag, everything now rotates around the new circle. In practice this means: with a crooked shot, it can make sense to place the pivot point at a spot that forms a natural reference in the subject.

Step 4: Reset and Undo the Rotation
If you don't like a rotation, you don't have to start from scratch. In the dialog box you will find the "Reset" button, which returns the settings to their initial values. You confirm the rotation itself with "Rotate". To undo individual work steps, use the keyboard shortcut Ctrl + Z. What is important here: rotating the layer only changes the position of the pixels, it does not delete them. You can see this when you then work with the Move tool and the corners of the image outside the visible area come back into view.

Step 5: Choose the Right Clipping
In the "Clipping" area you specify how to handle the areas that extend beyond the edge after rotation. "Adjust" is set by default. This option is worthwhile almost every time, because the supposedly cut-off pixels are retained and simply lie outside your working area. So you can still use them later. Be aware of the consequence, however: if you did not undo the clipping and then moved the image, the pixels would actually be lost. If you then save the image, this data is gone for good. You should therefore not use this work step as a standard procedure.

Step 6: Have the Result Cropped Directly
If you don't want to deal with protruding areas, choose the "Clip result" option. After rotating and confirming with "Rotate", the image is cropped directly to the work area. However, this may leave behind a rectangle with transparent corners. Another option is the Crop tool. You drag out a frame with it, confirm it with a click in the center, and get a clean result. Both variants are good, but they differ in how much control you retain after rotating.

Step 7: Adjust the Image Preview
While you rotate, GIMP displays a preview of the image. However, you can also disable this preview. Then you only see the grid and, in the background, the original state. This is helpful if you want to keep a close eye on the initial state. If you enable the preview again, its opacity can be adjusted. The default value is 100 percent. At around 50 percent, the preview becomes semi-transparent, which makes comparison with the original easier. For everyday work, I recommend leaving the opacity at 100 percent so that you see a fully opaque preview.

Step 8: Set the Guide Lines
The guide lines make orientation easier for you. You use a menu to determine how they should look. By default, "Number of lines" is selected there. With the slider, you increase or decrease the number of horizontal and vertical lines. The preset is 15 lines, and this is exactly the value many users keep. Alternatively, you can also select the Golden Ratio in the menu and align the image based on this division. This is particularly suitable for compositions where image structure and proportions play a role.

Step 9: Rotate in 15-Degree Steps
If you want to work precisely, you can enable the "15°" option. After that, the image only rotates in steps of 15 degrees. This is especially useful when you are working with round angles or don't want to get lost in decimal values. If, on the other hand, you need odd values like 4.77 or 5.83 degrees, you simply disable this option again. After experimenting, don't forget to bring the settings back to their initial state via "Reset" before you continue with the actual editing.

Step 10: Understand the Rotation Direction
You set the direction via the "Direction" menu. The default value "Normal" rotates the image in the direction in which you move the mouse. So if you drag downward, the image is rotated counterclockwise. If you choose "Corrective" instead, the exact opposite happens: moving downward leads to a rotation in the other direction. This sounds illogical at first, but it has a clear advantage. When correcting a tilted subject, you only need to drag in the direction in which the subject lies, and GIMP straightens it automatically.

Step 11: Straighten a Crooked Horizon
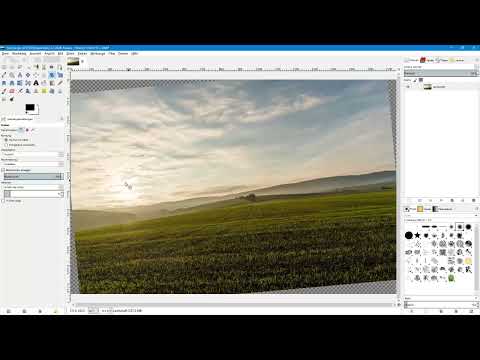
A practical example for the "Corrective" direction is a crooked horizon. First, disable the image preview so that you only see the original image and the lines. Then you move the grid until one of the horizontal lines lies exactly along the horizon. After that, you click on "Rotate". The image is rotated so that the horizon runs straight. If you additionally select the "Clip result" option under "Clipping", the transparent edges disappear automatically. In this way, you get a cleanly aligned photo in a few seconds.

Step 12: Understand and Set the Interpolation
The interpolation determines how the individual pixels are blended with one another during rotation. You can best see the effect on a simple square on a transparent background. If you set the interpolation to "None" and rotate the square, clear stair-step effects appear along the edges. This setting only makes sense for retro or pixel graphics. For objects and photos, it is generally not desired.

Step 13: Use the "Cubic" Option
For photos and objects, I recommend the "cubic" interpolation. It calculates the color of a pixel from its neighbors. This creates a fine, soft transition at the edges, for example from the green of the square to the white background. If you zoom in far, for example to 800 percent, you can see the blended colors that create this transition. The result looks much more natural than without interpolation. The "linear" and "Lanczos 3" options show their strengths mainly when enlarging and reducing images. With a pure rotation, they hardly differ from "cubic".

Step 14: Keeping track
With these settings, you have learned about all the important functions of the Rotate tool. It's best to experiment with a test file so that you can confidently assess the effect of each option. Keep in mind that many steps can be undone, and use Ctrl + Z liberally until you are satisfied with the result.
Summary – Rotating and aligning images with the Rotate tool in GIMP
The Rotate tool in GIMP is a versatile aid with which you can rotate layers, selections, and paths. You start it with Shift + R and decide in the tool options what should be transformed. Via the dialog box, you control the angle, the center of rotation, and the direction. For clipping, you should use the "Adjust" option so that no pixels are lost, or choose "Clip result" directly if you need a clean format. With the "Corrective" direction, you can straighten crooked horizons in no time. For photos and objects, "cubic" interpolation is the best choice, as it produces soft and natural edges.
FAQ
How do I quickly access the Rotate tool in GIMP?The fastest way is with the keyboard shortcut Shift + R, or alternatively via the icon in the toolbar.
Can I enter the exact rotation angle?Yes, in the dialog box that appears when rotating, you can set the angle numerically.
What happens if I move the center of rotation?The rotation then takes place around the new center point, and the image changes its position accordingly.
Are pixels lost when rotating?Not with the "Adjust" option, because the overhanging areas are preserved outside the work area. You can only lose pixels if you apply the clipping and then save the image.
Which clipping option makes sense for beginners?"Adjust" is best suited for beginners because you can still use the pixels later. If you need a clean format right away, choose "Clip result".
What is the "Corrective" direction for?It rotates the image in the opposite direction of your mouse movement and is therefore ideal for straightening crooked horizons or subjects.
Which interpolation should I use for photos?For photos and objects, "cubic" is usually the best choice, as it produces soft and natural edges.
When does the "None" interpolation make sense?It makes sense for retro or pixel graphics where the jagged edge effects are intentional.


