
If you want to align images or objects exactly in GIMP, you don't have to rely on eyeballing. The document grid and the guides give you fixed reference points to which every element can be aligned. Marco Kolditz shows in the tutorial how to activate the grid and adapt it to your preferences, how to use magnetic snapping, and how to set guides via the rulers or the menu. This guide takes you step by step through all the important settings.
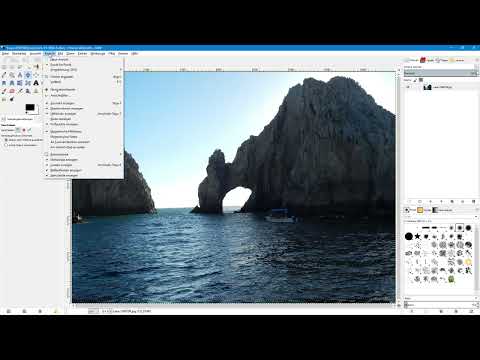
The video is only loaded from YouTube when you play it – data (including your IP address) is then transmitted to YouTube/Google. More in the privacy policy
Key Takeaways
- You display the grid via View. You adjust it via Image and Configure Grid.
- Line style, spacing, unit of measurement and offset determine what the grid looks like and where it starts.
- With the magnetic grid, selections and objects automatically snap to the grid points.
- You pull guides out of the rulers. Via the Image and Guides menu, you set them precisely in percent or pixels.
- You remove guides by dragging them back into the ruler, or all at once via "Remove all Guides".
Step 1: Activating the Document Grid
First, create a new, empty file with a white background. Then open the View menu and activate the "Show Grid" entry. At first glance, the result looks a bit busy, because the default setting shows a solid, black grid with a spacing of 10 × 10 pixels. Especially with larger images, this can obstruct the view of your subjects.

To see the grid points better, it is advisable to zoom further into the image. With the 1 key, you set the zoom level to 100%. The lines then already look much clearer, even though they are still very dominant in the default setting.

Step 2: Adjusting the Grid via "Configure Grid"
The actual adjustment is not done in the View menu, but in the Image menu. Click there on "Configure Grid". In the dialog box, you can tailor the grid completely to your needs. Start with the line style, which is set to "Solid" by default.

If you open the selection menu for the line style, you will find several alternatives. The "Intersections" option only displays small dots at the crossings of the grid lines. Many users find this pleasant because the grid then doesn't look dominant and you can still orient yourself by the spacing.


"Crosshair" works similarly to the intersections, but displays small crosses. This looks a bit more prominent. The "Dashed" option creates a grid with small gaps, while "Double dashed" allows a two-color variant. Here you use the foreground color for the dark lines and the background color for the gaps. If you choose, for example, a shade of blue as the background color, an alternation of black and blue results.


Step 3: Setting Spacing, Unit of Measurement and Offset
In the "Spacing" section, you determine how large the individual grid squares should be. The fields for width and height are linked to each other by default via a chain symbol. If you change one of the two values, for example from 10 to 50 pixels, the other adjusts automatically. The grid then appears significantly larger.

Below the pixel values, you see the same values in inches. However, you can also switch the unit to centimeters. This way you can immediately see how large a grid square actually is in the final output. In the tutorial's example, the width of a square corresponds to about 1.7 cm.

With the offset, you shift the starting point of the grid. By default, it begins at 0 pixels, so directly at the top left edge of the document. If you enter, for example, 25 pixels here, the grid only begins correspondingly further inside. This is useful if you need an even margin.

If you have changed too much, you can use the "Reset" button to bring all settings back to the default values. Afterwards, the familiar continuous pattern in black with 10 × 10 pixels appears again.

Step 4: Activate the magnetic grid
A grid is especially helpful when objects can be aligned to it. The "Magnetic Grid" function exists for this. You can find it in the View menu. After activating it, newly created objects snap to the grid points. In the tutorial, the "Intersections" setting with 25 pixels was selected beforehand. With Ctrl + Shift + J you then zoom out of the image so that you have the entire document in view.

Step 5: Align objects to the grid
To test the function, you create a new, transparent layer. To do this, click the icon for a new layer in the layers palette. Name it, for example, "Object" and confirm with OK. The layer now sits at the very top of the layer stack.

Then select the rectangle selection tool and drag out a selection in the image. You will notice that the selection automatically orients itself to the grid lines as you drag it out. Afterwards, you can fill the selection with a color using the fill tool. In the example, black was used. The fill aligns exactly with the grid.
If the black grid points are too conspicuous for you, you can tone them down via Image and "Configure Grid". In the tutorial, a shade of gray was chosen as the foreground color for this. The points remain recognizable but look less distracting.

Step 6: Drag guides out of the rulers
Guides are especially helpful when working with photos, for example to check whether the horizon is straight. To do this, switch to another image in the tab. Then activate the "Show Rulers" option in the View menu. Rulers now appear at the top and left edges.

Pick up the Move tool. Click on the top ruler, hold down the left mouse button, and drag a horizontal guide into the image. From the left ruler, you can do the same with a vertical line. In the example, the horizontal line shows that the horizon in the photo is not straight. So the camera was held slightly crooked. The tutorial covers straightening the image in a later video.


Step 7: Remove guides individually
You remove a guide with the Move tool. When you move the mouse onto the line, it is displayed in red. Now hold down the left mouse button and drag the line back into the corresponding ruler. As soon as it reaches the ruler, it disappears. This procedure works equally for horizontal and vertical guides.


Step 8: Set and remove guides collectively via the menu
If you want to get rid of many guides at the same time, you don't have to remove each one individually. Open the Image menu, select "Guides" and click "Remove all Guides". The image is then free of all lines again.

In the same menu you will also find options with which you create guides at precisely defined positions. The first option is "New Guide (by Percent)". You choose whether the line should run horizontally or vertically, and then enter a percentage value. In the tutorial, a vertical line was set at 50%. This results in a line exactly in the middle of the image. Another horizontal line at 50% places the intersection exactly at the center of the photo.

The second option is "New Guide" with pixel values. Here, the value always refers to the left or top edge of the document, respectively. A vertical guide at 1500 pixels therefore appears 1500 pixels from the left edge. With the same method, you can set a horizontal line at 1000 pixels. The rulers help you read the position.

A third variant is offered by the "New Guides from Selection" function. First, you drag out a selection, for example with the rectangle select tool. Then, in the Image menu under Guides, you choose the entry "New Guides from Selection". The guides are then aligned with the edges of your selection. Afterwards, you can deselect the selection via "Select None". The guides remain in place.

With the "Snap to Guides" view active, which is enabled by default, selections and objects snap to the guides. This allows elements to be placed particularly precisely.

The method also works with an elliptical selection. The guides are not created diagonally, but horizontally and vertically at the edges of the ellipse. With "Select None" and "Remove all Guides", you then tidy up the document again.

Summary – GIMP Document Grid and Guides: Beginner's Guide
The document grid and guides are two indispensable helpers in GIMP for the precise placement of objects. You activate the grid via View and adjust it via Image and "Configure Grid": line style, spacing, unit of measurement, and offset are among the most important settings. With the snap to grid option, your selections and objects automatically snap to the grid points. You drag guides out from the rulers, place them precisely in percent or pixels, or create them from an existing selection. To remove them, simply dragging them back into the ruler or using the "Remove all Guides" command is enough.
FAQ
Why does the grid in GIMP look so dark by default?The default setting shows a solid, black grid with 10 × 10 pixels. Via Image and "Configure Grid", you can change the line style, color, and spacing at any time.
How do I reset my grid settings?Open the "Configure Grid" dialog and click the "Reset" button. The default values will then apply again.
What does the snap to grid option do?With snap to grid enabled, newly created objects and selections align with the grid points. You can find the option in the View menu.
How do I remove a single guide?Select the Move tool, click on the guide, and drag it back into the corresponding ruler. It disappears immediately.
Can I remove several guides at once?Yes. In the Image menu under "Guides", there is the command "Remove all Guides". This deletes all lines in the document at the same time.
How do I place guides at exactly specified positions?In the Image menu under "Guides", use the options "New Guide (by Percent)" or "New Guide". With the second option, you specify the position in pixels, relative to the left or top edge of the document, respectively.
Can I create guides from a selection?Yes. First drag out a selection and then, in the Image menu under Guides, choose the entry "New Guides from Selection". The lines are then aligned with the edges of the selection.


