
Sometimes color channels or selection tools are not enough to cleanly separate a person from the background. In that case, it is worth taking a look at the Paths tool. It is actually intended for technical objects with straight edges, but it can also be used for people if you apply it correctly. In this tutorial, you will learn how to create a clean outline with anchor points, curves, and paths, turn it into a selection, and convert that into a layer mask. Afterwards, you refine the mask so that hair and edges look natural.
The video is only loaded from YouTube when you play it – data (including your IP address) is then transmitted to YouTube/Google. More in the privacy policy
This tutorial is based on the second part of my series on cutting out subjects. The basics from the first part will help you when you fine-tune the mask later.
Key Takeaways
- The Paths tool is particularly suitable for clear contours. With a person, you combine straight segments and curves.
- Anchor points and handles give you control over the course of the path. With the Shift key, transitions stay smooth; with the Ctrl key, paths can be closed and edited.
- A path only becomes usable once it is converted into a selection and then into a layer mask.
- Cut-outs such as gaps between arms or legs are created with an additional path inside the outline.
- The fine work on the mask with the brush and the clone stamp determines the final result, especially with hair.
Step-by-Step Tutorial
1. Activate the Paths tool and set anchor points
You will find the Paths tool in the toolbox. The settings are straightforward; leave the "Design" mode active. A single click on the image sets an anchor point. A straight connection is only created with the second point. To close the path, hold down the Ctrl key and click on the first anchor point. Without curves, this creates a polygon path with angular transitions.


2. Create curves with the handles
To create a curve, click in the image and hold down the left mouse button. If you drag the mouse to the right or left, handles appear that determine the course of the curve. If you then set another anchor point and drag again, a curve is created between the two points. You can move an anchor point or individual handles at any time until the course is right.
3. Avoid kinks and smooth transitions
If you move only one handle, a kink quickly appears, which may be intentional at certain spots, such as a crease in trousers. If the transition is supposed to be smooth, however, grab one of the two handles and hold down the Shift key while doing so. Both handles then move at the same time, and the curves blend cleanly into each other.
4. Remove and add anchor points
To remove an anchor point, move the mouse pointer over it, hold down Ctrl and Shift, and click. The minus symbol shows you the action. Conversely, you add a point by holding down the Ctrl key and clicking on the existing line. A plus sign then appears. This technique is helpful if you want to refine the course of the path afterwards.
5. Work with the Paths dialog and manage subpaths
Every path you create with the Paths tool appears in the Paths dialog, regardless of whether it is open or closed. There you can see a preview and rename or delete paths. You remove an unneeded path by selecting it and dragging it onto the trash icon.
If you want to start a new subpath without connecting the last point, hold down the Shift key when clicking. Two paths then appear in the dialog. With the Ctrl key held down, points can later be connected again, so that the subpaths become a single closed path.

6. Place edges along the person
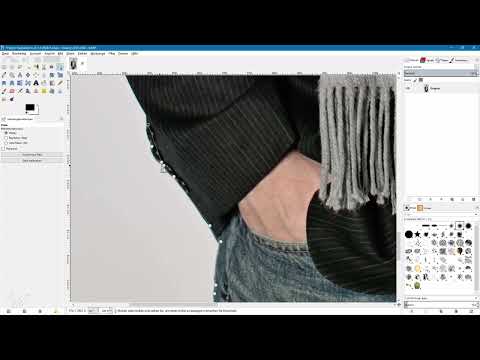
Now we get to the actual purpose. Switch to the Layers dialog and work directly on the original layer, because the path does not change the image as long as you do not convert it into a selection. Zoom in on the area you want to start with, such as the bottom hem of the trousers.
Do not set unnecessarily many small points. Instead, consider where a straight line is enough and where a curve is needed. On straight trouser edges, a few points with slight handles are enough; on curves such as the top, you need more control. Work your way forward piece by piece and always pay attention to which anchor point is active. If you continue clicking while the wrong point is active, GIMP connects the points unexpectedly.

7. Making the path visible and navigating through the image
While you work, the path may disappear from view. Show and hide it again in the Paths palette using the red line when you need to see the image. To move the image section, hold down the space bar. The mouse pointer then turns into a directional cross, and you can navigate through the entire subject without changing the path.

8. Closing the entire contour and naming the path
After you have completely traced the outline of the person, close the path with the Ctrl key. With fine structures such as hair, you don't have to trace every strand. It is enough to place the path slightly outside the hairline, because you will refine this area later with the mask. To keep track, name the path in the Paths palette by double-clicking, for example "Kontur".

9. Cutting cutouts out of the path
The contour still encloses areas that should later show the background, such as the space between arms, legs, or body. For these spots, you draw another closed path inside the existing path. Already existing paths remain active while you add new ones. After converting to a selection, the overlapping area is removed from the selection. For zooming, you don't necessarily have to choose the Zoom tool. Set the zoom level directly, and the active path will be preserved.

10. Creating a selection and a layer mask from the path
Duplicate the original layer and name the copy "Freisteller". You convert the path into a selection via the tool options by choosing "Selection from Path". The path is retained in the Paths palette. Then right-click the "Freisteller" layer, choose "Add Layer Mask", and in it "Initialize Layer Mask to Selection". Confirm with "Add". Afterwards, deselect via the menu or with Ctrl, Shift, and A.

11. Using a color fill as the new background
As long as the original layer lies underneath, you can still see the old background. Therefore, create a new layer, name it "Farbfläche", and fill it with the foreground color. Choose a color that stands out well from the subject, such as a shade of blue. That way you immediately see where remnants of the old background remain. The color fill can be recolored at any time later, for example to red, without having to change anything about the cutout.

12. Touching up with the brush on the layer mask
The fine work takes place on the mask, not on the image. So make sure the layer mask is active before you paint. Set the foreground color to black, choose a hard brush, and paint over light remnants at the edges. Black on the mask hides, white shows. With a smaller brush size you work on tight spots; for large areas you use a larger tip.

13. Painting missing areas back in with white
Sometimes the path cuts away too much, such as a strip of fabric or part of the skin. Then you switch the foreground color to white and paint the area back in over the mask. With the X key you swap between foreground and background color, which makes switching between hiding and showing easier. It's better to paint gently several times than to apply one stroke too hard. Small irregularities make the edge look more natural.

14. Refining hair with a soft brush and paint dynamics
For the hair, you work with a softer brush and a smaller size. Paint with black over the areas that don't belong to the person, and reduce the opacity while doing so. Several light strokes look more natural than a single strong one. If you use a graphics tablet, you can link pen pressure to brush size via the paint dynamics. The width of the stroke then changes depending on pen pressure. This takes practice, but rewards you with a fine result.

15. Making edge corrections with the clone stamp
For the edge areas of the hair where the background still shows through, the clone stamp is better suited than simply painting over them. To do this, duplicate the layer again, name it "Edge Correction" and select the clone stamp on this image layer. Hold down the Ctrl key to set a source, usually a spot with similar hair. Then paint over the light edge areas so that the copied structures replace the background. Adjust the brush size constantly and keep setting new sources. Set the alignment to "aligned" so that the source moves along and does not always copy the same spot.

16. Checking the final result and adjusting the color fill
Finally, you show the cutout again and compare the result with the original. Pay particular attention to the ears, hairline and transitions to the background. Smaller flaws such as a bright spot next to the ear can also be removed with the clone stamp. Afterwards, you can recolor the color fill at any time, for example to a shade of red. The cutout remains unchanged in the process. This way you can see whether the mask also holds up against other backgrounds.

Summary – Cutting out a person in GIMP with the path tool
With the path tool, you can cut out people precisely if you deliberately combine straight lines and curves. You set anchor points, adjust handles and avoid unsightly kinks by using the Shift key. You create cutouts by means of additional paths, which you convert into a selection and then into a layer mask. The real quality only emerges when refining the mask with a soft brush and the clone stamp. Take your time for this, because good hair takes patience.
FAQ
What is the path tool particularly suited for?It is mainly suited for subjects with clear edges and curves, for example technical objects, but it can also be used for people if the mask is refined afterwards.
How do I close a path in GIMP?Hold down the Ctrl key and click on the first anchor point. The path is then closed.
Why does a kink appear in my curve?Most likely you are only moving one handle. Hold down the Shift key while dragging, then both handles move at the same time.
How do I create a layer mask from a path?Convert the path into a selection via the tool options. Then right-click on the layer, choose Add Layer Mask and then Initialize Layer Mask with Selection.


