
A fresh digital photo quickly looks too clean. With GIMP, you can edit an image so that it looks like an old shot from a drawer: washed-out, sepia-brown, with soft edges and slight traces of motion. This tutorial shows you the approach of Marco Kolditz. He starts with an automatic GIMP filter and then develops his own look from it, which appears much more convincing.
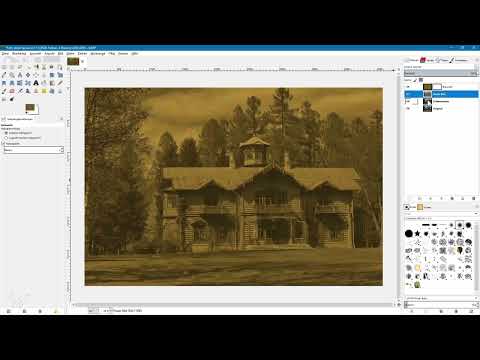
The video is only loaded from YouTube when you play it – data (including your IP address) is then transmitted to YouTube/Google. More in the privacy policy
You don't need any prior knowledge of image editing for this. All that matters is that you are basically familiar with layers, layer masks and the tools in the "Colors" menu. All steps are non-destructive, which means your original photo remains unchanged at all times.
Key Takeaways
- The automatic "Old Photo" filter only delivers a basic effect. For a credible look, it is worth taking the route via your own layers.
- Always work with copies of the original layer so that you can go back at any time.
- With the Channel Mixer and Levels, you control the black-and-white conversion and contrast precisely.
- Layer modes and layer masks combine sepia, motion blur, color stains and noise into a coherent overall image.
- With blur, noise and a white border, you create the typical traces of an old photo print.
Step-by-Step Guide
Step 1: Try the Automatic Filter
First, select the original layer and open the "Decor" section in the "Filters" menu. There you will find the entry "Old Photo". The dialog box shows no preview, so you should simply try out the options: Activate "Defocus", "Sepia" and "Mottle". For the border size, the filter determines how strongly the image fades to light at the edge. Marco chooses the value 100 here. After confirming, GIMP calculates for a moment. Look at the result at a small zoom level, around 26%. You will notice that the colors look artificial and the border is not convincing. Nevertheless, the filter is a quick way to get started when things need to be done fast.

Step 2: Create a Copy for the Black-and-White Version
Close the test copy again and activate the original layer. Create a copy using the "Duplicate Layer" icon in the Layers window. A double-click on the layer name allows you to rename the layer, for example to "Black-and-White". This approach preserves the original and allows you to change or discard each stage individually.

Step 3: Convert to Black-and-White with the Channel Mixer
Activate the black-and-white layer and choose "Colors", "Components" and then "Channel Mixer". Enlarge the dialog box so that the preview is displayed larger, and activate the preview. Also set the "Monochrome" option at the bottom, otherwise the image stays in color.
The Channel Mixer mixes the color channels red, green and blue. Marco reduces the red channel to 70%, the green channel to 20% and the blue channel to 10%. This makes the image look somewhat darker and calmer. Pay attention to the sum of the values: it should not exceed 100%. If it is above that, bright areas blow out, or dark areas sink completely into black. With the sliders you can feel your way toward the right result, because every image reacts differently.

Step 4: Control Contrast and Brightness with Levels
Create another copy of the black-and-white layer and rename it, for example, to "flat image". Then open "Colors" and "Levels". Old photos rarely have hard contrasts, so you want to weaken them somewhat.
Drag the slider for the brightest areas (white) to the left, so that the brightest pixel in the image is no longer pure white but a light gray. Then drag the slider for the dark areas (black) to the right. Marco sets a value of around 53 here. As a result, the darkest point of the image becomes a dark gray instead of deep black. The result looks flat, exactly as is typical for an old print.

Step 5: Add the Sepia Tone via a Color Layer
In the toolbox, select a brown tone as the foreground color. A rather muted sepia works best. Then create a new layer above the black-and-white layer, name it, for example, "Sepia", and fill it with the foreground color.
Set this layer's layer mode to "Hard Edges". This blends the color with the black-and-white image underneath, and the tint shines through. The result already looks distinctly like a sepia print, but still seems too uniform.

Step 6: Refine the sepia layer with a mask
So that the tint is not equally strong everywhere, you work with a layer mask. Right-click on the sepia layer and select "Add Layer Mask". The color of the mask doesn't matter at first. Then switch to the black-and-white layer, copy the image with Ctrl + C and paste it into the mask with Ctrl + V. Then you delete the floating selection. Since the mask now appears reversed, you select the "Invert" option under "Colors". Make sure that you have really selected the mask and not the image layer, otherwise the copy will end up in the wrong place.

Step 7: Simulate motion blur
Old photos were often made with long exposure. If something in the picture moved back then, such as leaves or grass, blur occurred. You recreate this effect by first merging all visible layers. To do this, select the top layer and use "Layer", "New from Visible".
Apply the "Blur", "Motion Blur" filter to this new layer. Marco chooses the "Zoom" variant and activates "Blur outward". He sets the length to a very low value of 2 so that the movement remains subtle. Afterwards, name the layer, for example "Motion Blur".

Step 8: Apply the blur selectively with a black mask
The blur should not affect the whole image. Therefore, add a black layer mask to the layer. This makes the effect disappear completely at first, and you see the previous image again.
Select the Paintbrush tool and set the foreground color to white. Use a very soft brush with a large tip, and turn off brush dynamics ("Dynamics off") so that opacity and size remain constant. Then paint mainly over treetops, twigs, leaves and lawn areas. The house or the trunk remain sharp because they hardly moved during the shot. In the area of the house, you should work with reduced opacity. If you have painted too much blur, switch between foreground and background color with the X key and correct the spot.

Step 9: Fine-tune the opacity of the blur
A fully pronounced effect quickly looks artificial. Therefore, select the layer with the motion blur and reduce its opacity to about 55 to 60%. Compare the before and after views. Then the movement looks like an occasional gust of wind, while the basic structure of the tree remains sharp and calm.

Step 10: Create washed-out colors with a render filter
Create a new, empty layer and name it, for example, "washed-out colors". Apply "Filter", "Render", "Clouds", "Plasma" to it. You can keep the default values for Random seed (0) and Turbulence (1). The result is very colorful at first, so you desaturate the layer via "Colors", "Saturate". Marco chooses the "Luminosity" option for this.

Step 11: Blend the layer with the photo
Set the layer mode of this layer to "Extract Phases". This washes out the image heavily, and even black appears partly bright. Then reduce the opacity to about 60%. The overall impression becomes noticeably older and softer.

Step 12: Add a slight green tint in the color spots
For typical color deviations of old photos, you create another layer named "Color spots". For this, you use "Plasma" again, this time with a different number as the starting value, for example 1.1. Then convert the layer to black and white, likewise via "Desaturate" with "Luminosity".
Now you tint the layer greenish. To do this, open "Colors", "Color Balance" and work on the highlights first. Drag the top slider toward Cyan, to about 25 to 26, and the slider for Yellow to about 40 so that the green tone does not turn out too strong. For the midtones, you correct with a slight yellow component until the tone fits. Then set the layer to the "Soft Edges" mode. The slight green tint now appears mainly in the brighter areas.

Step 13: Recreating the White Photo Border
Many old prints show the white photo paper at the edge. To recreate this, create a new layer, fill it with white, and name it "White Border". Add a black layer mask to it so the area initially stays invisible. Set the layer mode to "Soft Edges".
Now select the Paintbrush tool with white as the foreground color, a very soft brush, and an opacity of about 40%. Paint unevenly along the edge, sometimes stronger, sometimes weaker. Painting over the same area repeatedly strengthens the border. If you duplicate the layer, the effect is intensified further. Afterwards, you can use a black brush to take some areas back a little so that the border does not look uniform.

Step 14: Adding Grain and Noise
Create a new layer named "Noise" and fill it with a medium gray. Apply "Filters", "Noise", "HSV Noise" to it. Drag the Saturation value to the right so that the grain becomes visible, and confirm. Then set the layer to "Soft Edges".
To make the grain look like real film grain, enlarge the layer slightly using "Scale" with the "Lanczos 3" interpolation. Hold down Ctrl while doing so to scale proportionally. Then crop the layer via "Layer", "Layer to Image Size" so that only the visible area is saved. A light Gaussian Blur with a radius of about 2 pixels takes the sharpness out of the noise, the hard edges disappear, and the image remains pleasant.

Step 15: Comparing the Result with the Original
Finally, duplicate the original layer and drag the copy all the way to the top of the layer palette. This way you can switch directly back and forth between the original and the edited look. Compare shadows, colors, and edges, and decide whether you want to adjust anything further. When you are satisfied, save the project in XCF format so that all layers are preserved, and then export the image as a JPG or PNG.

Summary ??? Aging a Photo in GIMP: Creating a Sepia Look with Layers
The automatic "Old Photo" filter is a quick way to get started, but it looks artificial. With your own layers, you achieve a much more believable look. The Channel Mixer controls the black-and-white conversion, the Levels adjustment dampens contrasts, and a sepia layer in "Hard Edges" mode brings the toning into the image. With masks, you apply motion blur, color stains, and the white border selectively. Noise and a light blur round off the impression. Always work with copies and masks, so you can adjust every step at any time.
FAQ
Question: Is the automatic filter worth using at all if it looks so artificial?Answer: Yes, for a quick preview or when you need to be fast. For a convincing result, however, you should regard the filter as a starting point and continue working with your own layers.
Question: Why should I work with copies of the original layer?Answer: This way the original photo remains unchanged. You can undo or adjust each step individually without having to start over.
Question: What happens if the sum of the channel values is above 100%?Answer: Bright areas can blow out, and dark areas get crushed into black. Therefore, make sure the values do not add up to more than 100%.
Question: Why do I have to invert the mask for the sepia look?Answer: The pasted copy of the black-and-white image is reversed in the mask, meaning light and dark are swapped. By inverting it, the areas where the toning should take effect are correct.
Question: Can I also use the motion blur without a mask?Answer: That is possible, but it usually looks unnatural, because then the whole image becomes uniformly blurred. With a mask, you decide for yourself which areas should look as if they moved.
Question: What is the purpose of cropping the noise layer to image size?Answer: Outside the visible area, the layer only needlessly consumes processing power and memory. After cropping, it is exactly the same size as your document.


