A portrait quickly looks flat and boring when both flashes shine with equal strength. That's exactly what happens when you don't set the power differently in a two-light setup. In this tutorial, I'll show you how to create a light direction with a small power adjustment that gives your image depth and shadows.
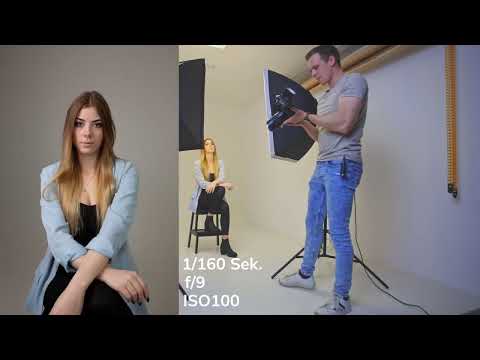
The video is only loaded from YouTube when you play it – data (including your IP address) is then transmitted to YouTube/Google. More in the privacy policy
Introduction
Many photographers buy a set with two flashes and set both to the same power. The result is even lighting, familiar from passport photos. The light is the same everywhere, there are hardly any shadows, and the face looks shapeless. This approach isn't wrong, but it's not very appealing for creative portraits.
The solution lies in a simple idea that you can borrow from cinematic three-point lighting. One of the two light sources is set significantly darker than the other. This creates a clear main light direction, and the shadow side still remains readable.
Key Takeaways
- Equal power on both flashes leads to a flat, even passport-photo look without depth.
- Different power creates a recognizable light direction and thus shadows on the face.
- The main light source defines the shape, while the second light source brightens the shadow side without neutralizing it.
- A power difference of about two stops (from 1/8 to 1/32) is often enough for a noticeable effect.
- If your flash doesn't offer fine power control, you can place the lamp farther away instead.
Step 1: Understand the Starting Situation
First, you should recognize the starting point. With two equally strong light sources, you get a situation in which both sides of the face are almost identically bright. As a result, contours disappear, and the image looks like an ID photograph.
So the problem isn't the technique itself, but the uniformity. You want to consciously see this starting point so that you can immediately recognize the difference after the adjustment.

Step 2: Check the Camera Settings
Before you work on the flashes, check your camera. In my example, the image was too bright because I had previously turned up the ISO value. With a high ISO value, every change in light seems bigger, and you lose control over the result.
Therefore, first set a low ISO value and check the exposure. Only once the camera is set appropriately is it worth changing the flash power.

Step 3: Capture the Passport-Photo Result for Reference
Now take a reference photo with both flashes at the same power. The image shows you the starting point. A gray background further emphasizes the passport-photo effect because it adds no accents at all.
Later, compare the result directly with the new setting. Only then will you see how much depth you've gained with the adjustment.

Step 4: Reduce the Power of the Second Light Source
Now comes the decisive step. Go to the lamp that is meant to serve as the background or fill light and turn its power down significantly. I set it from one-eighth to 1/32 power. That corresponds to about a two-stop difference.
Note that the flash briefly recharges after the change. It may still release the energy that was in the buffer. Therefore, first take a test shot and only then check the result.
The main lamp remains set stronger and takes on the role of the actual light. The weaker lamp only ensures that the shadow side doesn't become completely black.

Step 5: Evaluate the New Light Direction
Now take a close look at the result. The light now clearly comes from the side of the stronger lamp. The facial contours become visible, and the image gains a direction. This is exactly the effect you don't achieve with the passport-photo setup.
The darker side isn't black but still has detail. This distinguishes this method from a single light source, where the shadow side would disappear completely. So you get depth without losing important details.

Step 6: Be careful with the combination of kit and continuous light
This combination is often sold in kits, and many beginners use it unchanged. In doing so, you often photograph the subject with one light source that illuminates almost nothing, while the other determines the lighting alone. If hardly any light reaches the dark side, practically nothing stands out there. That quickly looks unnatural.
So make sure the ratio stays balanced. The shadow side should be darker, but not disappear.

Step 7: Alternative via the distance of the lamps
Some flash units cannot be adjusted finely enough to reduce the power as desired. In this case, a different adjustment helps: the distance. Place the stronger lamp somewhat closer to the subject and the weaker one somewhat farther away. Light falloff depends on the square of the distance, so the difference creates an effect similar to that of adjusting the power.
Try out the distance in small steps and check the result on the camera image. With a bit of patience, you will find the position that suits your subject best.

Summary – Setting two light sources correctly: More depth instead of a passport photo look
A two-light setup doesn't have to look flat. What matters is that you deliberately treat the two light sources differently. A stronger main light sets the direction, while a weaker lamp softly brightens the shadows. You start with a suitable ISO value, take a reference photo, reduce the power of the second light source by about two stops, and check the result. If your flash doesn't allow fine adjustment, distance helps. This way you avoid the passport photo look and get a portrait with form and expression.
FAQ
Why does the passport photo look so flat?Because both light sources shine with equal strength. As a result, shadows and contours are missing, and the face appears without shape.
How big should the power difference be?A difference of about two stops, for example from 1/8 to 1/32, is a good starting point. Then adjust the value to your subject.
What happens if the second lamp is too weak?Then the shadow side stays very dark, and details are lost. Increase the power slightly or reduce the distance to the subject.
Can I achieve the effect without power control?Yes. Place the stronger lamp closer to the subject and the weaker one farther away. The light falloff produces a similar effect.
Why should I check the ISO value beforehand?An ISO value that is too high makes the exposure hard to control. You then recognize the effect of the flash adjustment less well.
What does Threepoint Lighting mean for this setup?Threepoint Lighting uses a main light source, a fill light source, and a background light. The tutorial adopts only the principle of weighting two light sources differently.


