Two lighting setups that are part of the basic knowledge in almost every portrait studio can be achieved with a single directional light source. Rembrandt lighting creates the distinctive triangle of light under the illuminated eye, while with split lighting a sharp shadow edge divides the face into two halves. Both patterns look dramatic, but they require precise positioning of the light and the model. I'll show you step by step how to go about it.
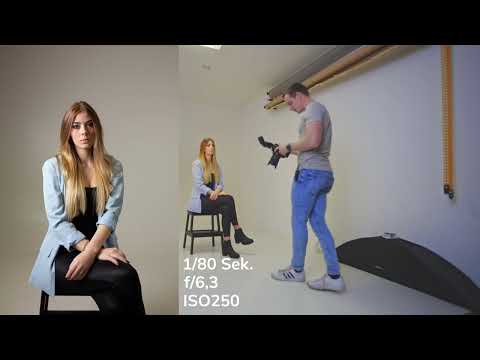
The video is only loaded from YouTube when you play it – data (including your IP address) is then transmitted to YouTube/Google. More in the privacy policy
Key Takeaways
- Rembrandt lighting and split lighting need a directional light source. A large softbox without restriction scatters the light too much to create clear shadow edges.
- A grid or a similar light modifier focuses the light and produces harder, controllable shadows.
- With Rembrandt lighting, the light source is positioned to the side and slightly above eye level. This way the nose casts a shadow that creates a small triangle of light under the eye on the cheek facing away from the light.
- With split lighting, the light source is moved further to the side until only one half of the face is lit and the other lies almost completely in darkness.
- You have to adjust the exposure after positioning. With strongly directional light, the image quickly turns out too dark, in which case increasing the ISO value helps.
- Both patterns are suitable for portraits with expression, mood and contrast, not for neutral application photos.
Step 1: Choosing the Right Light Source
Before you position the model, you decide on the right light. A large softbox scatters the light in all directions. This creates soft, harmonious transitions on the skin, but it isn't enough to cleanly bring out Rembrandt lighting or split lighting. You need a light source that creates shadows without making them too harsh.
A softbox with a grid is well suited for this. The grid works like a tunnel that focuses the light and directs it mainly forward. The shadows become more defined as a result, but remain controllable. So you shouldn't look for a tiny point light source that makes everything extremely hard, but for a light modifier that sits between soft and hard.


Step 2: Positioning the Light Source to the Side
Don't place the light source directly in front of the face. Move it a bit to the side, to the right or left, depending on which side you prefer. The light should fall on the subject at an angle from the front, not head-on. Make sure the light source is not too high. A slight angle from above is enough to align the shadow of the nose correctly.
You can remember the height easily if you think of a sunset. The light source is located slightly above eye level, but not so high that the light comes steeply from above. With this setup, you have laid the foundation for both lighting patterns.


Step 3: Setting Up the Rembrandt Lighting
Now it's about the actual Rembrandt lighting. Your model should sit so that the nose casts a shadow onto the half of the face facing away from the light. On the cheek facing away from the light, a small, bright triangle then forms below the eye. This triangle is the hallmark of Rembrandt lighting, named after the painter who used it so frequently in his paintings.
If the triangle is not yet visible, move the light source slightly or ask your model to turn their head a little. Check the result on the camera display or in the viewfinder. The illuminated half of the face should dominate, while the other should receive only a faint glimmer of light. The light should pass slightly over the tip of the nose without reaching the lower part of the face.


Step 4: Adjusting the Exposure
After positioning, the exposure often isn't right yet. Because of the focused light, the image quickly looks too dark, especially at small aperture values such as f/6.3. You can first try adjusting the aperture. If that isn't enough, increase the ISO value until the exposure is right. However, make sure to keep an eye on image noise.
Don't move the lamp unnecessarily far up just to improve the brightness. The position is decisive for the effect, so it's worth working with the ISO value first. Only if the result still isn't convincing, change the position of the light source step by step.

Step 5: From Rembrandt Lighting to Split Lighting
Once you have mastered Rembrandt lighting, you can turn the light further to the side. As you do this, the triangle of light shifts until the illuminated half of the face gets larger and larger and the nose almost directly forms the edge of the shadow. This pattern is called split lighting. The face is divided exactly into two halves, one of which is in the light, the other almost completely in shadow.
As you keep turning, watch out for distracting details. Hair hanging down on the dark side can cast additional shadows or be lit in an undesirable way. Reflections from other lamps in the room can also appear. Therefore, check the entire image frame and adjust the model's position if necessary.


Step 6: Fine-tuning the shadow edge that divides the face
With split lighting, fine-tuning determines the impact. The shadow edge should run exactly along the tip of the nose. If the dark side is too bright, turn the light source a bit further to the side or reduce the brightness of the lamp. If the bright side is too dark, increase the light output or correct the exposure.
A tip from practice: A slight glimmer of light on the far eye gives the portrait depth. It prevents the dark side from looking completely black. You decide the degree of shading yourself. The further you move the light to the side, the more extreme the contrast becomes, and the more problems there can be with hair or background reflections.


Step 7: Consciously choosing when to use the effect
Split lighting is a powerful creative tool. It looks mysterious, dramatic and high-contrast, but it is not suitable for every situation. This style is hardly suitable for job application photos or neutral portraits. Use it where you want to work with mood, character or a story.
Whether the effect ultimately fits depends on what you want to achieve. With Rembrandt lighting you get a softer, classic look, with split lighting a hard, graphic contrast. Both patterns require practice, but can be implemented well with a single light source. Once you have understood this, you can deliberately combine them with additional light sources.
Summary – Lighting Rembrandt Lighting and Split Lighting Correctly
Rembrandt lighting and split lighting are two classic lighting setups that you can create with a directional light source, such as a softbox with a grid. With Rembrandt lighting, you position the light to the side and slightly above eye level, so that a small triangle of light forms under the eye facing away from the light. With split lighting, you move the light source further to the side until one half of the face is in the light and the other disappears into shadow. Pay attention to the exposure, adjust the ISO value if necessary, and check the entire image frame. Both patterns give portraits expression and contrast, but they are not suitable for neutral job application photos.
FAQ
Which light source is suitable for Rembrandt lighting?A softbox with a grid or another light modifier that focuses the light. A large, non-directional softbox scatters the light too much to create clear shadows.
How do I recognize Rembrandt lighting in the image?On the cheek facing away from the light, a small, bright triangle forms below the eye. The nose casts a shadow onto that side of the face.
Where should the light source be placed for Rembrandt lighting?To the side of the model, diagonally from the front and slightly above eye level, similar to a setting sun.
What is the difference between Rembrandt lighting and split lighting?With Rembrandt lighting, a small triangle of light remains visible on the dark side. With split lighting, a clear shadow edge divides the face exactly into two halves.
What do I do if the image is too dark after positioning?First adjust the aperture. If that isn't enough, increase the ISO value. Change the lamp position only gradually, as it determines the effect.
Why shouldn't I use split lighting for job application photos?The style creates strong contrasts and looks dramatic. It is therefore not suitable for neutral, objective portraits.
What problems can occur with split lighting?Hair on the dark side can cast shadows, and reflections from other lamps in the room can appear. Therefore, check the entire image frame.


